Now that the rear fuselage line fasteners are drilled and installed, it's time to tackle the next step in the top cowling hanging.
Next up is drilling pilot holes through the cleco adapters in the Skybolt kit to fixate the final position of the top cowling. The rear is defined, but the amount you sand towards the front of the cowl can still be modified slightly. Lowering the front off course also means reducing the space above the top cylinders of the engine as the front of the cowl moves down. This is more a thought process than a fact. As you already have mated your top line close to the horizontal split line of the bottom cowl, the variation will be very minimal. But it's worth thinking about the effects of your sanding efforts.
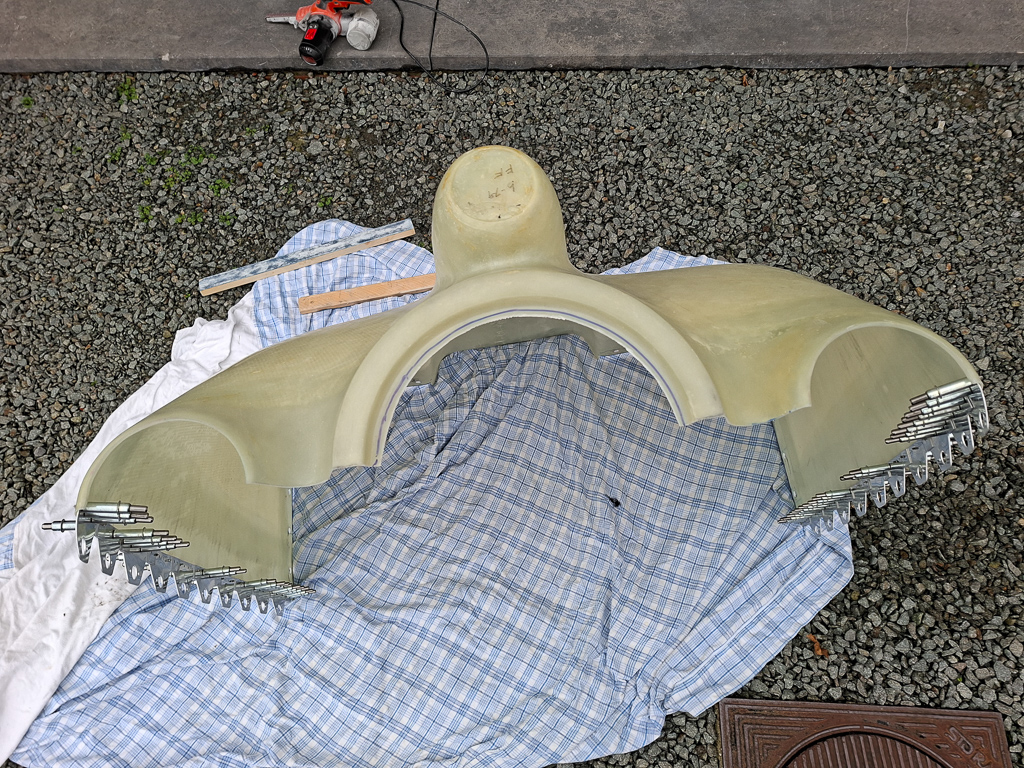
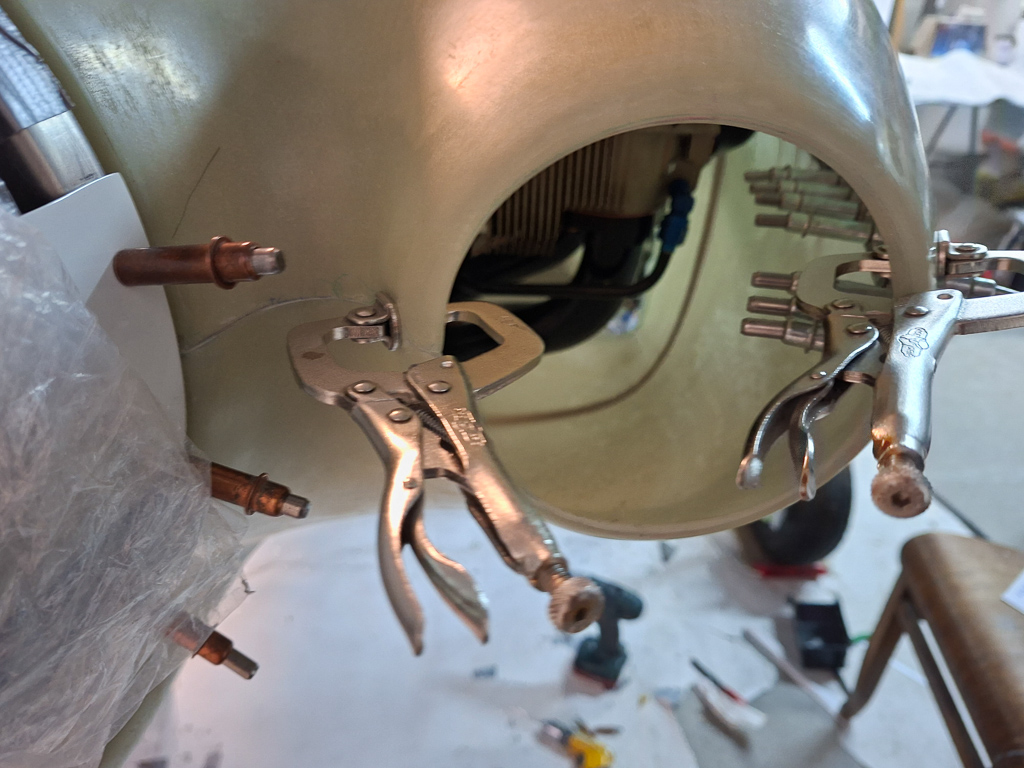
I already had removed the epoxy from the top cowl air intake rings. I did the same on the bottom cowl. Placing the intake aluminum rings on the circle and cutting and sanding back the material until getting close the the final shape. The idea here is also that the front becomes a bit more flexible with less material in the middle joggle so that it can more easily be clamped together. I wanted to see how these middle "joggle" area's between spinner and air intake rings interact between bottom and top cowl when the top cowl is on in order to take the correct decisions on where more sanding is needed. In the end it showed this was a good decision as it did help me in more precisely defining the front split line. It's also makes it easier to use clamps on the in and outside between the 2 cowl parts.
I had previously drilled the brackets on the bottom cowl and mentioned at that point that I considered my bottom cowl top line final. I stick to that idea and am not touching the bottom cowl anymore.
All adjustments and alignments will be done on the bottom horizontal split line of the top cowl only.
Once I move to final drilling, I will triangulate the position of the holes of the cleco adapters in the Skybolt brackets. There are 10 cleco adapters in the kit so you can install 5 both sides.
Important, start at the fuselage and move foward. Once 2 holes are drilled, the final angle of the top cowl is defined and the rest of the split line will need to be sanded and adjusted accordingly to follow that line. So before drilling that second hole, make absolutly sure that the cowl is well clamped in the front, that there is little to not interference between top and cowl on the horizontal split line. Take the time now and be patient. Time spent now can save a lot of time down the road (involving epoxy and such unpleasant tasks).
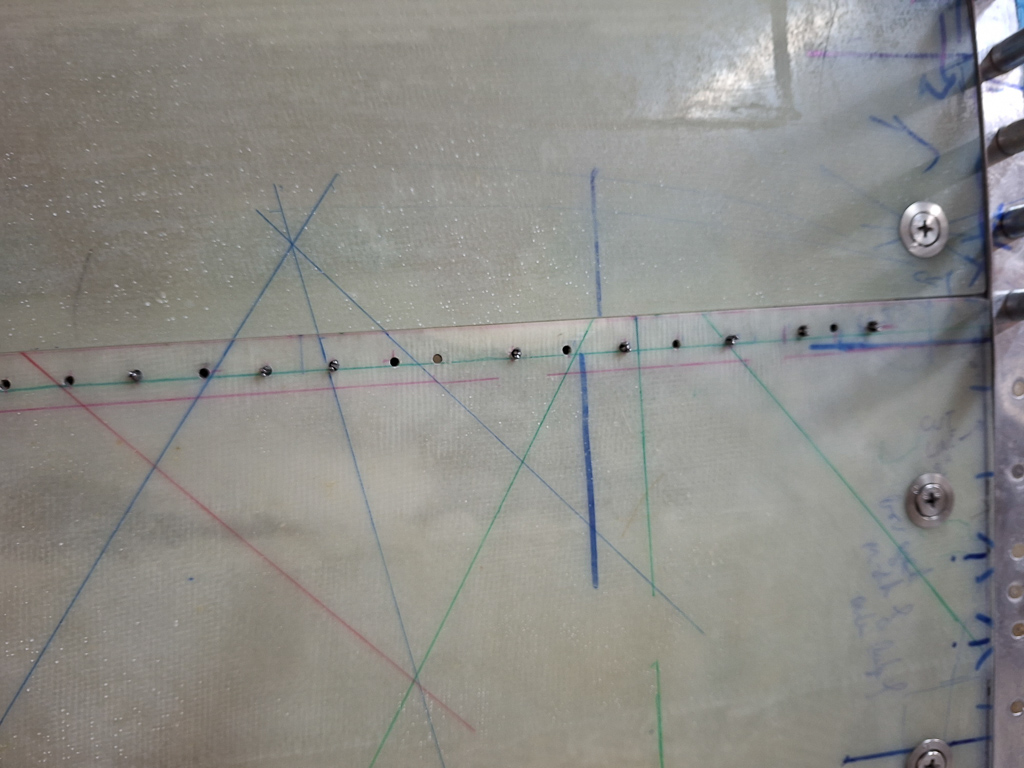
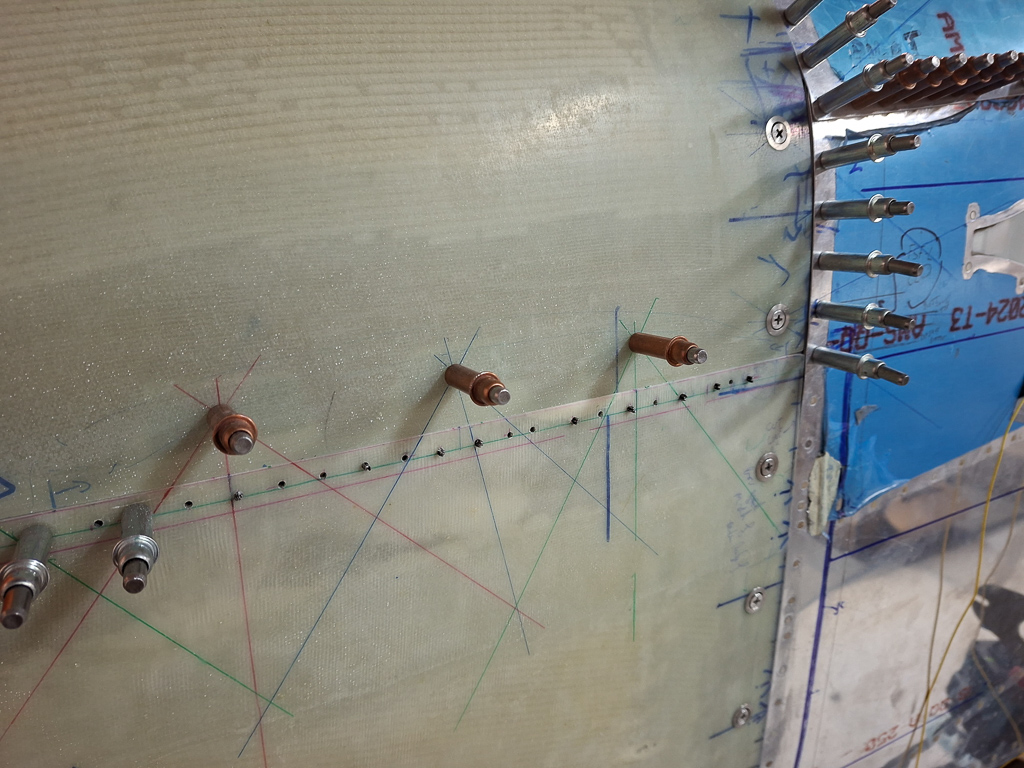
In the image below, the cleco adapters are taped into the brackets with duct tape. The lines in different colors on the side of the bottom cowl triangulate to the center of the hole. As explained in earlier acticles, this makes it easy to relocate the holes once the top cowl is installed and the adapters are no longer visible. Forget about the "light" method shining a light source behind the hole. IT DOES NOT WORK WELL. Shadows and angle of the light relative to the hole will give a false view on the drill location. You will never be as accurate as with the triangulation method shown here.
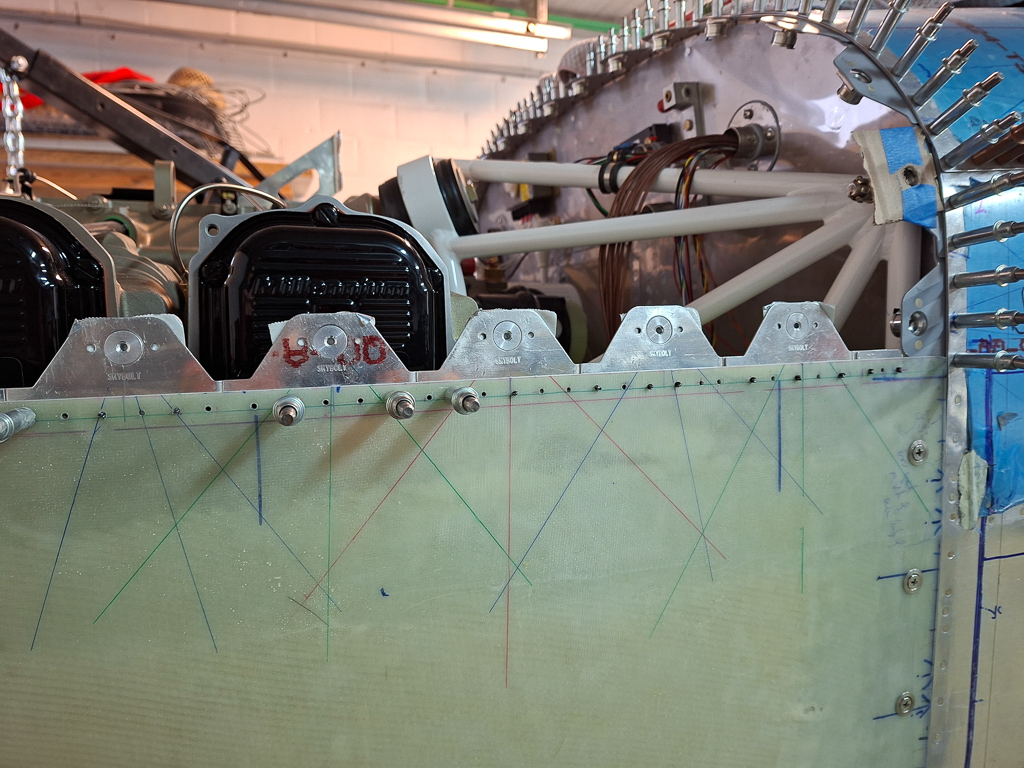
Taped 5 more on the passenger side.
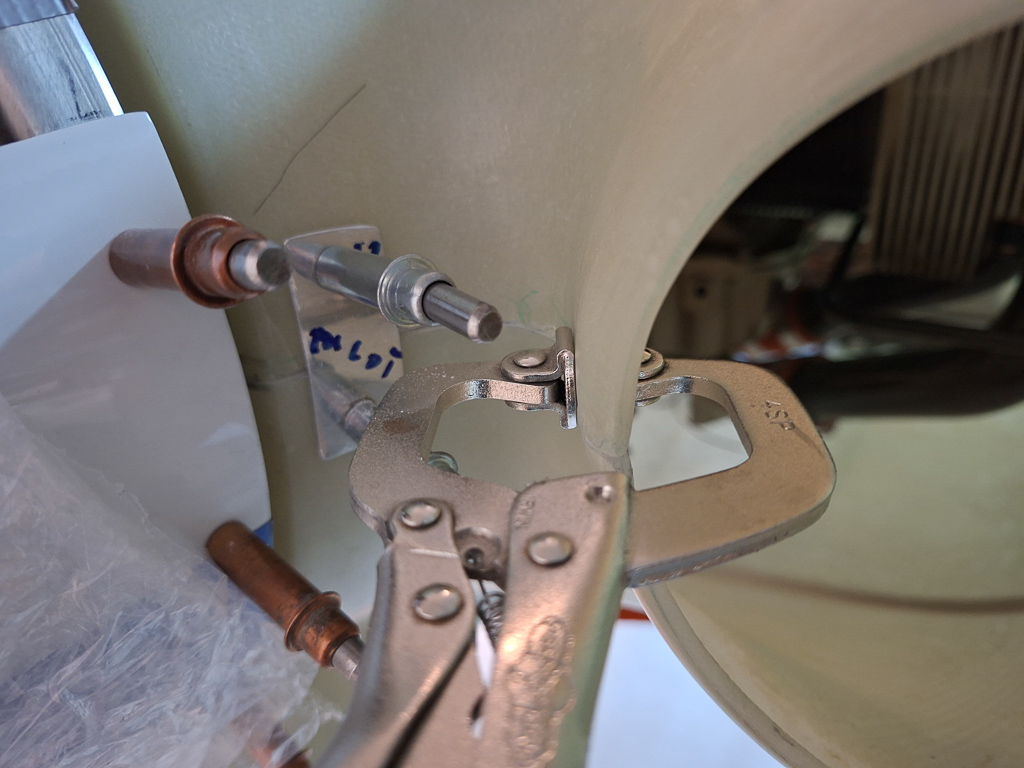
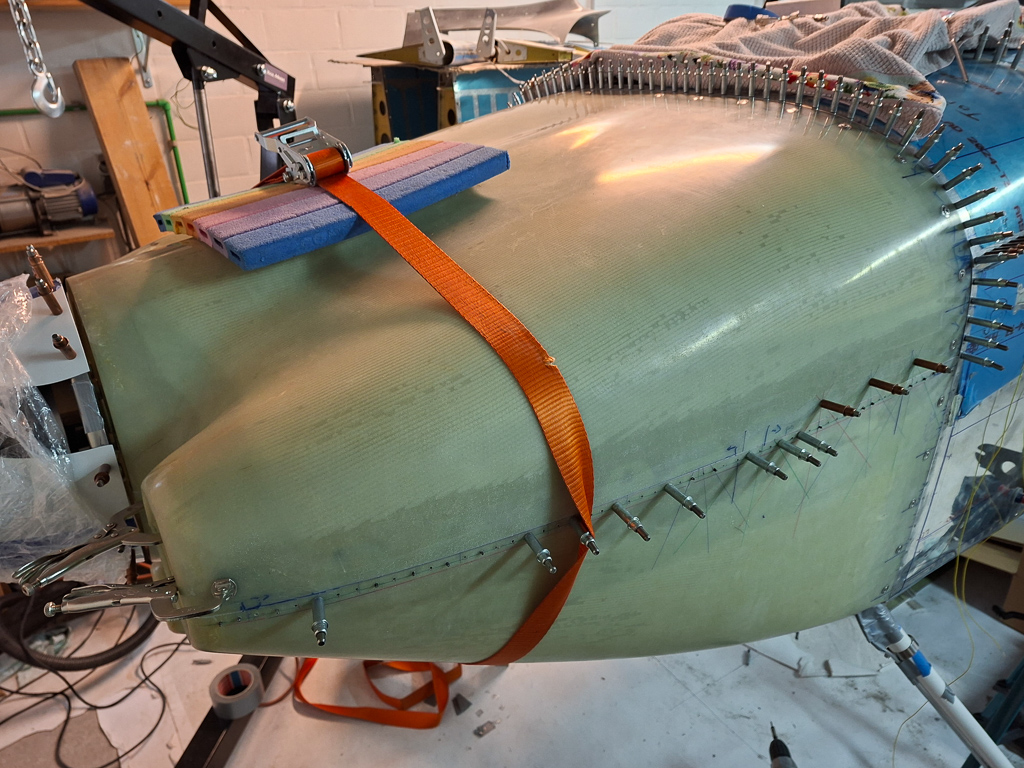
Now it's money time. The front line pilot side was ok as it was and I could easily clamp the parts together leaving a good match at the spinner and at the side. A little gap can be fixed later on with some epoxy but I want to avoid this as much as possible as it is less strong than the original and more important: I hate working with epoxy resin.
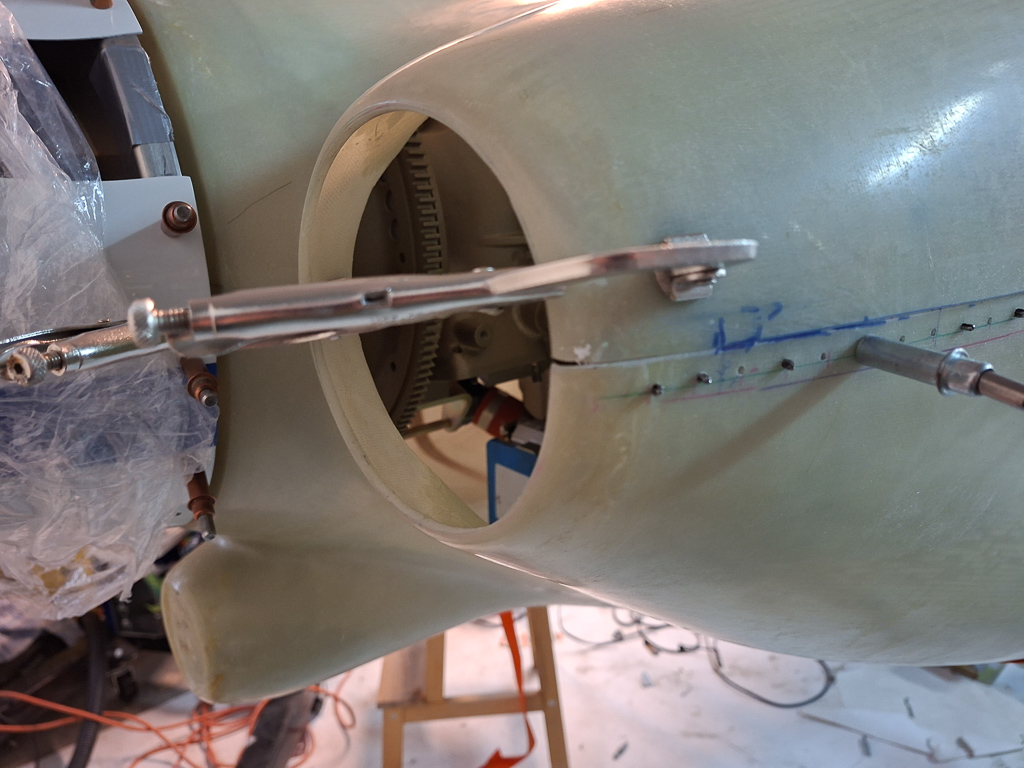
The image below shows the good match between both halves. A clamp keeps it in position by clamping the epoxy onto tab of the first Skybolt bracket
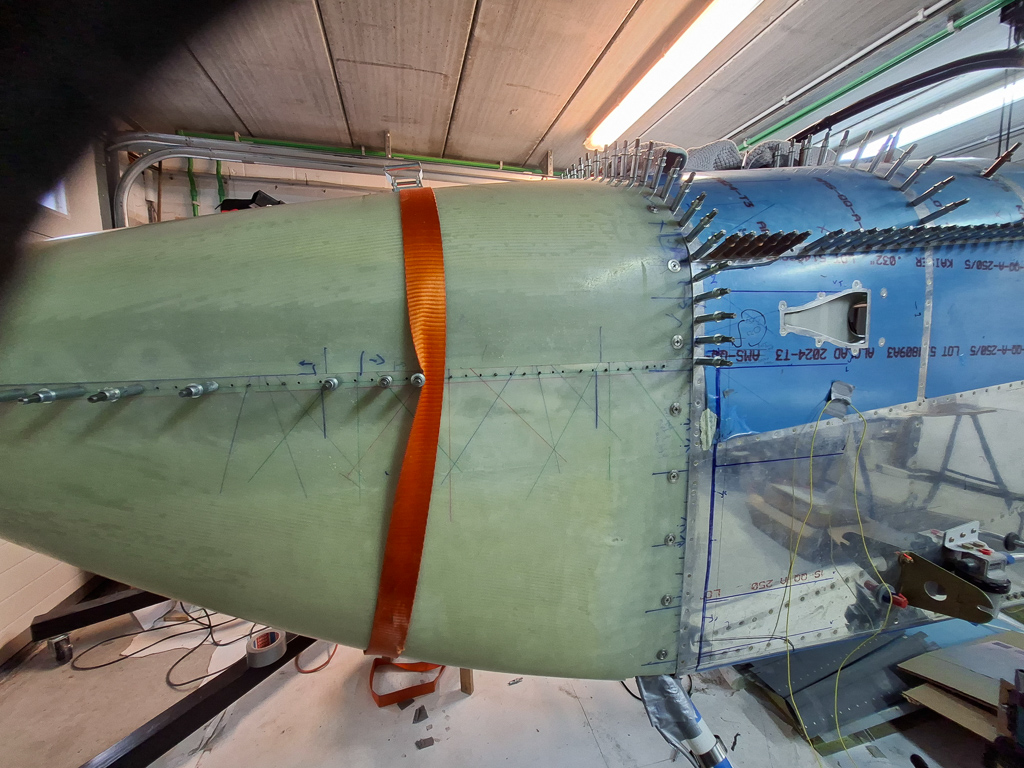
I also used a ratchet strap over the cowl. I doubt this changed much as the sides were already nicely touching eachother. If you do need to use it, don't put too much stress on it so the shape doesn't get distorted.
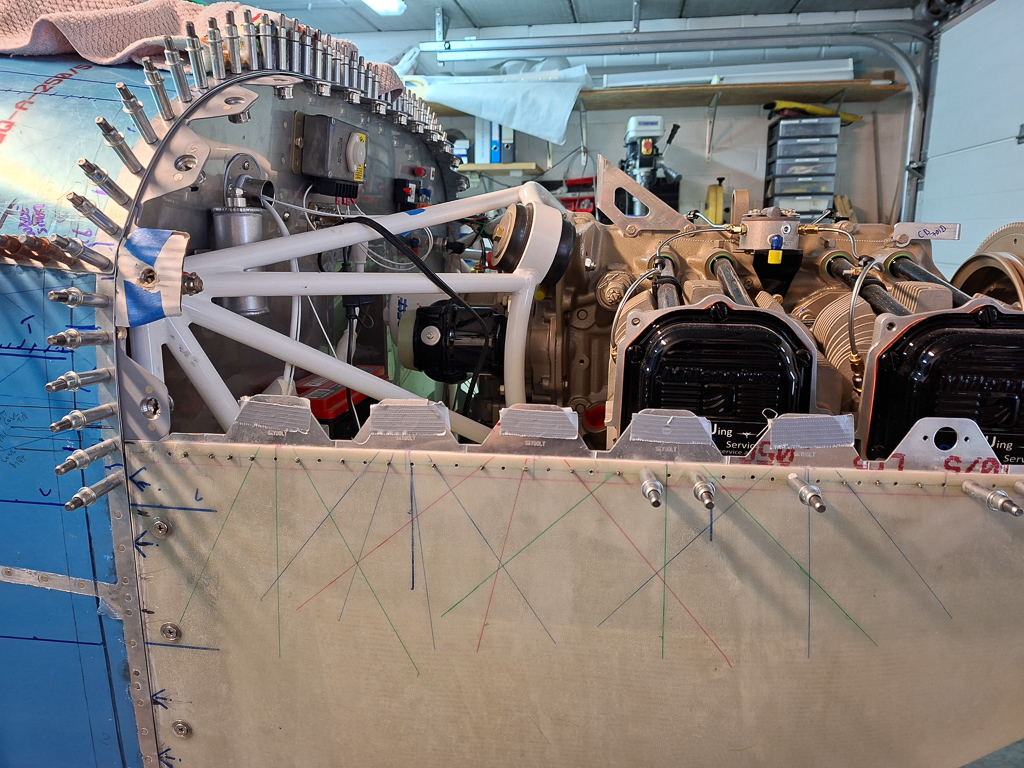
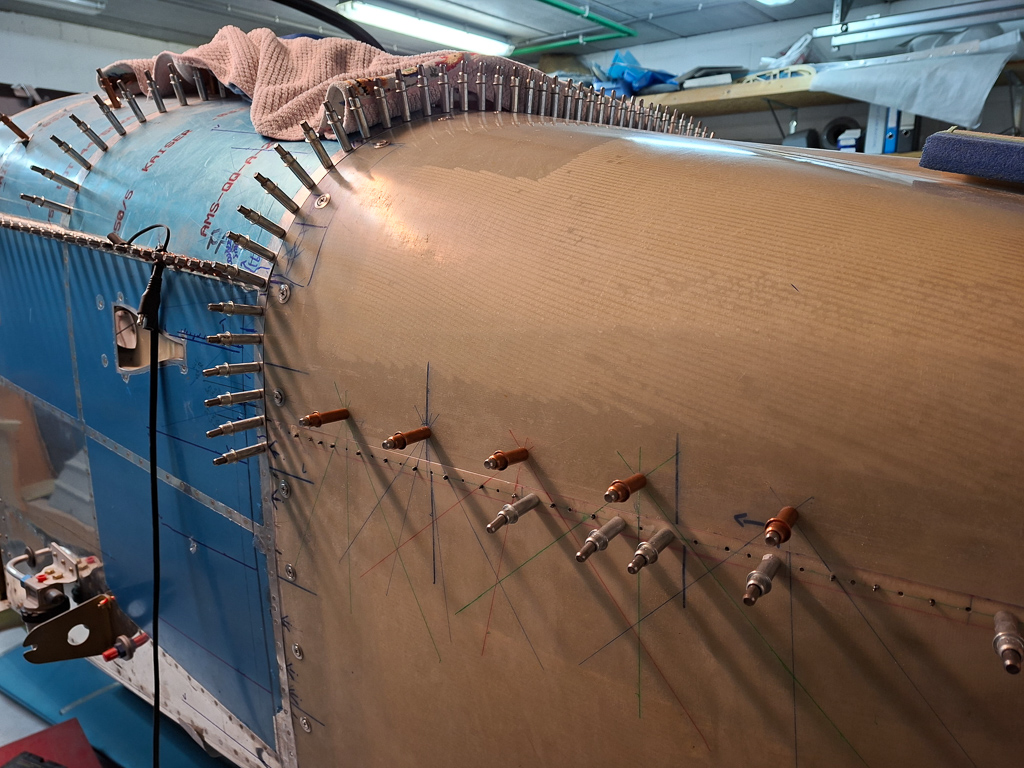
With all in place, I extended my triangulation lines and decided to start in the second bracket location. This already sets the angle op the top cowl permanently. Keep in mind: with 1 (the one at the firewall already drilled) it still allows for tilting a bit. with this second one drilled, the angle is fixed !
In the next image I drilled the second bracket hole, clecoed it and then did the same on the bracket left and right of it. This fixates the horizontal line in 3 locations.
As I was happy with the result, I turned to the passenger side and did the same on that side.
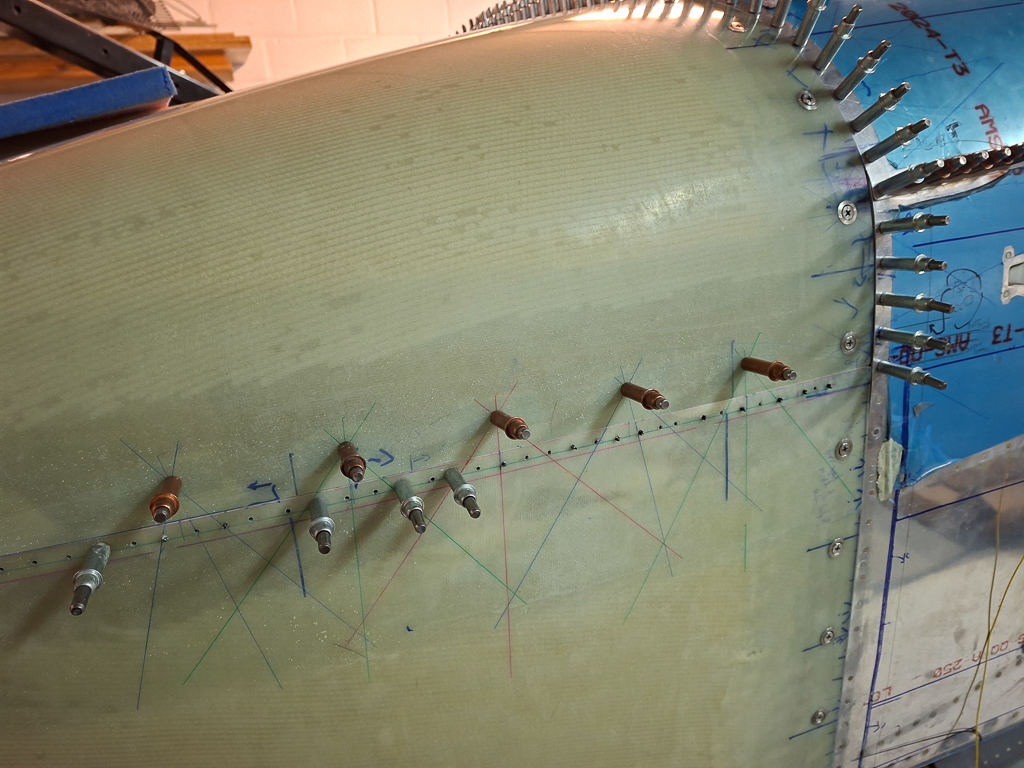
I moved the strap forward and continued on the next 2 holes forward.
And repeated it on the passenger side. Both sides now have 5 cleco's
Additionally to the clamps, I wanted something extra to maintain the front position and drilled some 0.032" scrap piece aluminum on the inside joggle at the spinner in order to fixate the relation between the 2. Finally there will be epoxy layers added extending from the bottom cowl which will hold a nutplate so that the top cowl can be screwed onto the bottom cowl. That's future music so for now I'm going with a temporary help piece.