

Waiting for the motor to arrive, I decided to tackle some more small finishing tasks that usually are done near the very end.
One of those things is attaching the epoxy fairings on the empenage section. There is one little catch here, the balancing of the elevator can only be done at the very end when the plane it painted. So in principle, you should wait until the very end to finally fixate the elevator fairings. So it's another spot of do, but cannot do. There are so many spots like this that I'm tired of waiting. I want to get things finished and done, otherwise the list of unfinished business only keeps growing and growing.
I decided that I will balance the elevator "roughly" and keep them a little "heavy" on the front side. That way, I can still take off weight from the lead block once it's painted. But then again, who wants to ruin his paint when it's coming back from the paintshop.
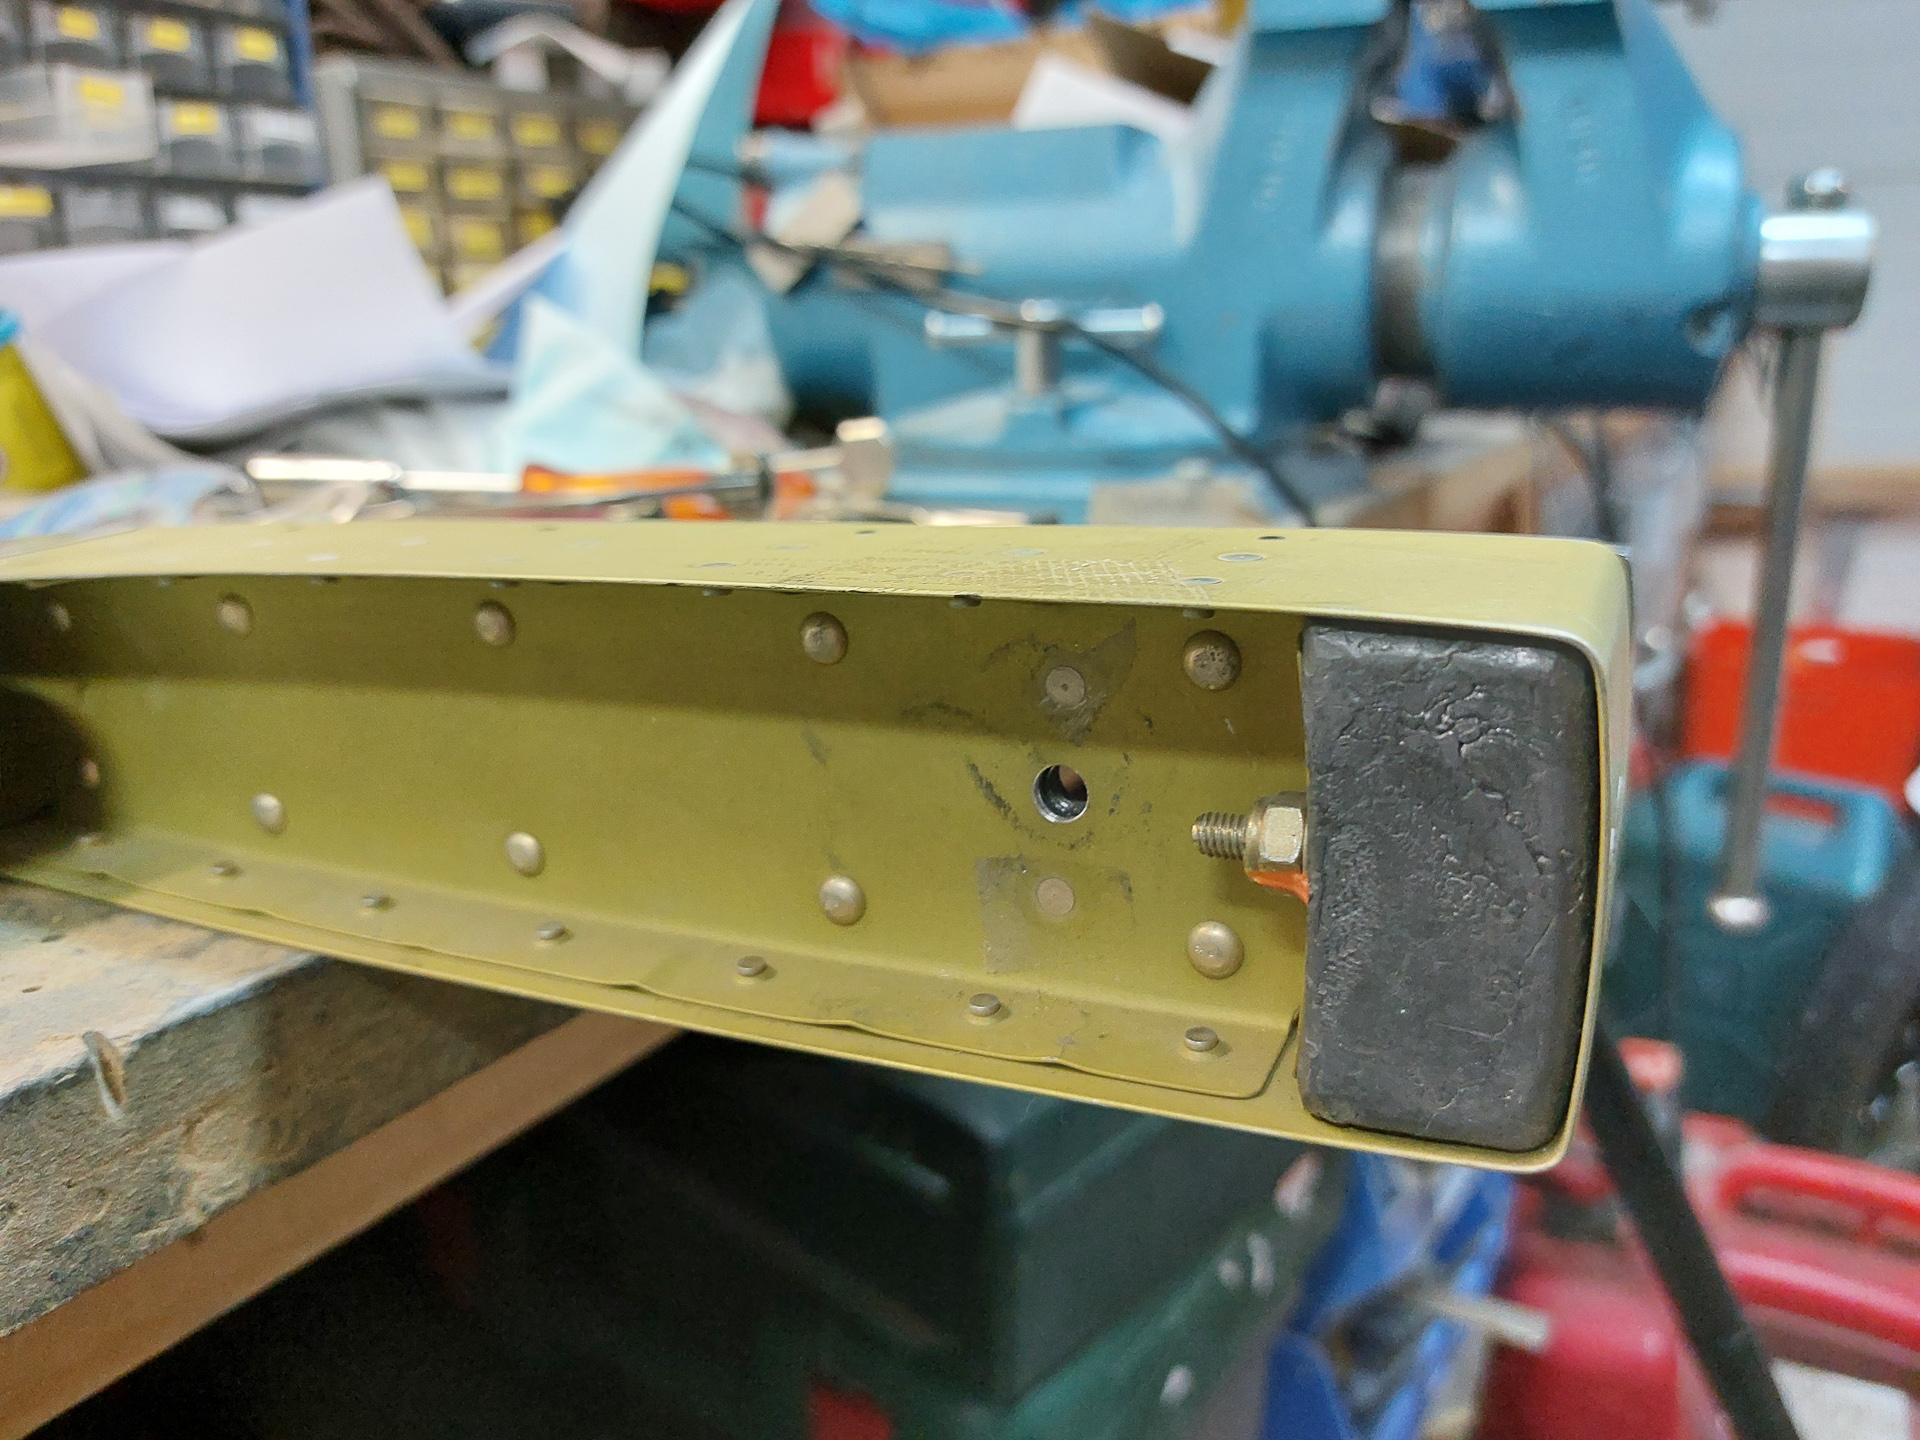
If you balance them now, the weight in the back will probably increase due to the added weight of the paint, so they are most likely the drop down (and the arm up) once they are painted. To compensate for this, I applied a little trick that a lot of other builders have done. I installed a K1000-4 nutplate in the front of the arm. From the inside of the arm, I will be able to add a AN4 bolt and add some AN4 washers if needed to add weight to the arm. This allows fine tuning of the weight balancing on the elevator after the plane has been painted. I will probably revisit this balancing act just before sending her to the paint booth. Even if I permanently attach the tips (as I plan to), I can still take lead of the front and from the inner side.
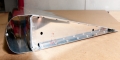
In the image below, you can see the location of the nutplate just behind the lead counterweight block.
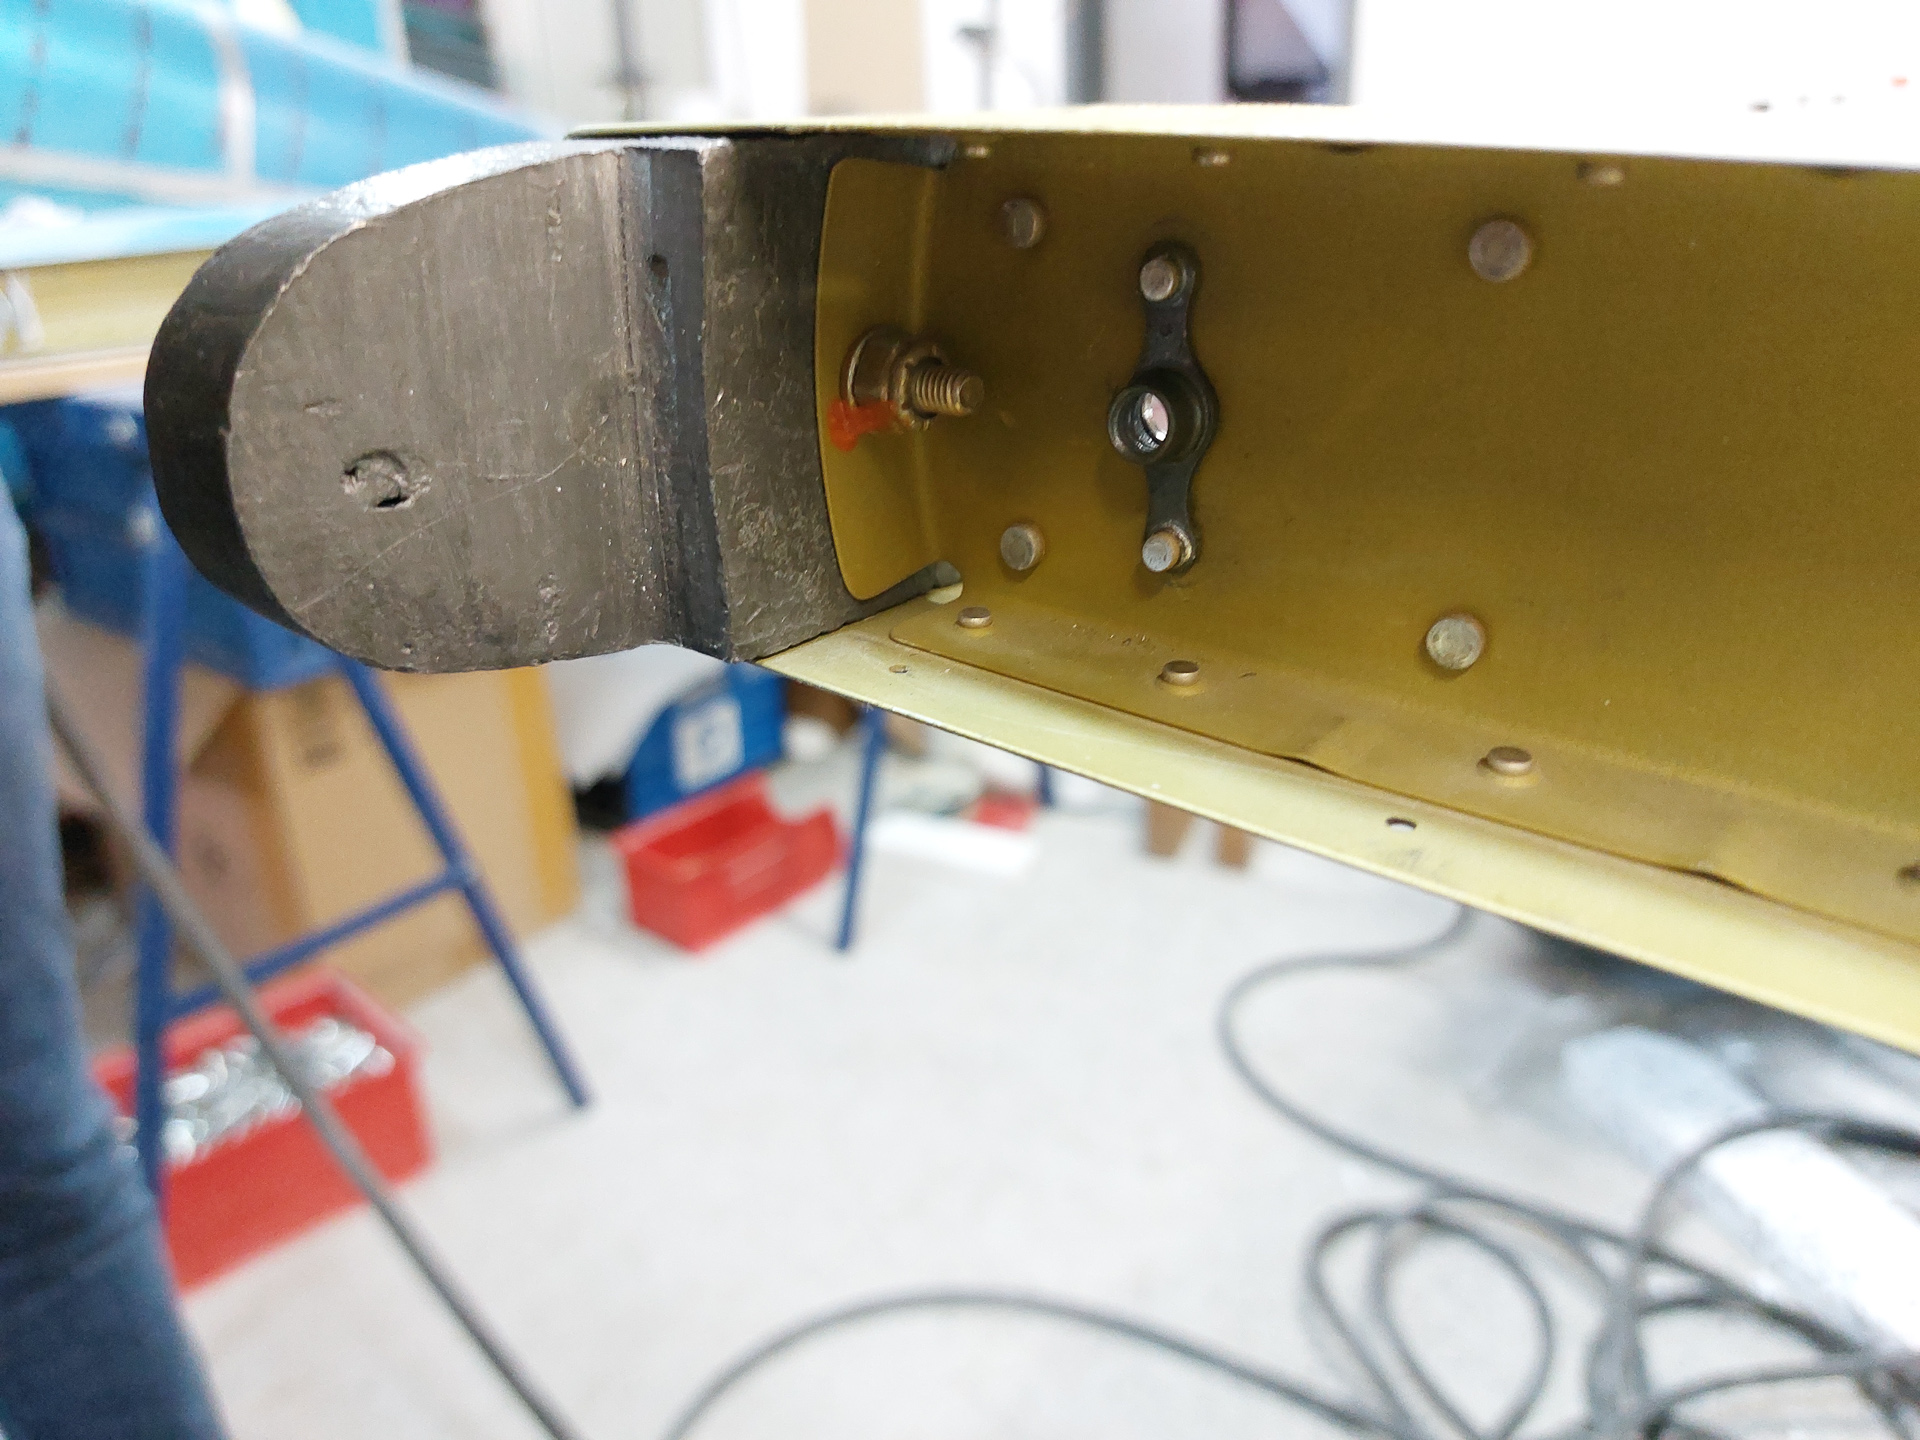
On the inner side it just show like a little bolt hole
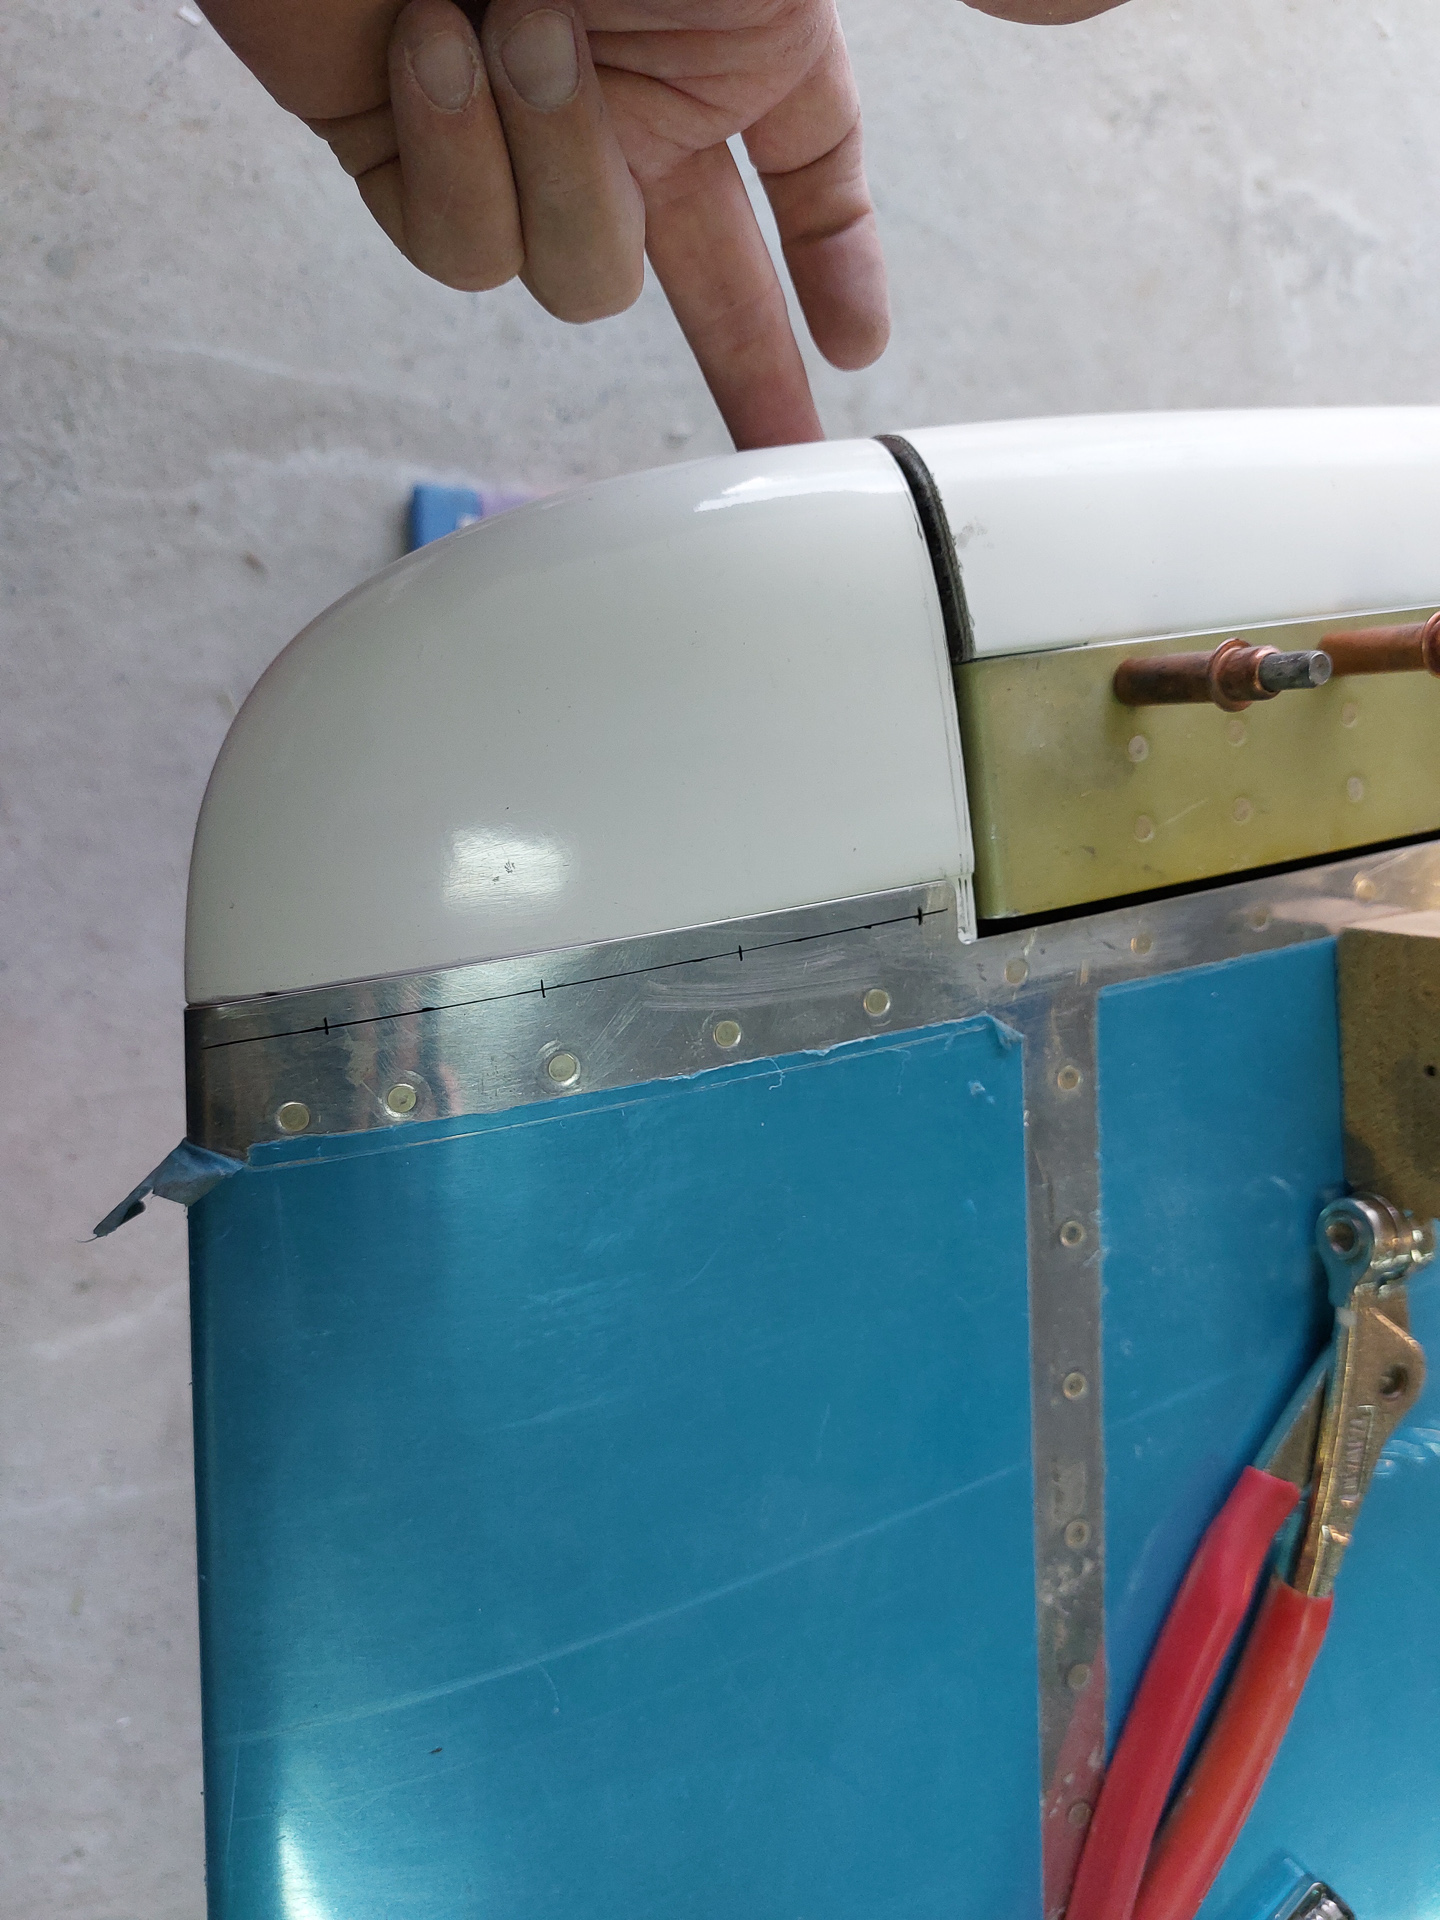
I reinstalled my elevators on the horizontal stabilo and positioned the elevator fairings. I'm not attaching them so far as I want to see how the gap looks like with the front fairing on the horizontal stabilisor installed. The fairing of the horizontal stabilisor is way too long and you 'll need to cut a fair bit of. In the image below, I started with a rough cut line that's still very liberal. I just inserted the tip and brought the elevator down, at the touching point, I added another 1/8" to make sure once cut, the elevator would swing past it. I will then further tune it with philes and sandpaper to get the minimum required gap between the elevator front and HS fairing.
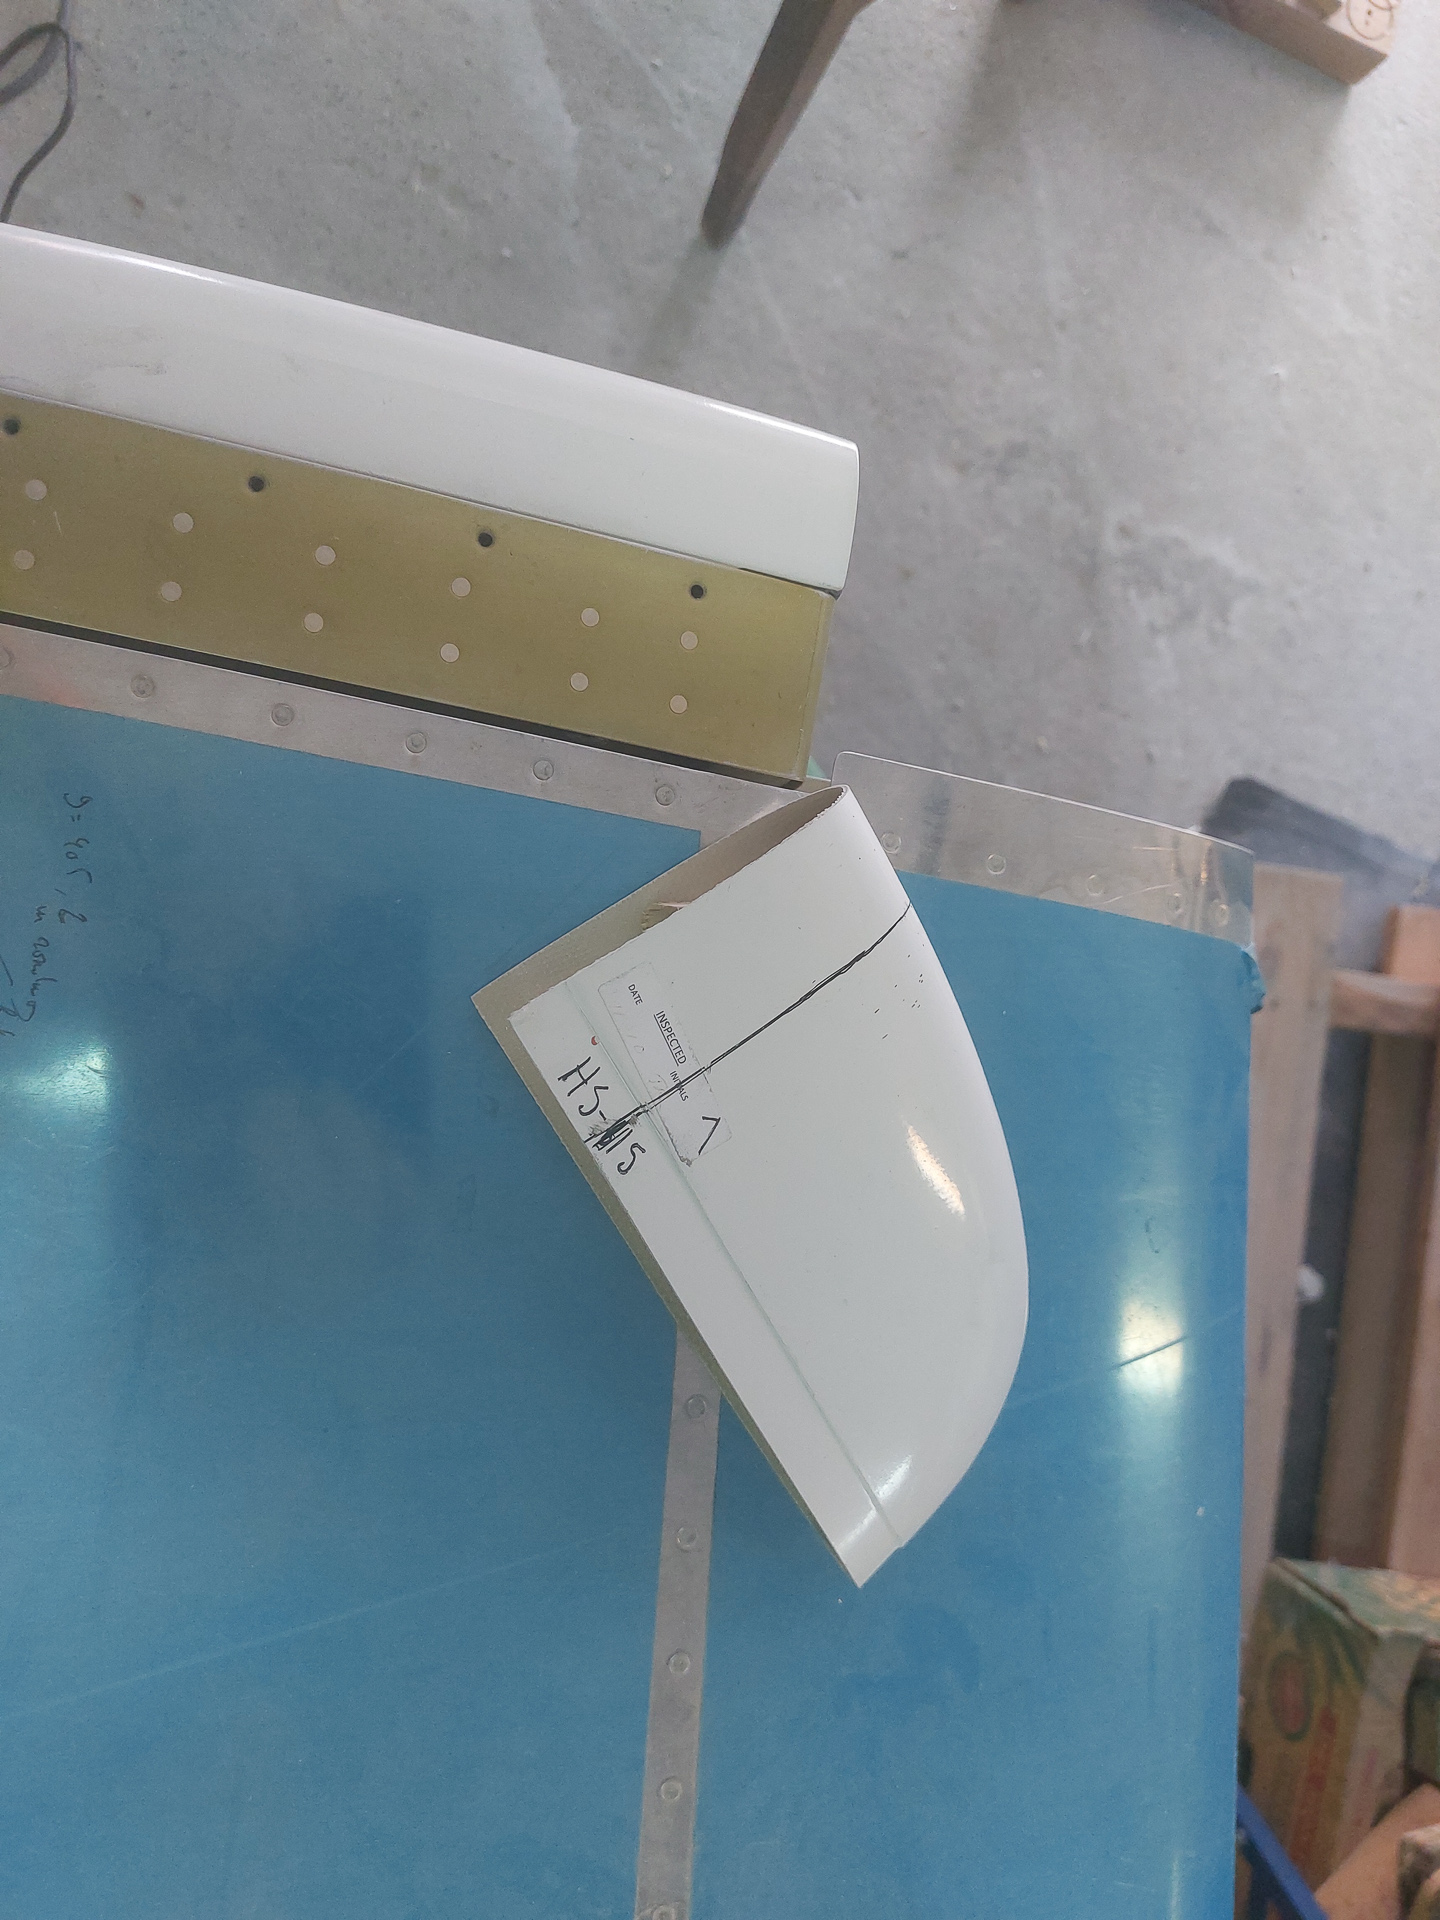
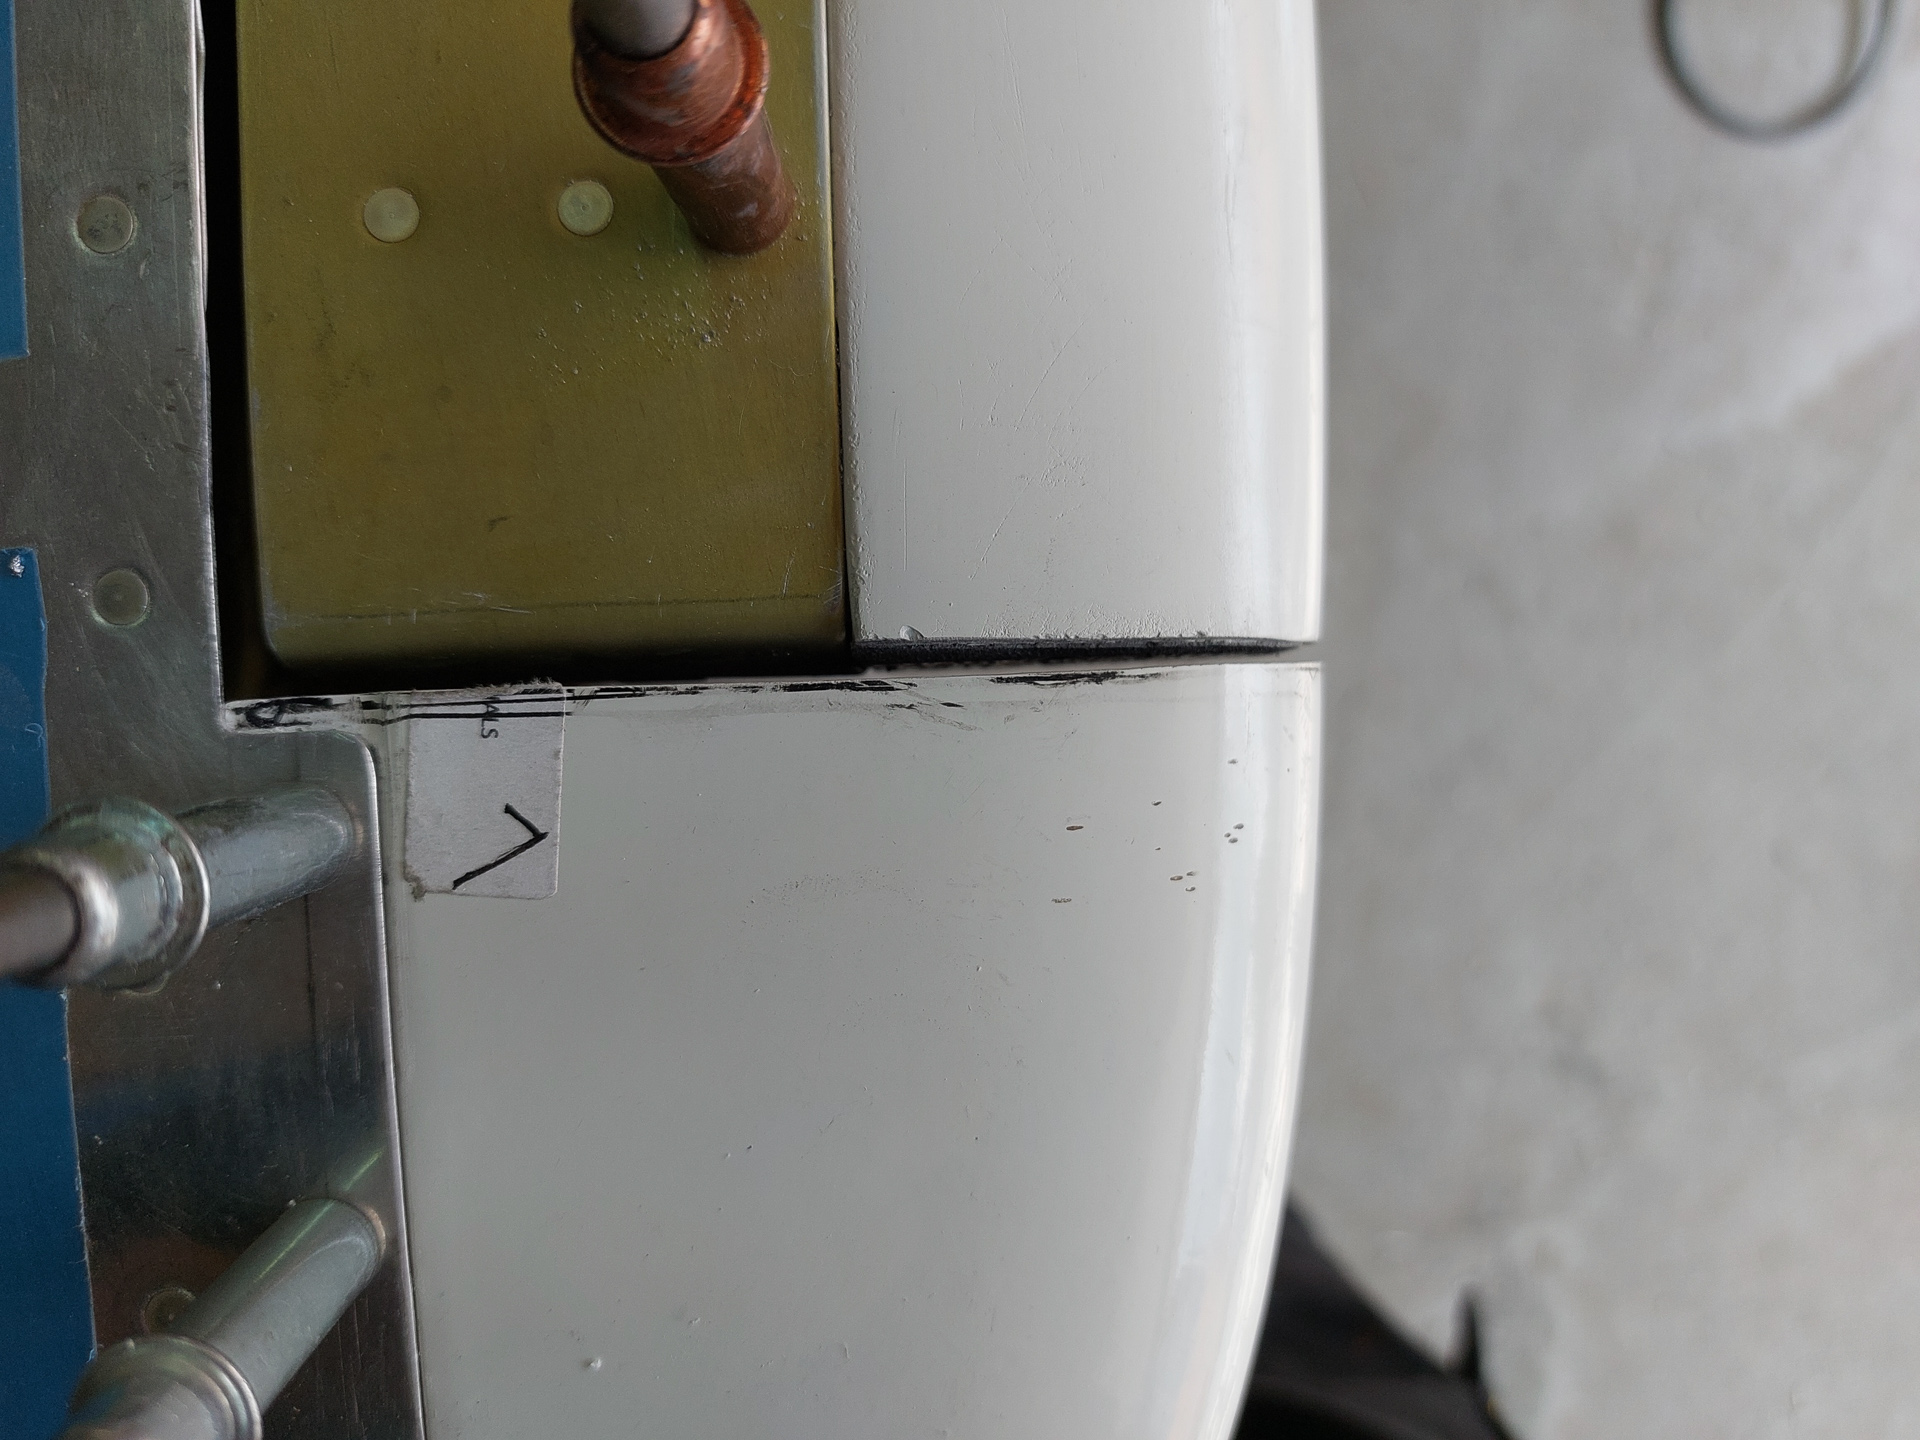
Here, the initial cut is make. The fit is fairly good and the alignment between VS and HS fairing is very nice. You don't want to have the fairing of the VS sticking out passed the HS fairing. The story of "drag" remember...
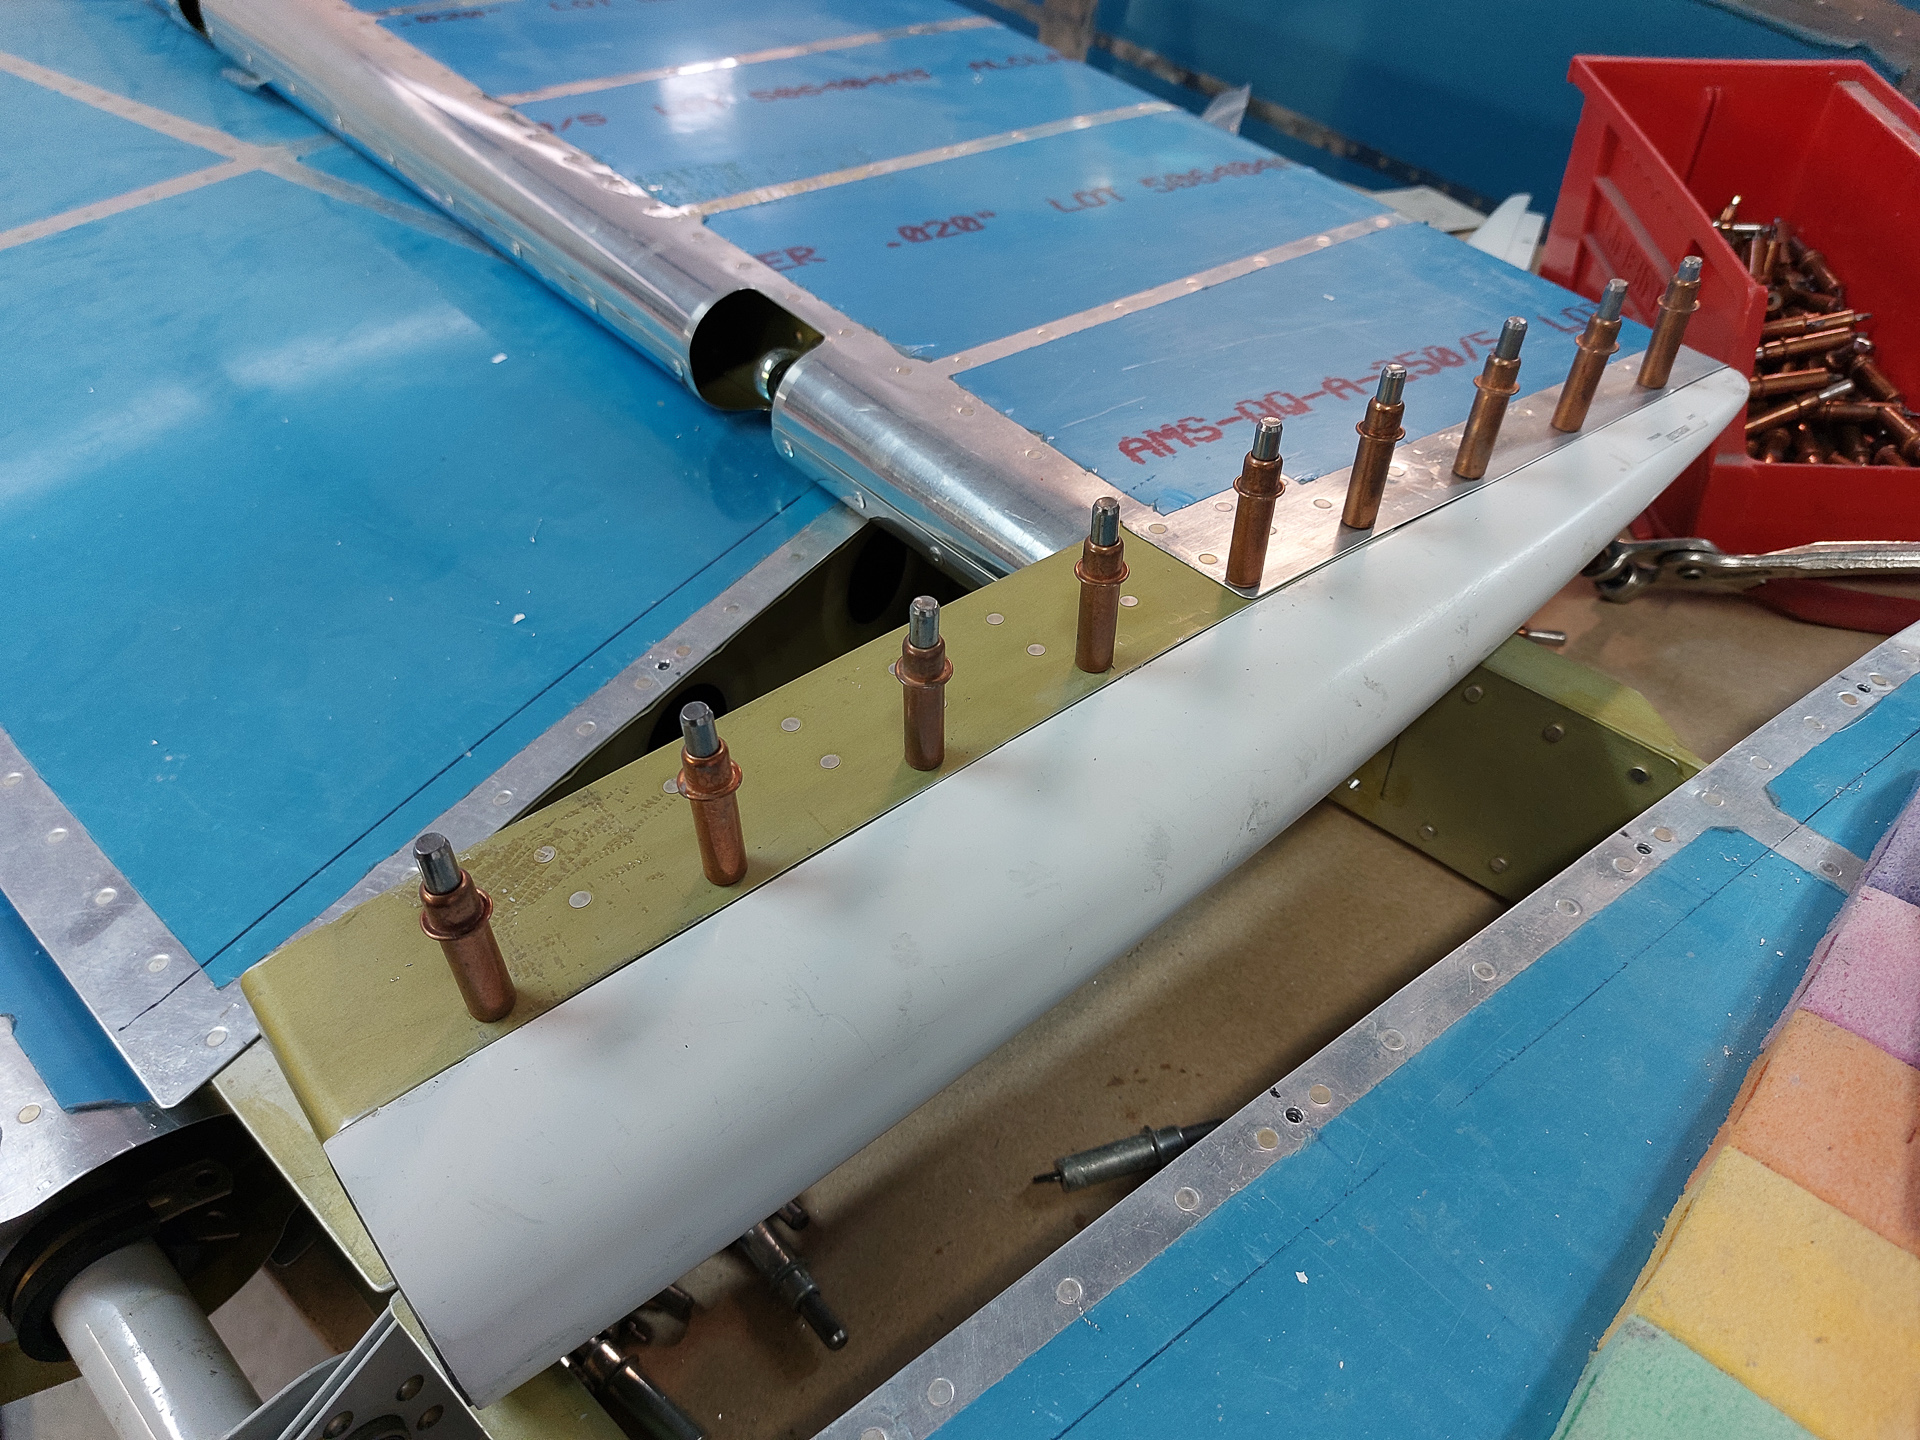
In the image below, the VS fairing is already drilled #30 to accept the CS4-4 pop rivets.
Then ensured the final position was good and pilot drilled #40 in the front HS fairing. At this point, my final spacing between HS and VS fairings is not defined yet. I wanted it drilled first in it's final position. That way, if things would slightly change due to the drilling, I can still make the final spacing later.

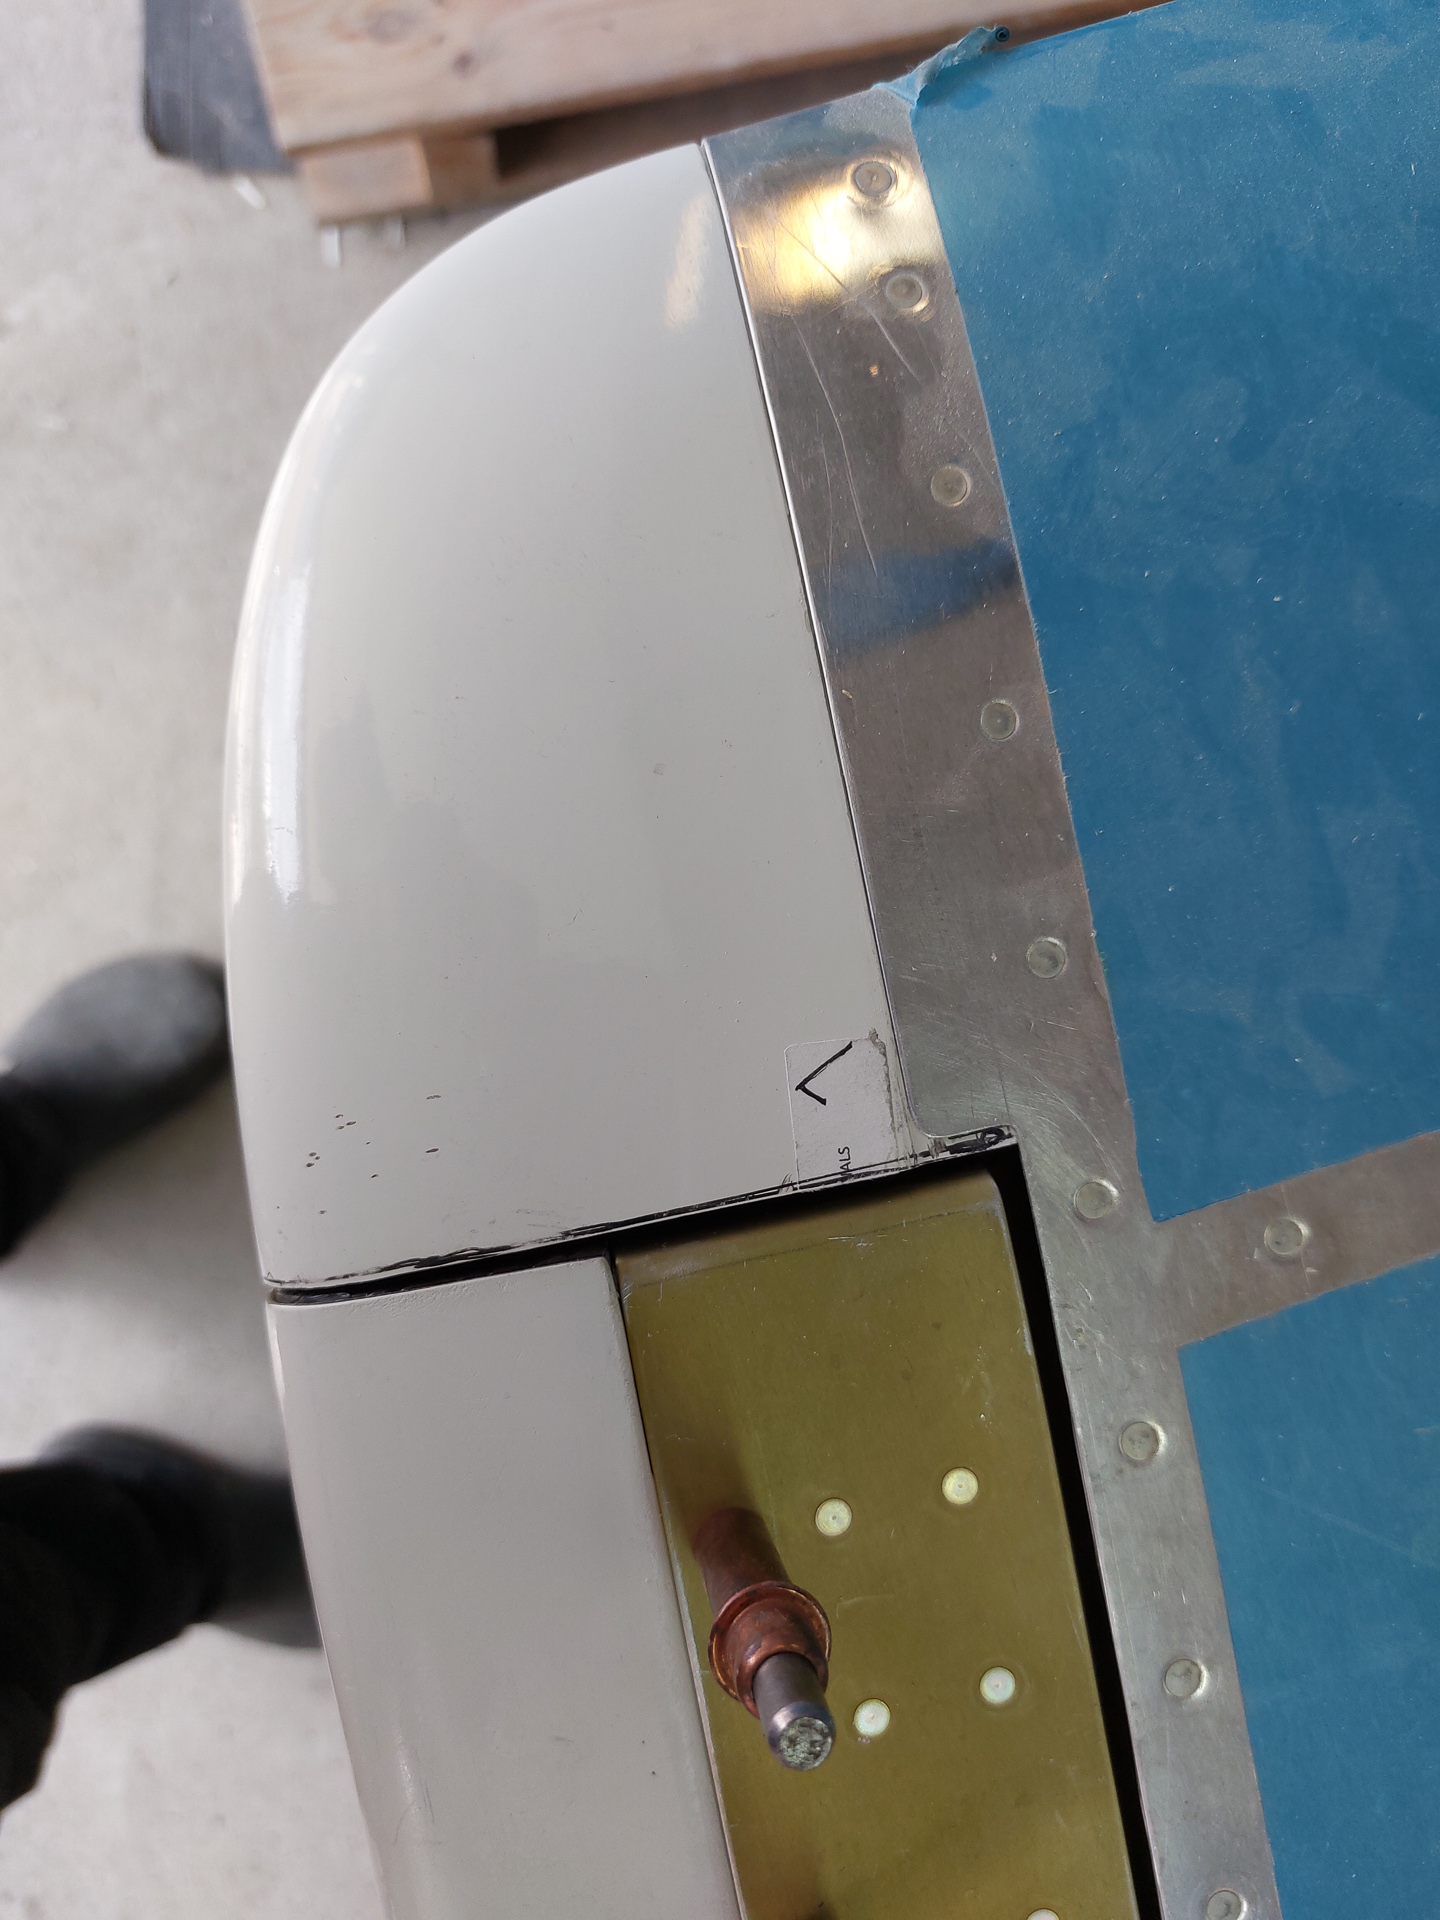
Alignment after drilling still "superb". The front of the VS elevator tip sticks out a little from the aluminum horn of the VS. There is no way you can really fix this on the fairing. I will probably smoothen this out with epoxy filler once we get closer to finishing. It won't probably be absolutly perfect but I gave up on the idea of building a prize winner long time ago. I just want a good and safe flying machine, not a beauty pagant.
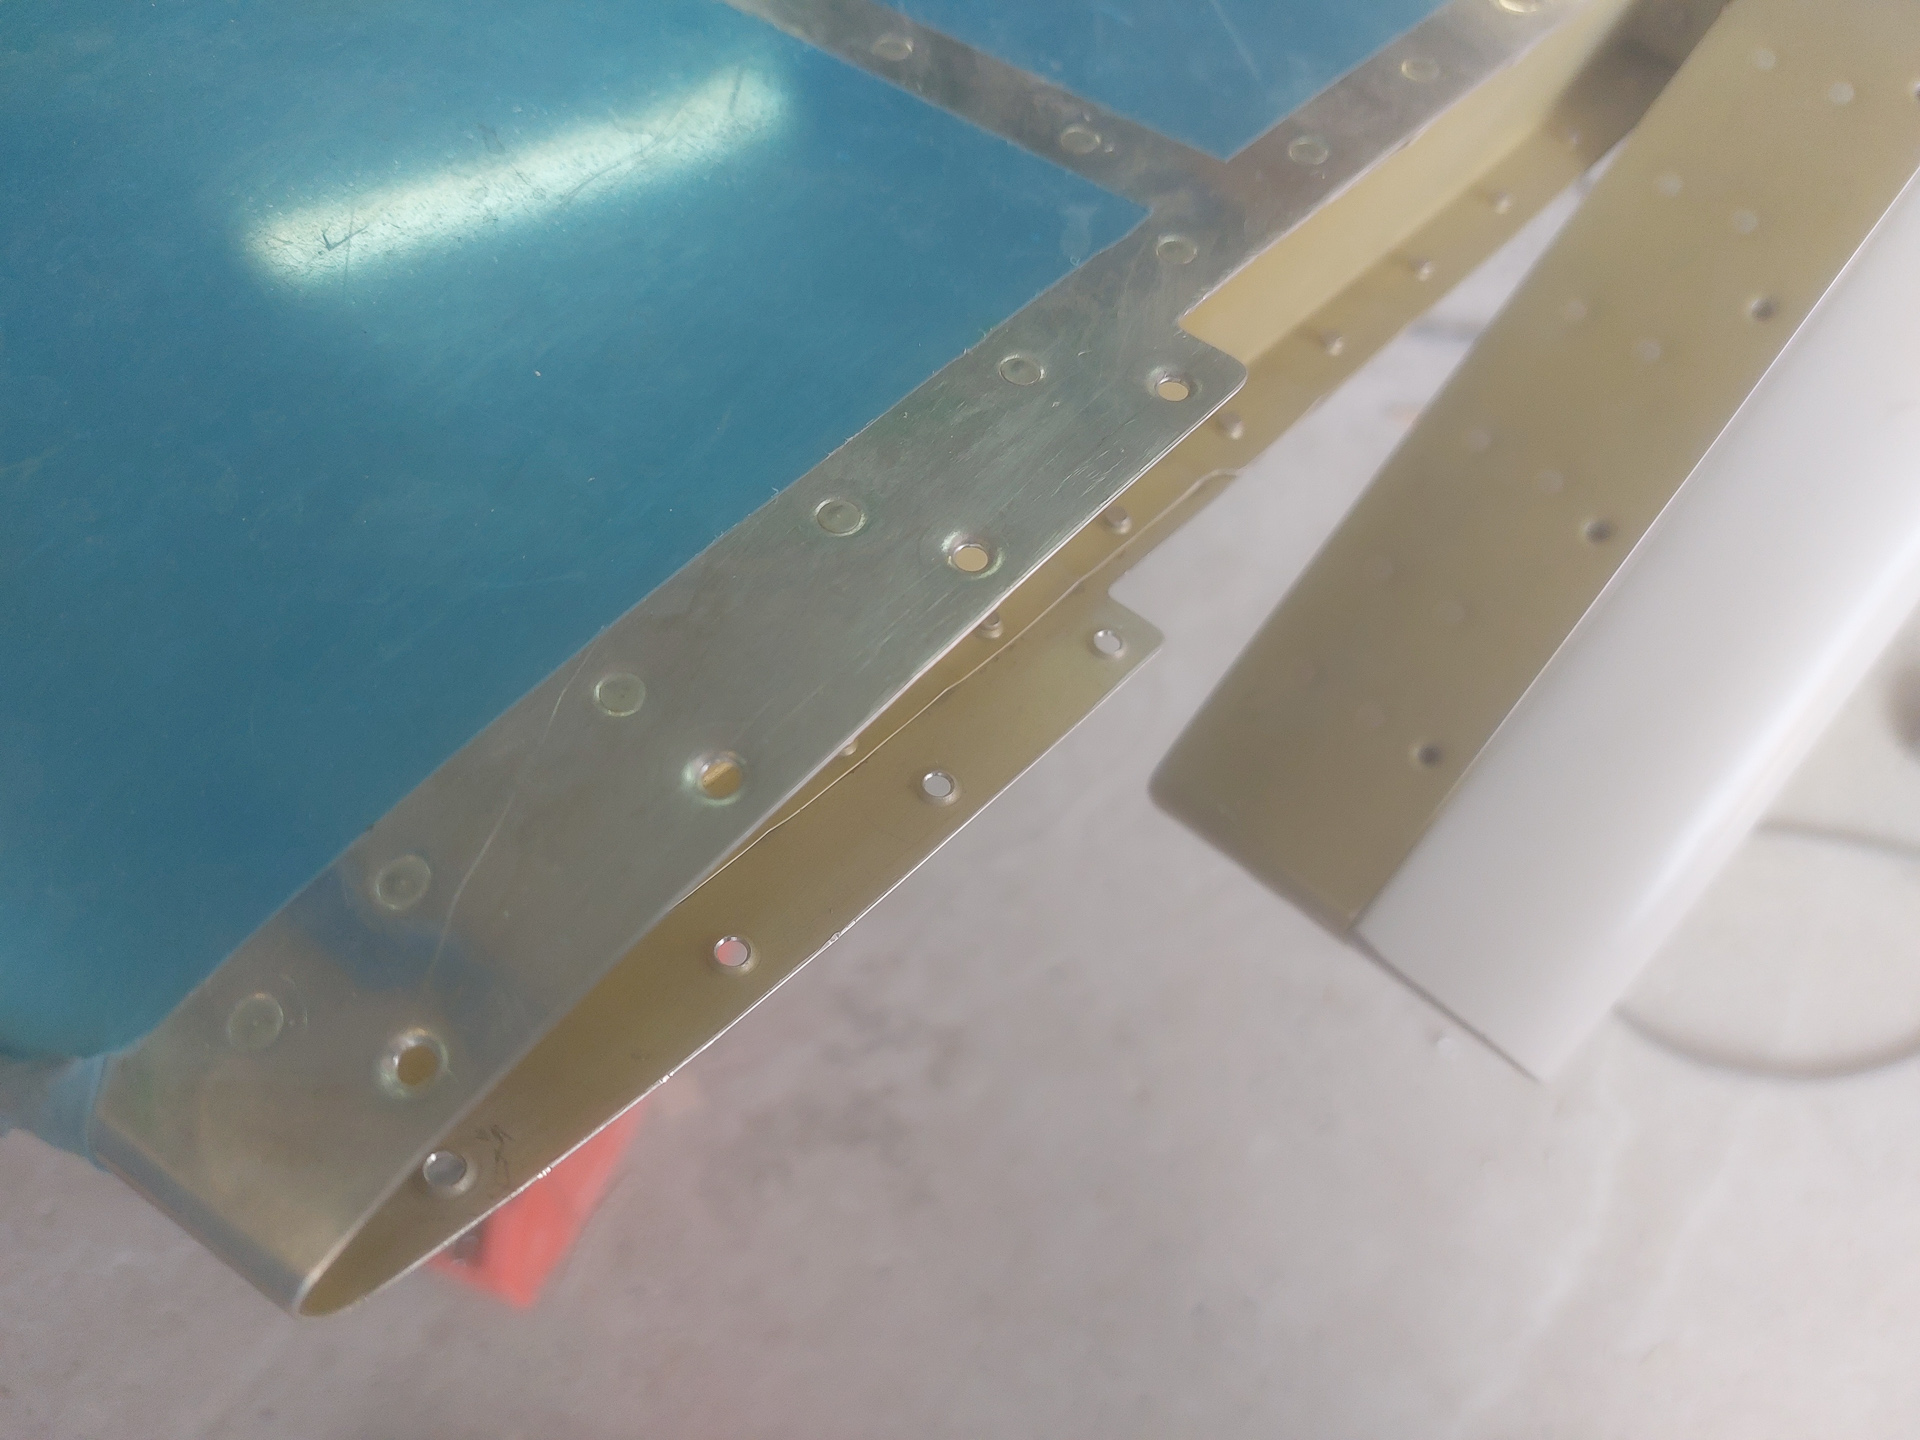
continued on the bottom side to drill the remaining holes, drew a line and marked the positions.
Reamed the holes to #30, deburred and dimpled.
The right side elevator needed little lead removed to have it balanced on the HS. You want the elevator to stay in the position that you place it. It should not tilt up or down when you release it. it remains still difficult to judge at this point as the cleco's add weight to the back and you shouldn't try to get it perfect now or you will end up short heavy on the front when the heavy cleco's are replace by tiny pop rivets
Once happy with that I updrilled the other side of the VS fairing. I have an aluminum reinforcement strip on the inside of the VS fairing for added strength. I don't like the idea of pop rivets pulled in thin epoxy fairings.
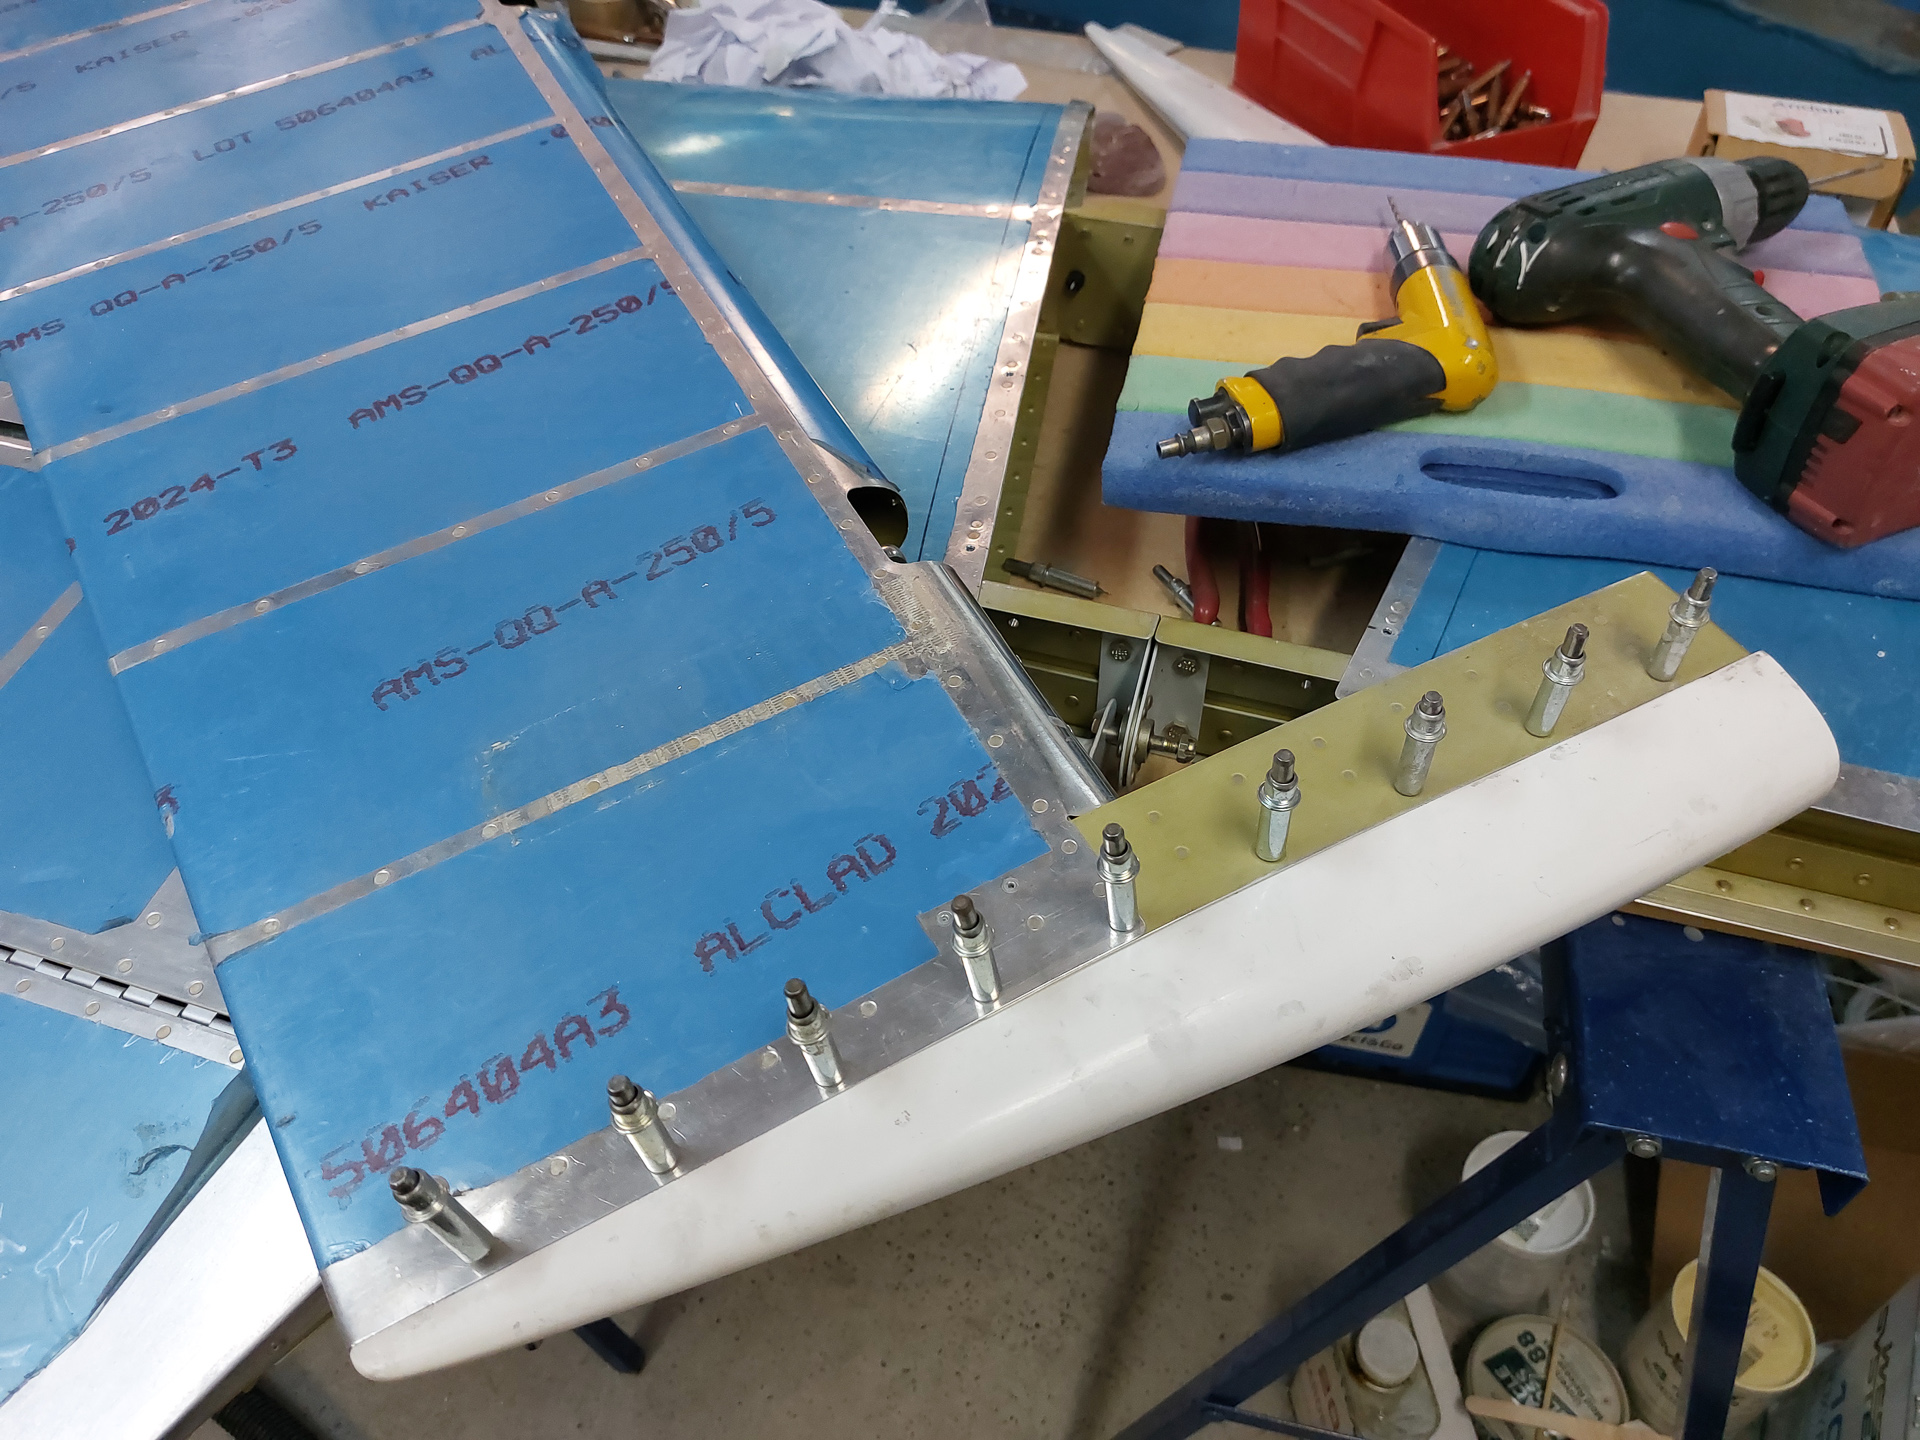
Al drilled, ready to continue with the next step in the next session (to be continued)


