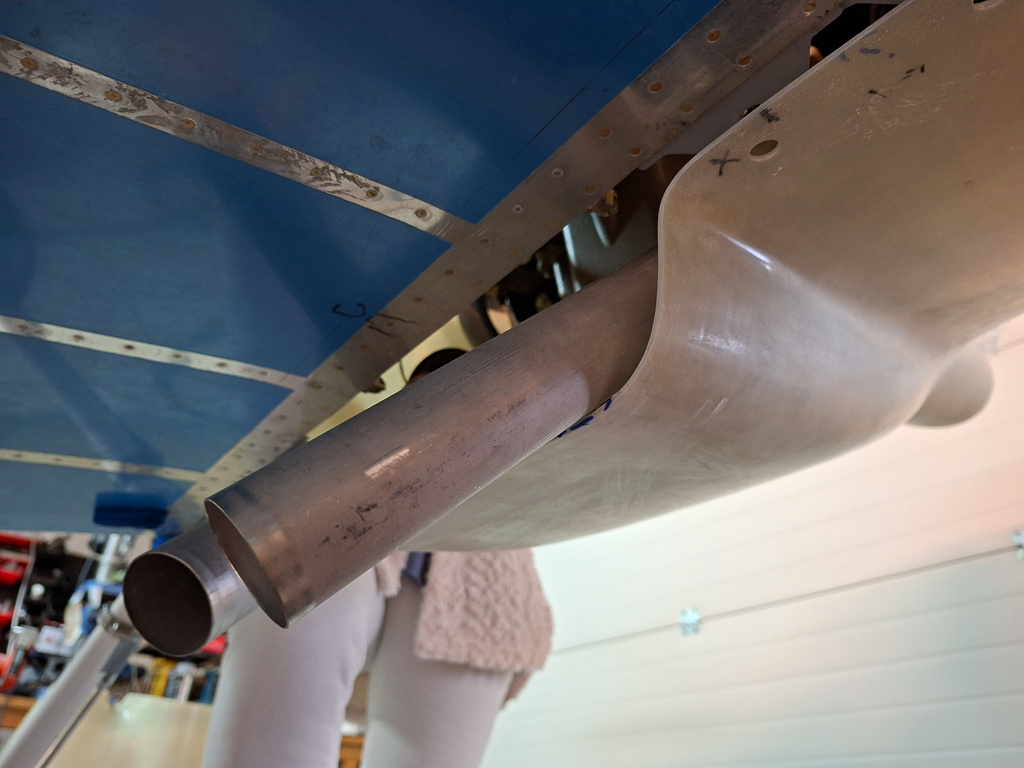
My Vetterman exhaust has mufflers and these are too high to fit in the Sam James cowl. I have seen this before with the RV7 of Joop St Jago in the Netherlands and found out that he did a modification of the cowl which is very subtle and makes the exhaust fit including the mufflers. As environmental issues and noise are big deal in Europe on most airfields, and landing taxes are based on a noise certificate, I decided to order the exhaust with the mufflers.
I was aware of that problem and the extra work it would cause. What I didn't foresee is what I discovered today.
I had cut back a remaining part on the rear of the bottom cowl. I had deliberatly not cut the exhaust bulge yet in order to evaluate how that needed to be cut only later on when the cowl was fit.
Now is that time of checking the fit of the exhaust through the bottom cowl. I cut the cowl on the red line in the image below and make the line equal on the entire rear length.
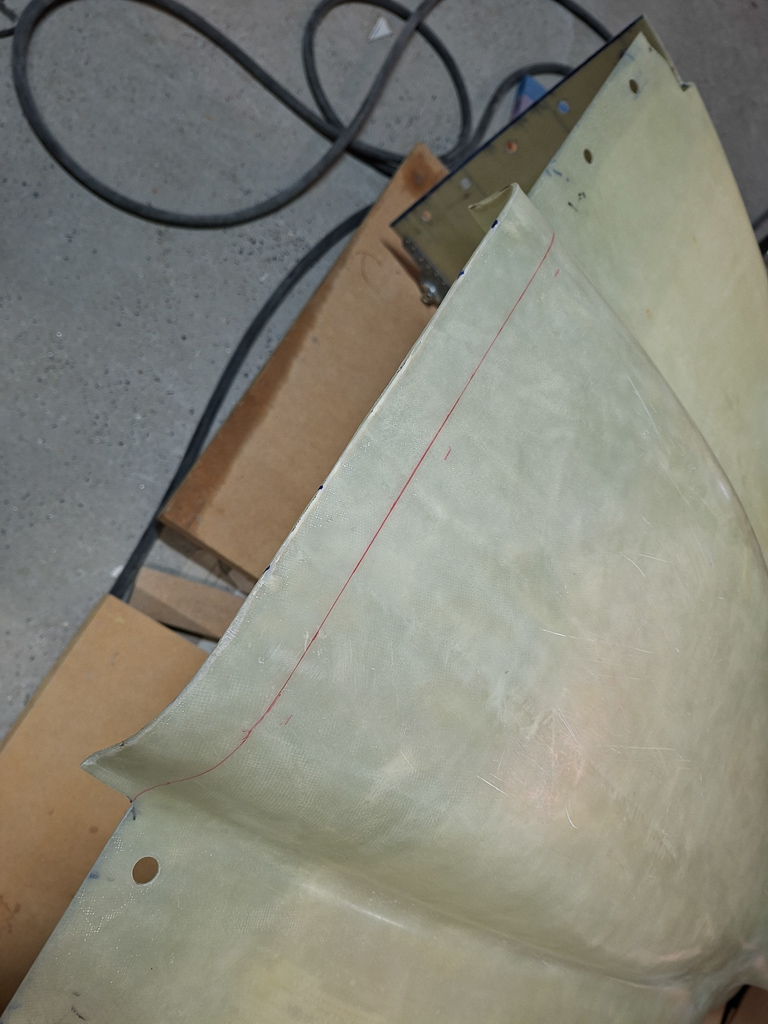
Putting the cowl back on led to some unpleasant surprise. The angle of the valves prevents the cowl to sit inside and the bottom to lay flat against the firewall.
Bugga... Now the question is, how to deal with that.
I tried to loosen the bolts on the cylinders, disconnect the connecton point between top and bottom exhaust and tried to reorient the valves so that the angle would be less.
That is not an option. As soon as I tighten the bolts again, everything shapes back in the original form. I don't have ball joints, they are welded connections that define the orientation.
Only couple of options left for the cowl:
1. either make notches at the place where the valves touch the cowl.
2. cutback the entire bulge in an angle of +-30 to 40 degreeds from the firewall down.
I'm undecided at this point and will ask some other builders opinions in the next days.
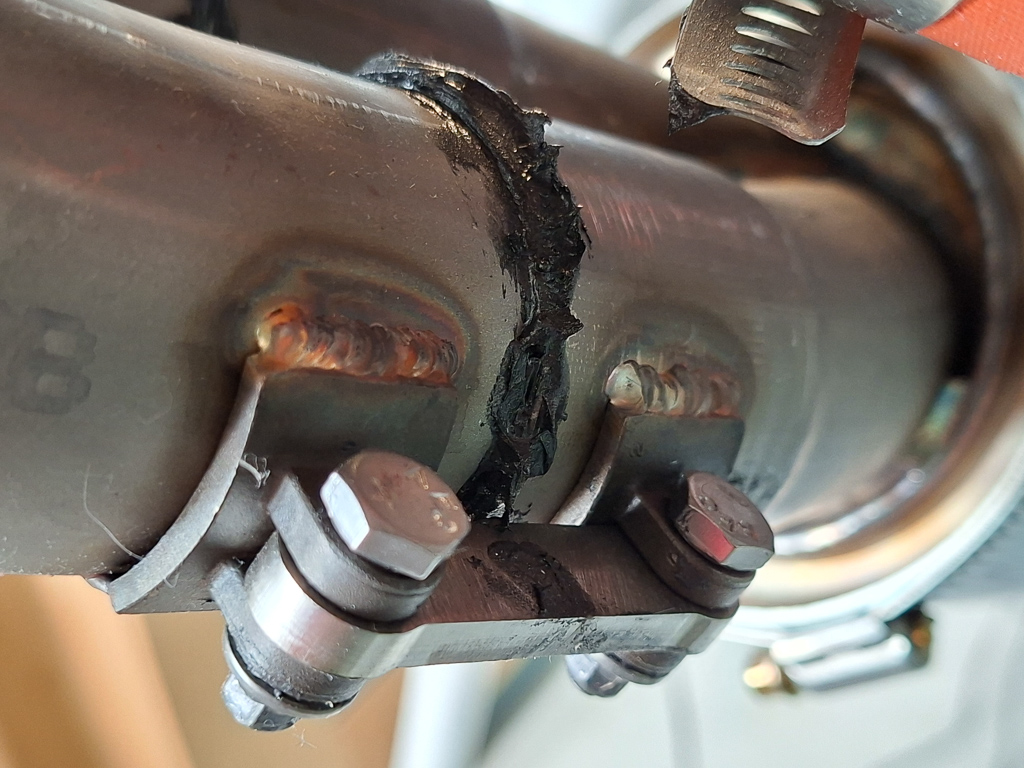
This is a connection point between the top and bottom exhaust pipes. These set the angle. I removed this connection as well but even then, the piper pull back in the original shape.
As you see, the pipes just slide into one another, there is no ball joint and no orientation change possible. These connection tabs are also too much on the bottom side and are too close to the bottom cowl.
I will need to have these re-welded about 30 degrees higher.
Rewelding the exhaust itself doens't look like being an option and having it sent back to Vetterman for rework will cost a fortune in new shipping and taxes. Will need to deliberate further on this after consulting some other builders.
As I couldn't continue, I decided to start working on the oil door. The cowl is a bit thicker where the oil door is supposed to go but there is no clear outline where to cut like the Vans cowl has.
So you will need to determine the best location for the oil door yourself.
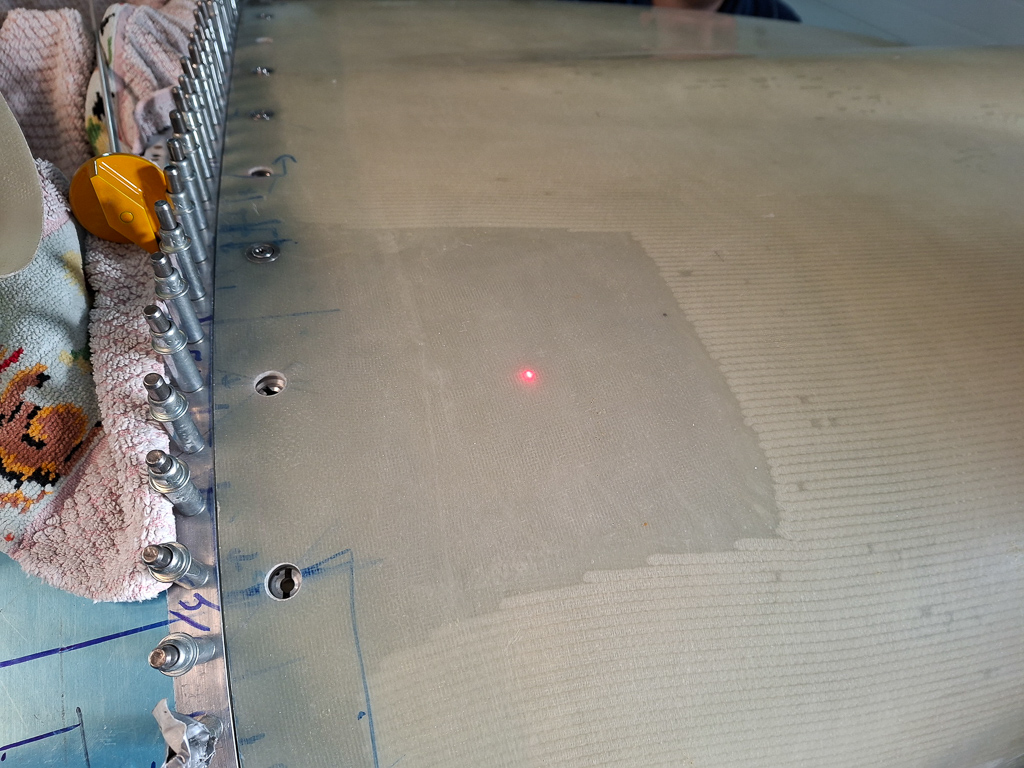
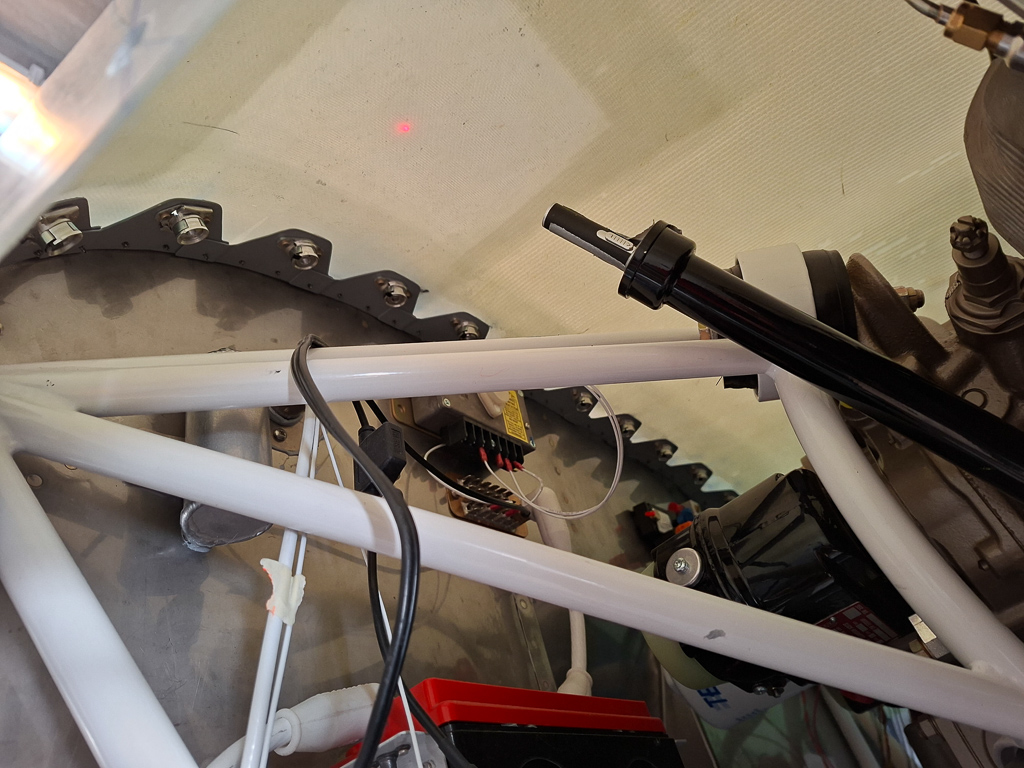
In found an easy way do deal with this. I had a small pen-laser light hanging around and used that to tape it in the oil probe. You can see it in the image below.
The pen is wrapped in duct tape so it can't slide down the oil probe. You don't want to loose that lamp into the engine case... that would be a disaster.
So stuck it nice and centered in the oil probe hole and then put the top cowl back on.
You can see the red spot projected by the laser. That is the exact spot on the cowl where the oil prober will be when you pull it out when it's centered in the oil probe tube (which is usually what you try to do when you read the oil level).
This is how it looks from the outside. All I had to do was mark it with a sharpie and the location is fixed.
I think I will not center the oil door around this but rather keep this spot a little on the front-middle (top right in this picture).
You still need to put your hand in there as well which is usually more on the bottom left.
I also checked most cessna's in our flying club and the oilprobe is with most aligned on the front line that's parallel to the firewall and a little towards the top.
So my thinking above is confirmed by that.