Finally I'm able to make the first cuts. And also finally I convinced myself that I can safely doing it without ruining a 5K cowling.
I first trimmed the bottom part of the cowling, left and right side. Your initial cut will have to be very conservative. Keep enough so you can do the fine tuning with sandpaper and a sanding block.
The cleco's on the sides allowed me to reposition the cowling in the exact right location without having any more "grip" in the bottom.
You have to trim the cowling line parallel to the bottom forward firewall skin. This is a precision task that requires some patience and about 5 to 10 times getting the cowling on and off. Using some ducttape helps but doesn't do miracles.
Each time I have to do a task like this I question the statement of Vans that an RV can be build by a single person. Getting the bottom cowling on and off requires a double pair of hands.
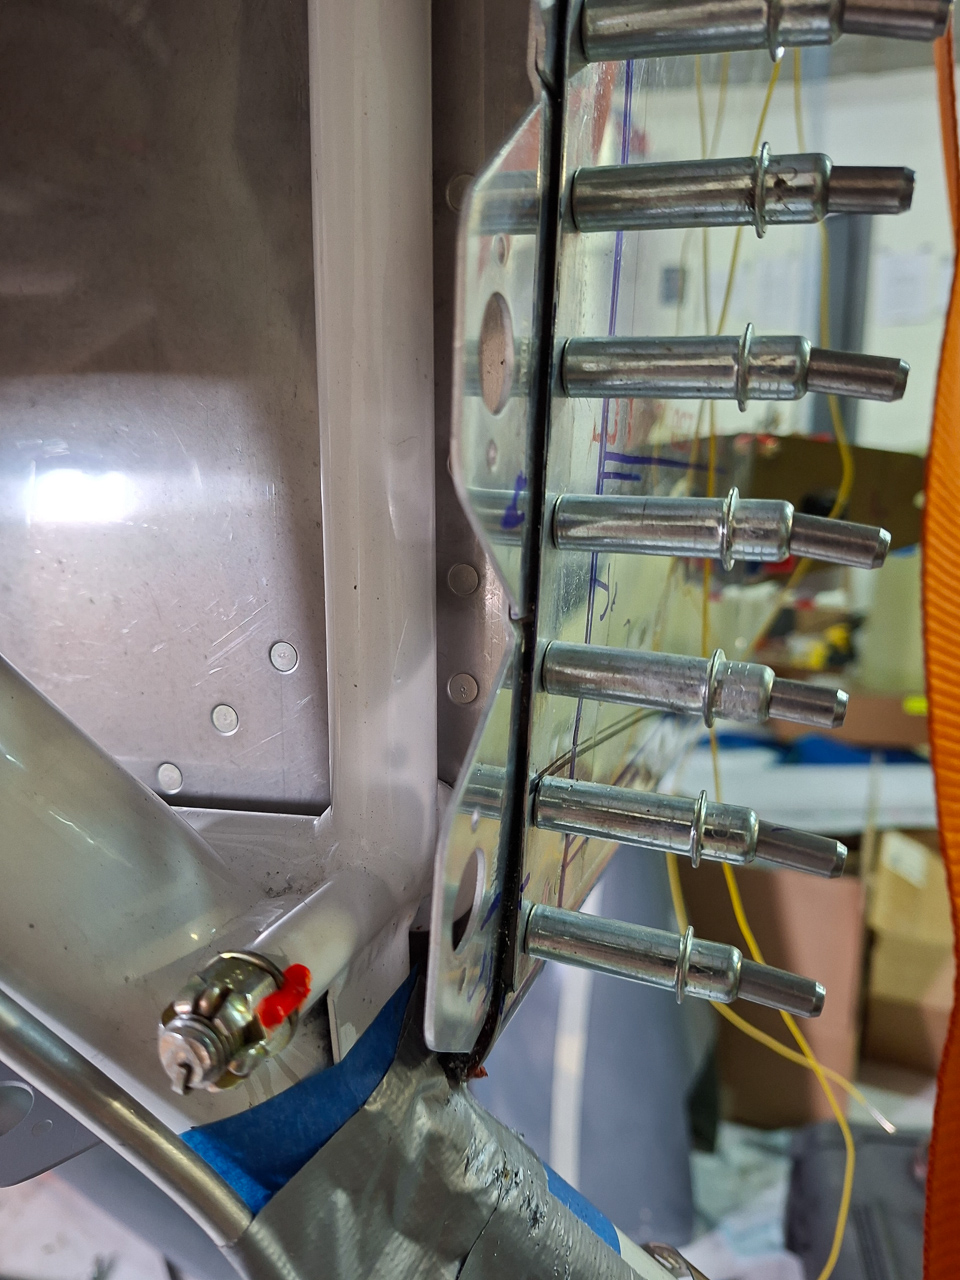
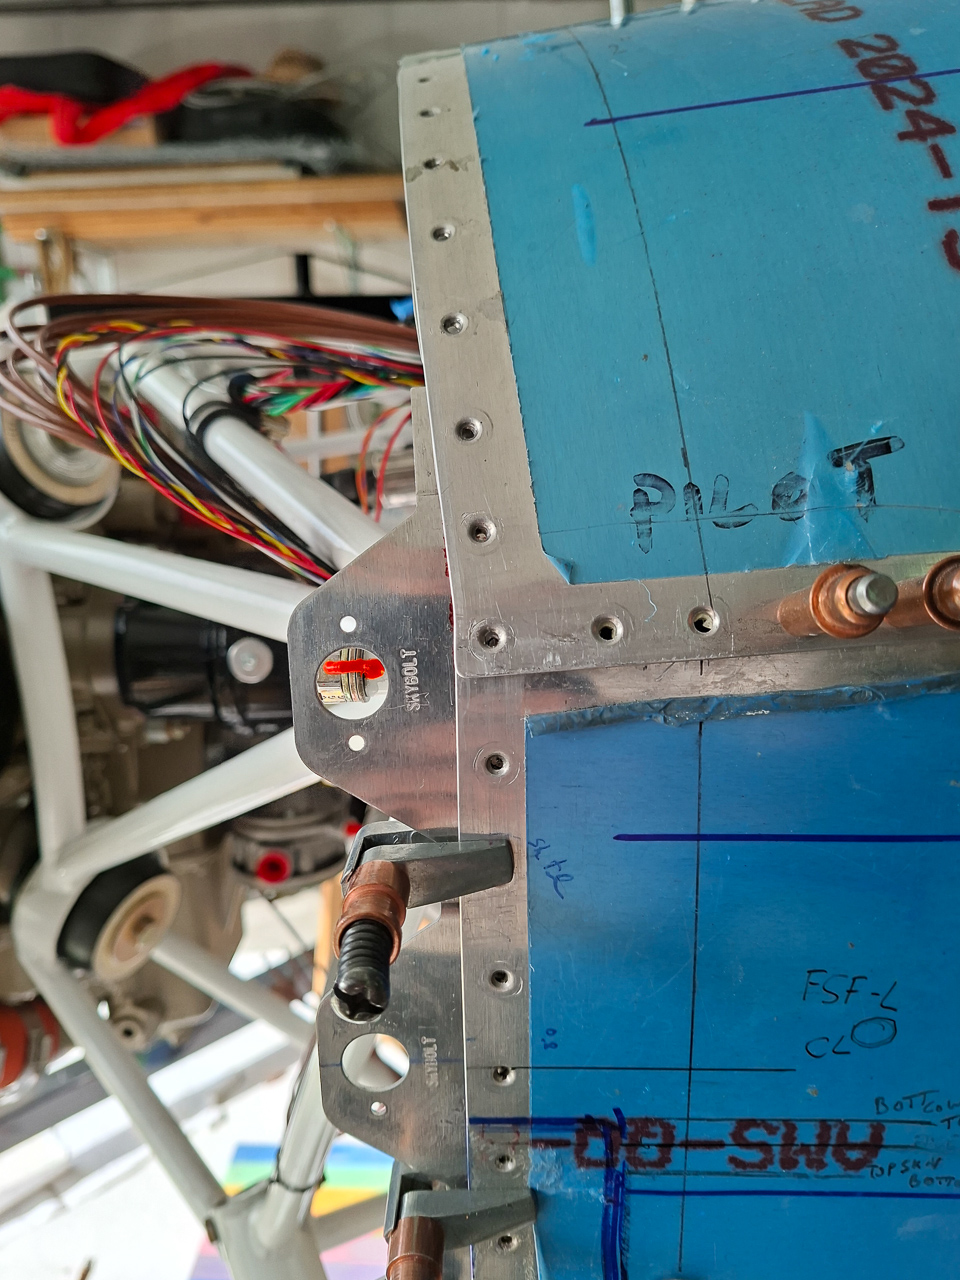
Below is a shot of the pilot side.
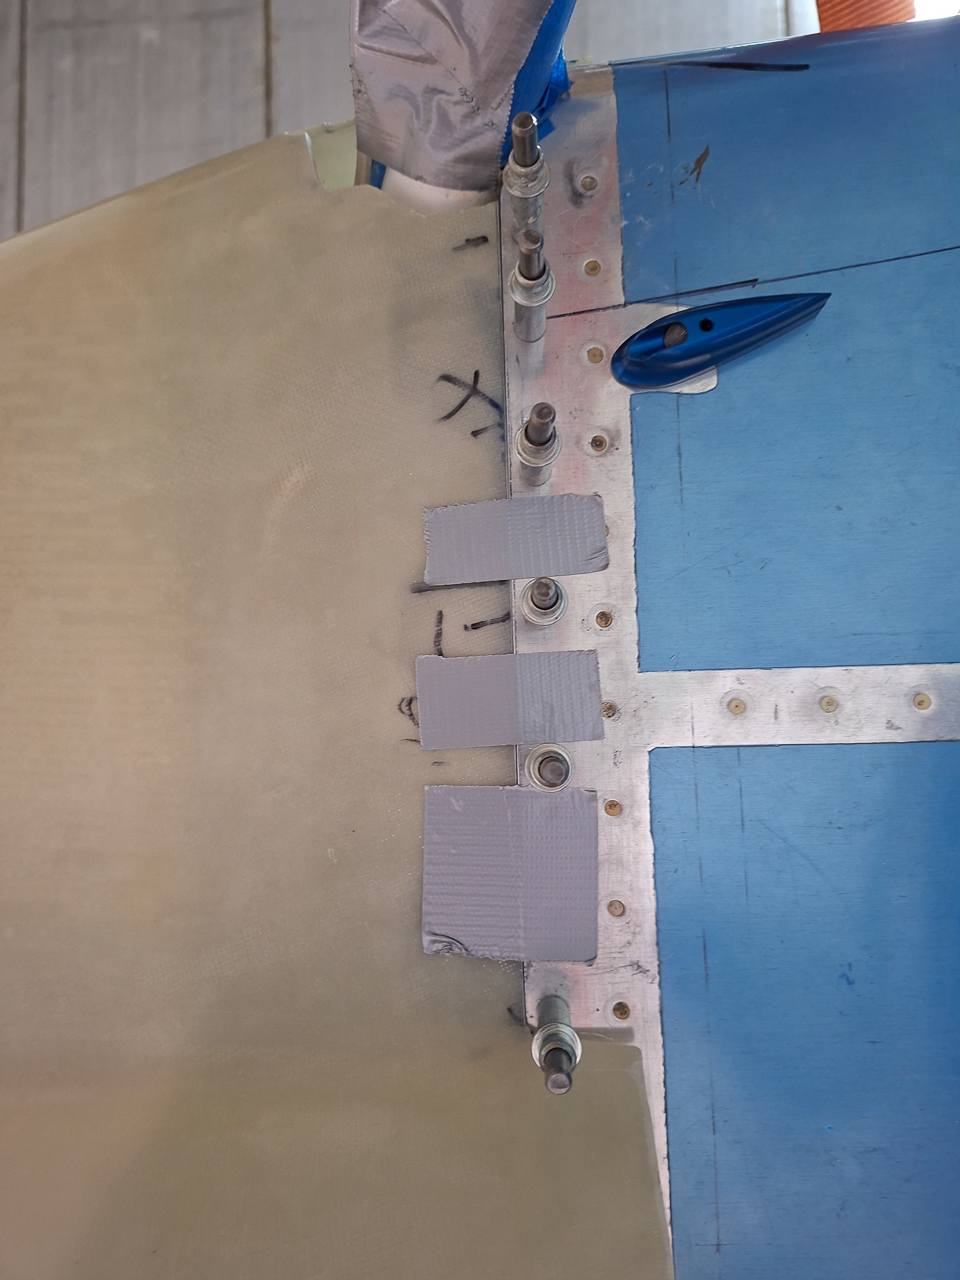
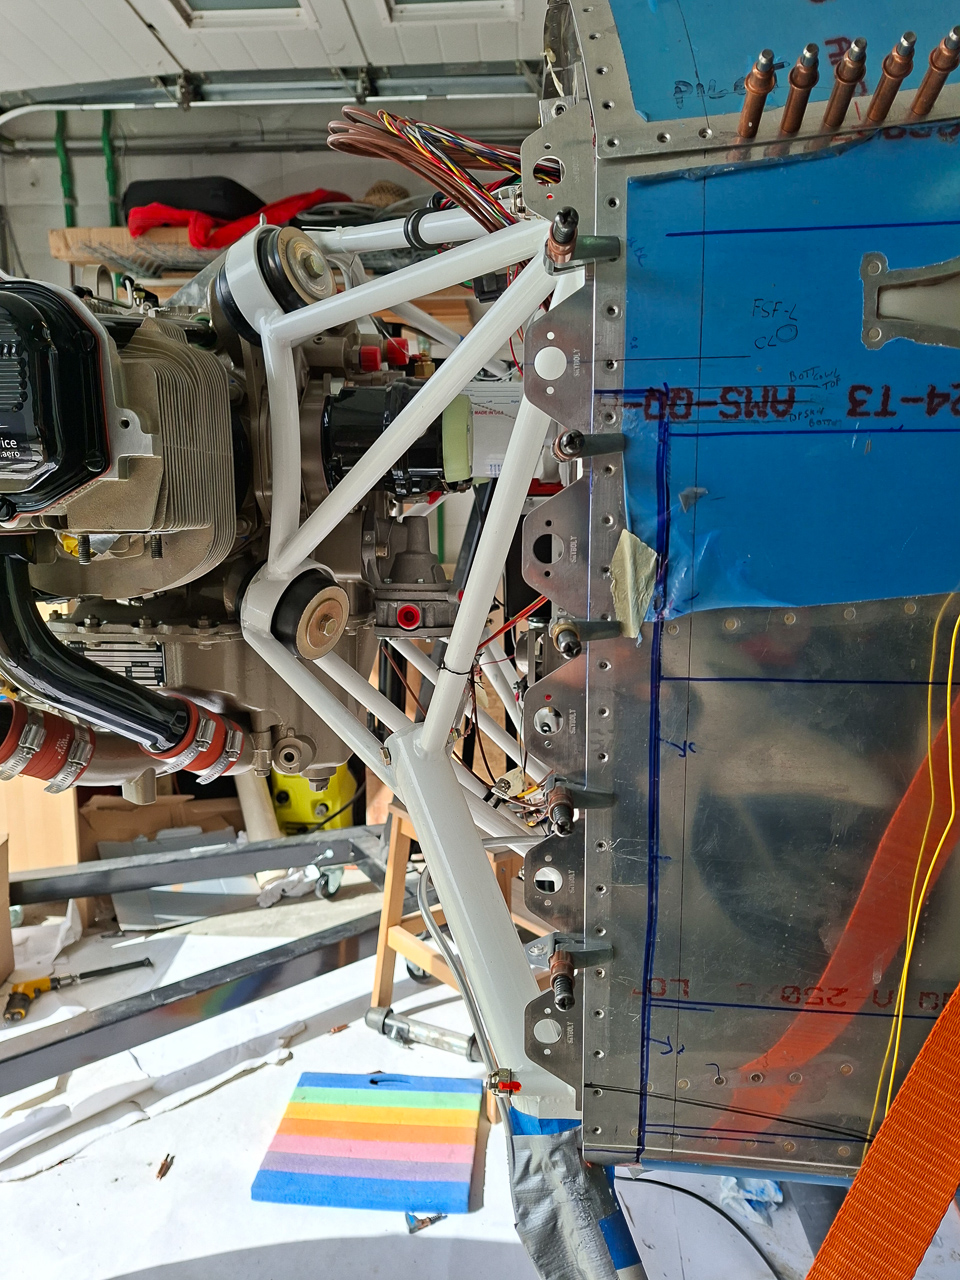
And a picture from the passenger side.
As you can see, no more grip down there so having the cleco's on the sides holding the bottom cowl from the fuselage sides is a real benefit to keep that perfect position. The cowl moves up a tiny bit (just a millimeter or 2) and you can account for that when drilling final the fastener holes. Most important now is to lock in that distance between the back of the spinner and the bottom of the spinner ring on the cowling.
Not trimming enough here would mean the spacing in the front is too small. Getting this trim line too much forward means increasing that gap in the front.
The first you can fix, the second is too late to fix. So be conservative on that first cut, you can always take away more but you can't put it back.
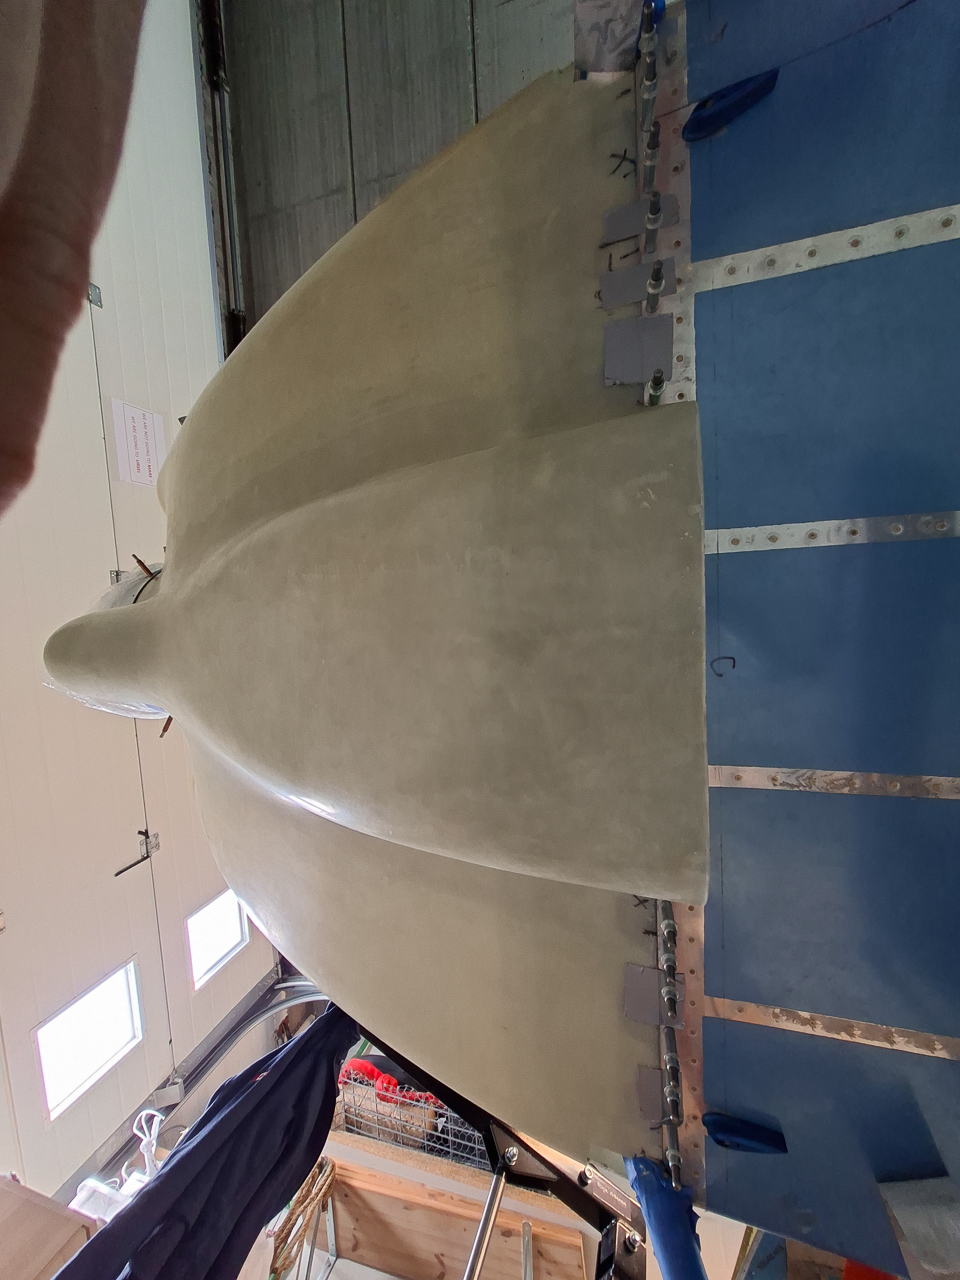
Here the final cut line is done. Well, for now. I try to cut as precise as possible with zero or very minor gap.
When the cowling is fully done, I will sand away some more material to leave a 0.020" gap for painting thickness.
Being precise now gives you the freedom to get it perfect in the end.
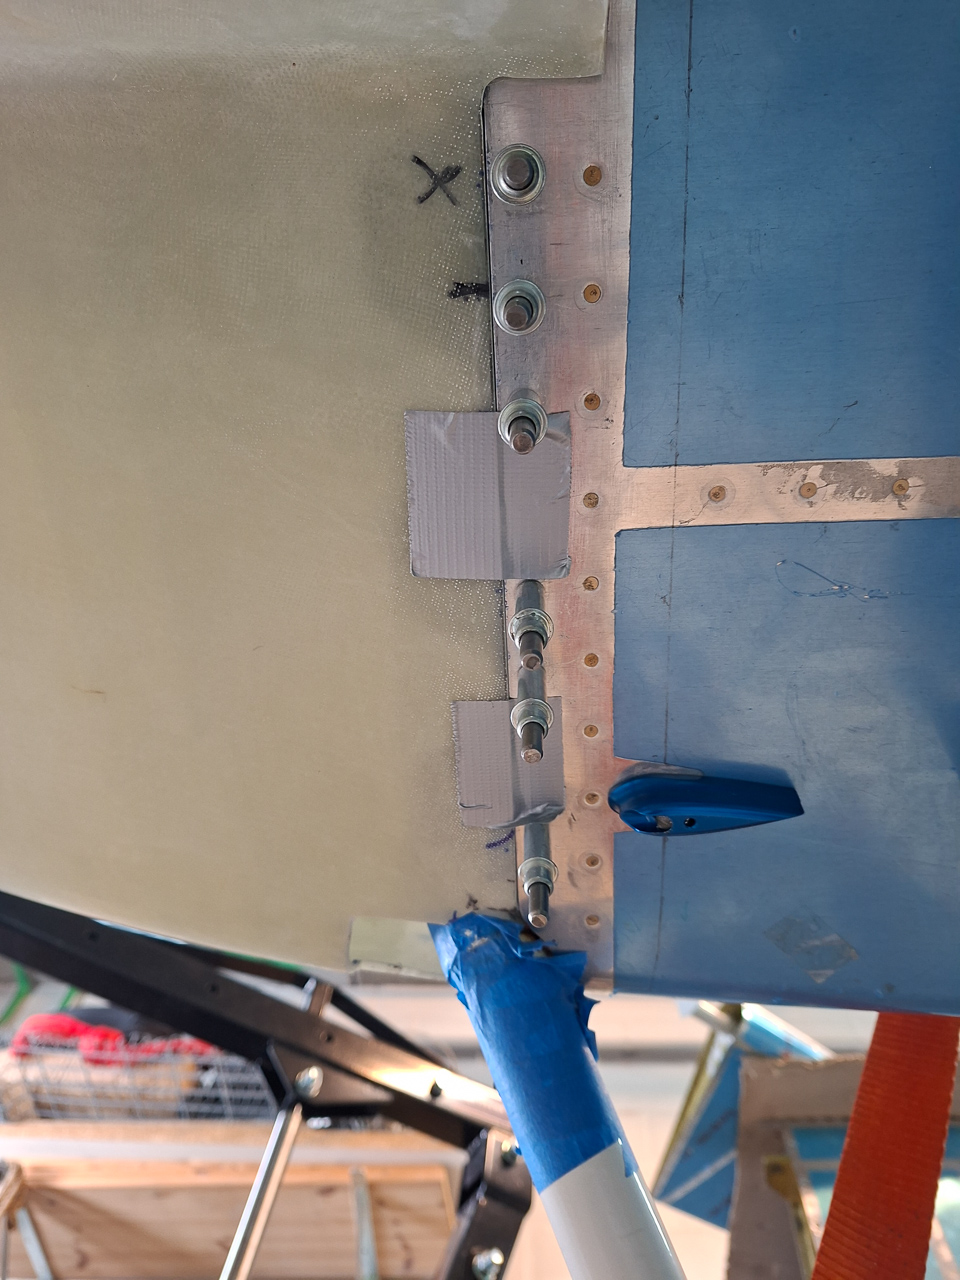
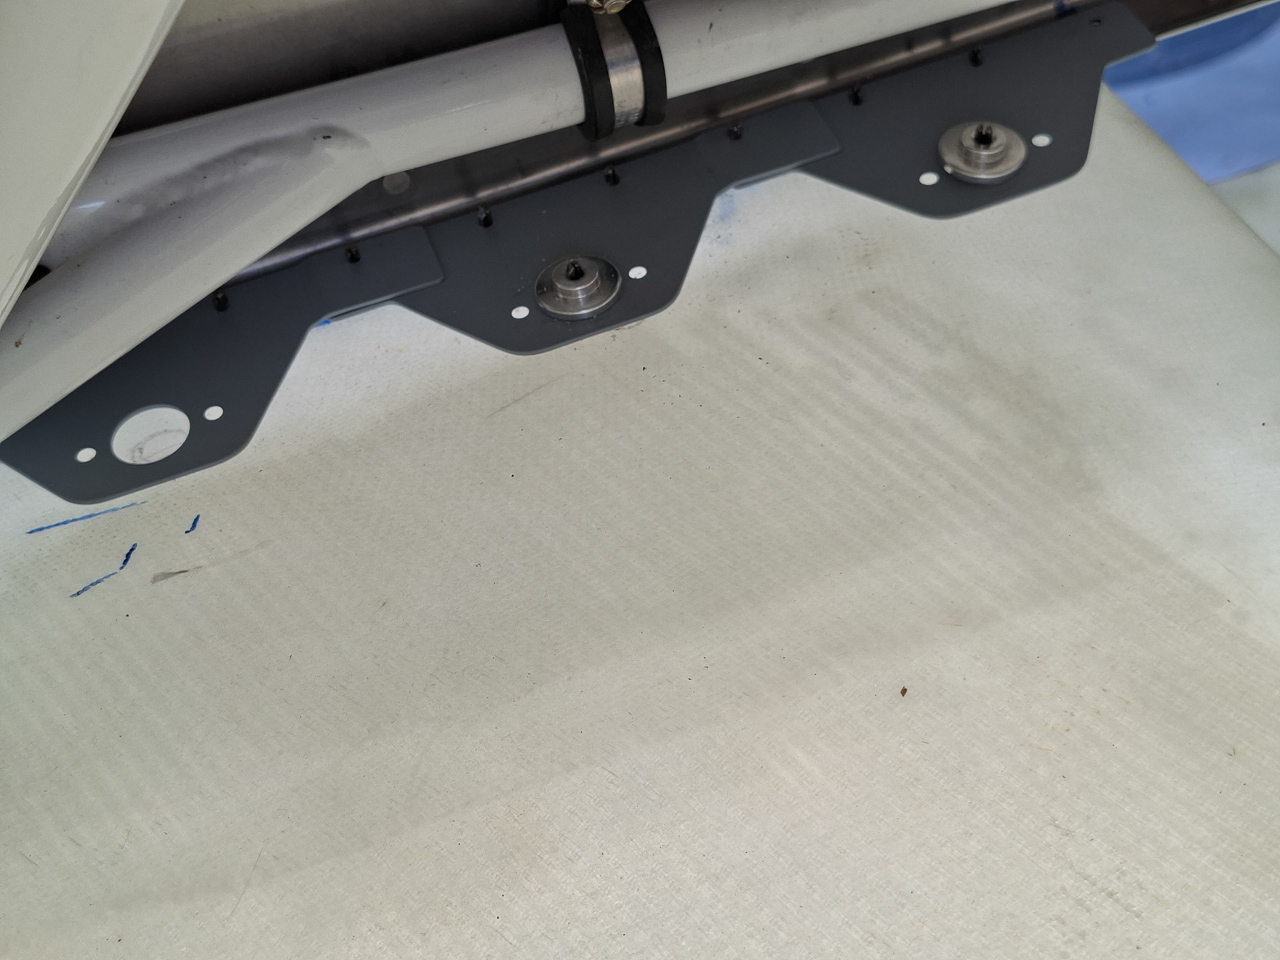
Next step I drilled #30 holes in the bottom cowl. Skybolt delivers some cleco adapters that fit in the large hole where the fastener will come.
This has a double advantage. 1, you can temporarily attach the cowl in the same spot each time without having to install the final fastener receptacle yet. 2, the cleco adapter works great as a drill bushing to get the starting hole perfectly centered in the large circle. Later on, you will need to enlarge that hole with a step drill and getting that pilot hole perfectly centered makes drilling the final large hole a lot easier without the need wander the step drill in the hole.
In the image below, 2 cleco's are installed
I did some measuring again to position the FSF-L and R brackets. These are the center line brackets on the firewall that should be inline with the brackets on the horizontal split line.
The purpose of doing this is to be able to install the vertical brackets on the fuselage sides for the bottom cowling.
If you know the positions of FSF-L, you can space the brackets below it accordingly to get a 3 1/2 inch spacing.
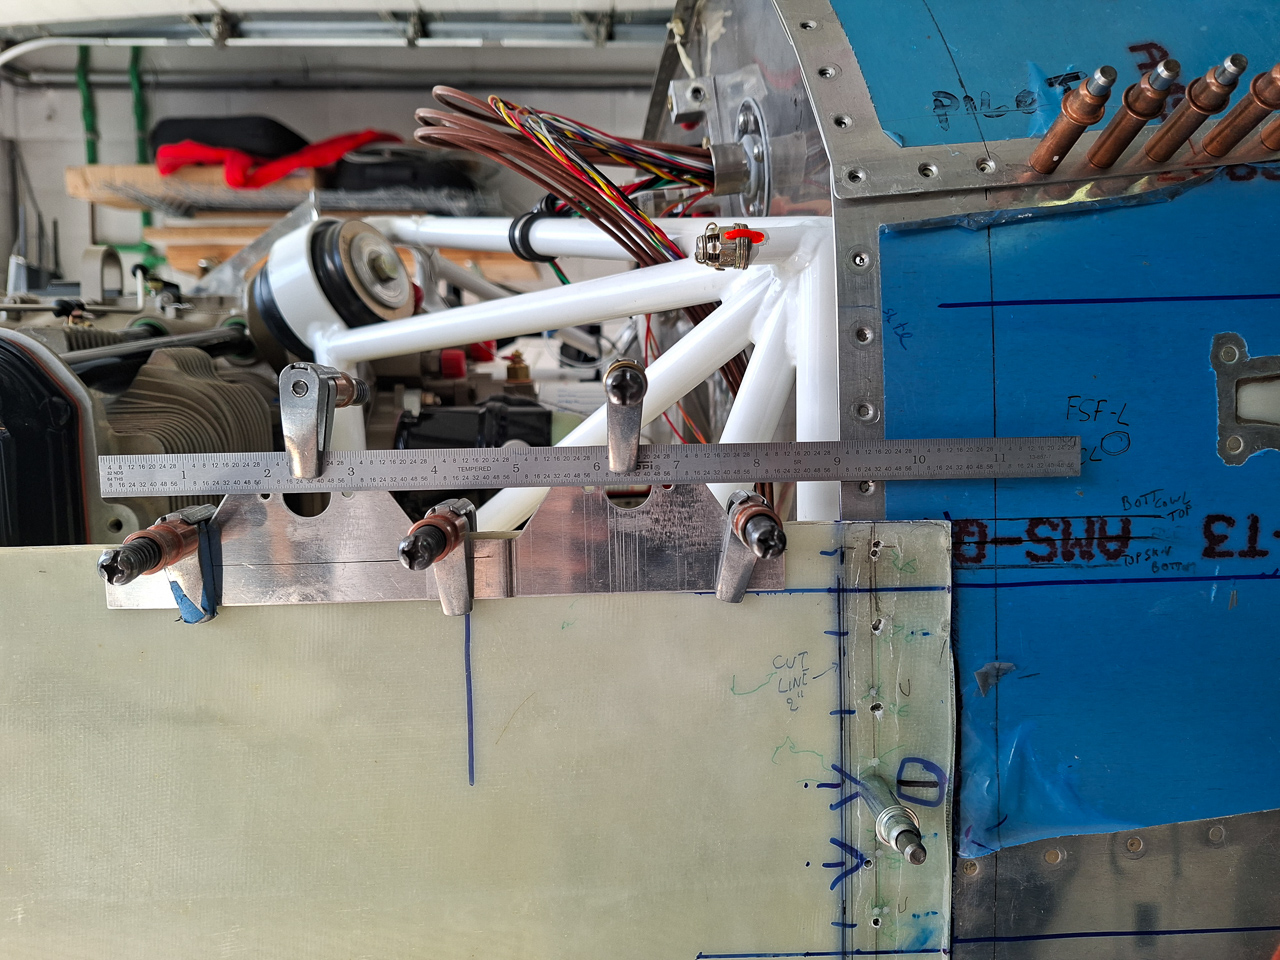
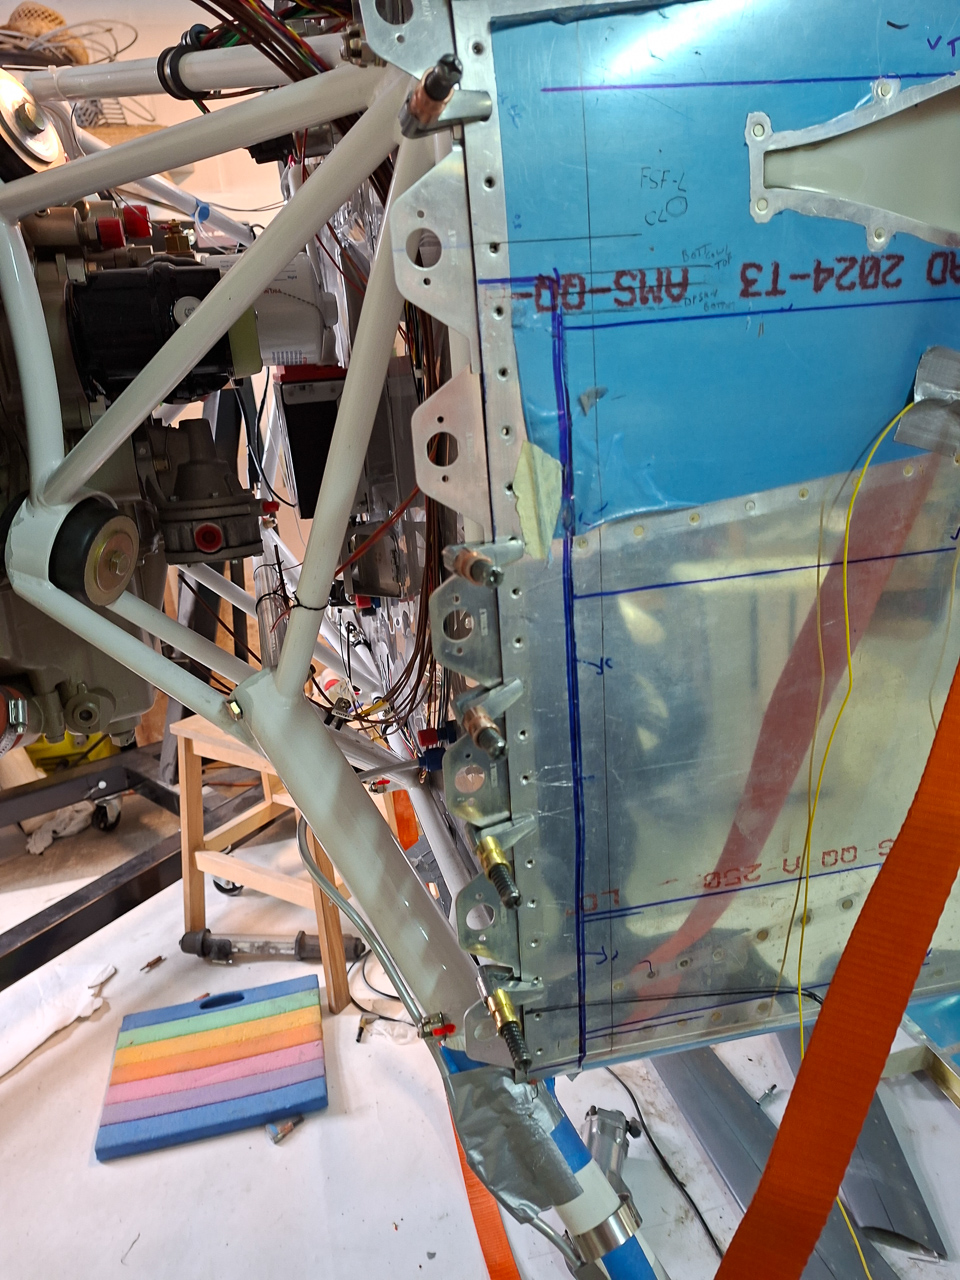
Below, the picture with the brackets positioned using 4 brackets below FSF-L. This is not my final layout but it gives you an idea what that would have looked like.
The bracket above FSF-L is a complicated one, it sits right in the bend of the firewall going forward at the top and you need to shape the bracket in order to lay flat in the bend.
As I have enough brackets, I decided to make the spacing a bit smaller and install 1 extra bracket. So finally I used 5 fasteners on the sides below the FSF -L bracket.
I cut back the lower bracket and bent the tab inwards so it lays flat on the lower bend in the firewall. (the picture shows it before doing that)
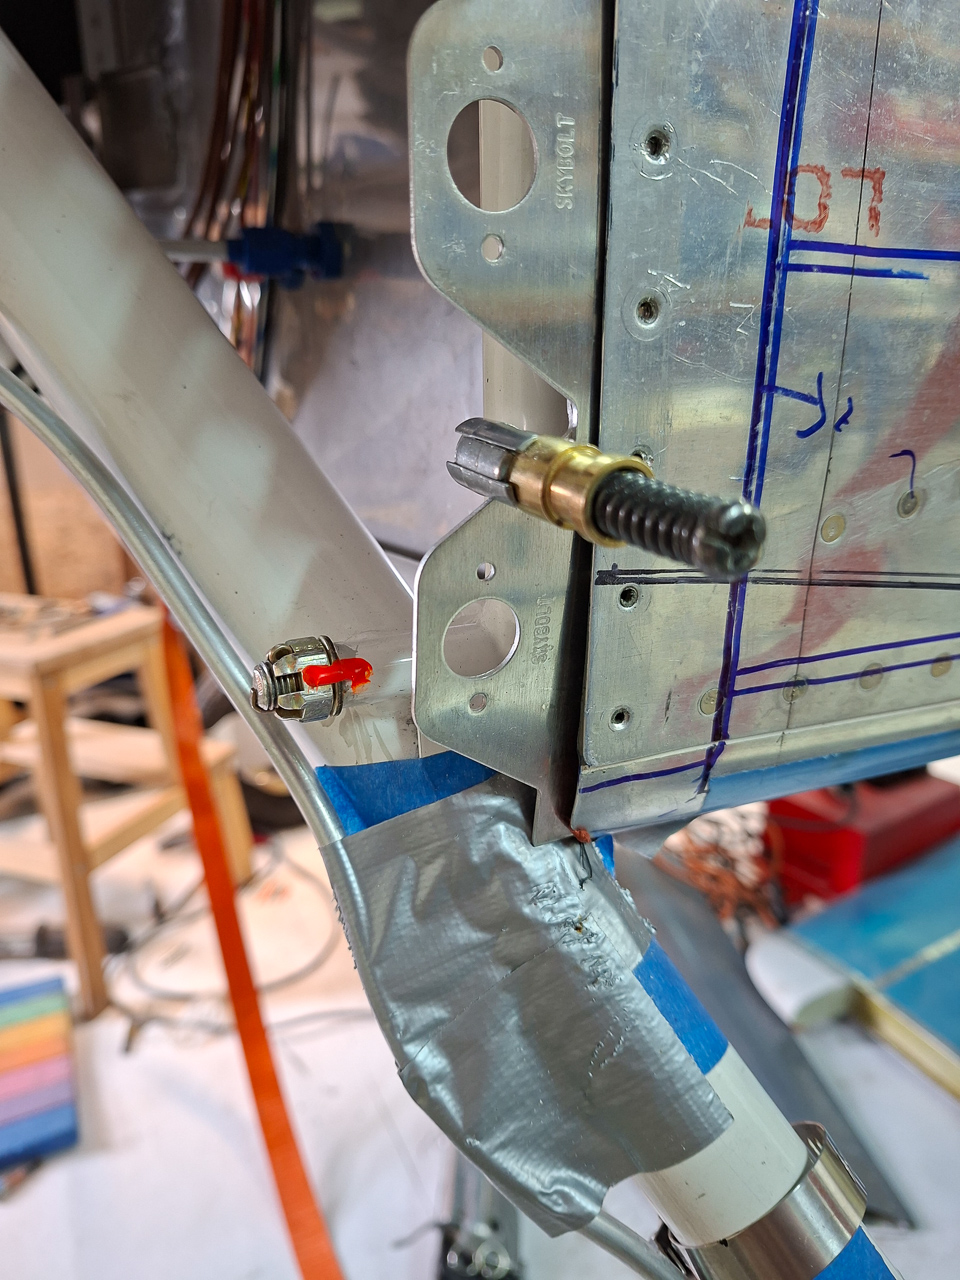
This is my layout with 5 brackets clecoed on the firewall edge. These cleco clamps are real handy to move the brackets around while laying out and measuring.
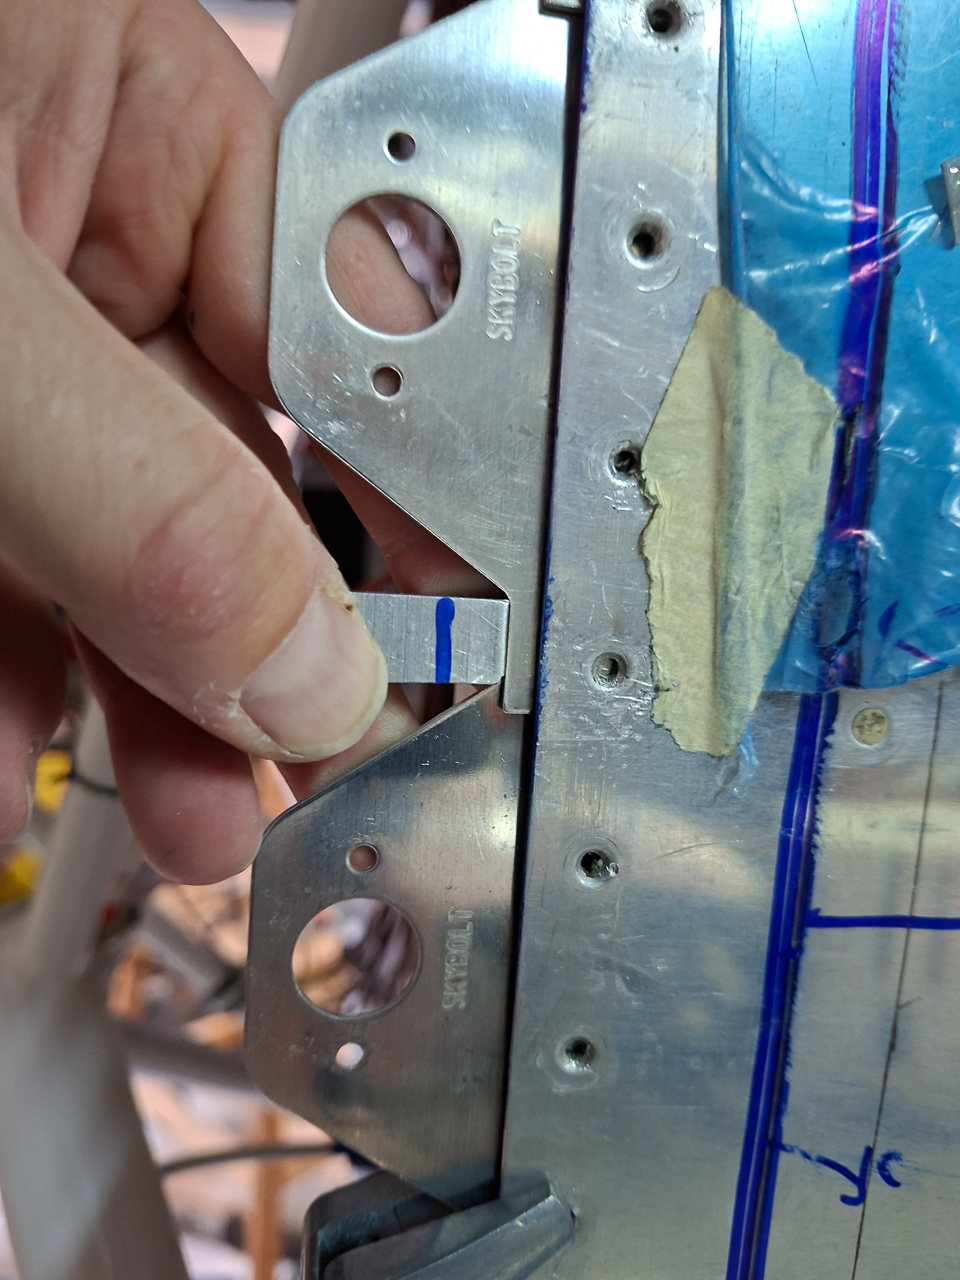
To get an equal spacing, I used a small aluminium block between the tabs. As I mentioned in the previous article, don't use 0.23 to 0.25 as length of the tab exposed over the firewall edge. This is too much and you will end up with insufficient edge distance on the holes. I used 0.2 which is more than sufficient to do what it's supposed to do.
The idea of having this part of the tab exposed is to avoid having "see throughs" at points where the cowling is trimmed a bit too much. Be precise and you won't need that. 0.2 is plenty.
In the picture below, the tabs are drilled to the fuselage. Make sure you install some clecos below the tab you are about to drill. This pulls the steel front firewall inline with the fuselage skin. If you don't do that, and they are not well aligned, you risk ruining the hole in the fuselage skin as the steel below is hard to drill through than the soft alumnium of the firewall skin. On the sides, most of them are aligned well but this will be important when you drill the top cowling holes near the top where the firewall steel sheet is flimsy and still moves

Before you drill, don't forget to cleanup that excess fuel tank sealant that was used to seal the firewall and fuselage side which may be sticking out at some points and prevents the brackets from laying flat against the firewall flange.
At this point, I'm ready to trim the firewall sides on the bottom cowl.
But as always with an airplane, there are 2 sides. First I have to complete the same thing on the passenger side.