

Yesterday I started sanding on the pilot wheel pant and today I continued some more fine tuning on the mating of the front and rear half to get that "as good as possible" mating line.
The height differences matter to the airflow but other than that I guess the join line is a pure esthetic thing to please the eye of the admiring visitor at airshows.

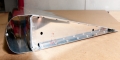
The joint is now as good as I can possibly get it and I'm pleased with this result. I also marked some black sharpie line to ensure the relation between the two stays the same while you take it apart multiple times for more sanding.
The seam now finally looks the way I want it and I will move on to the next step.

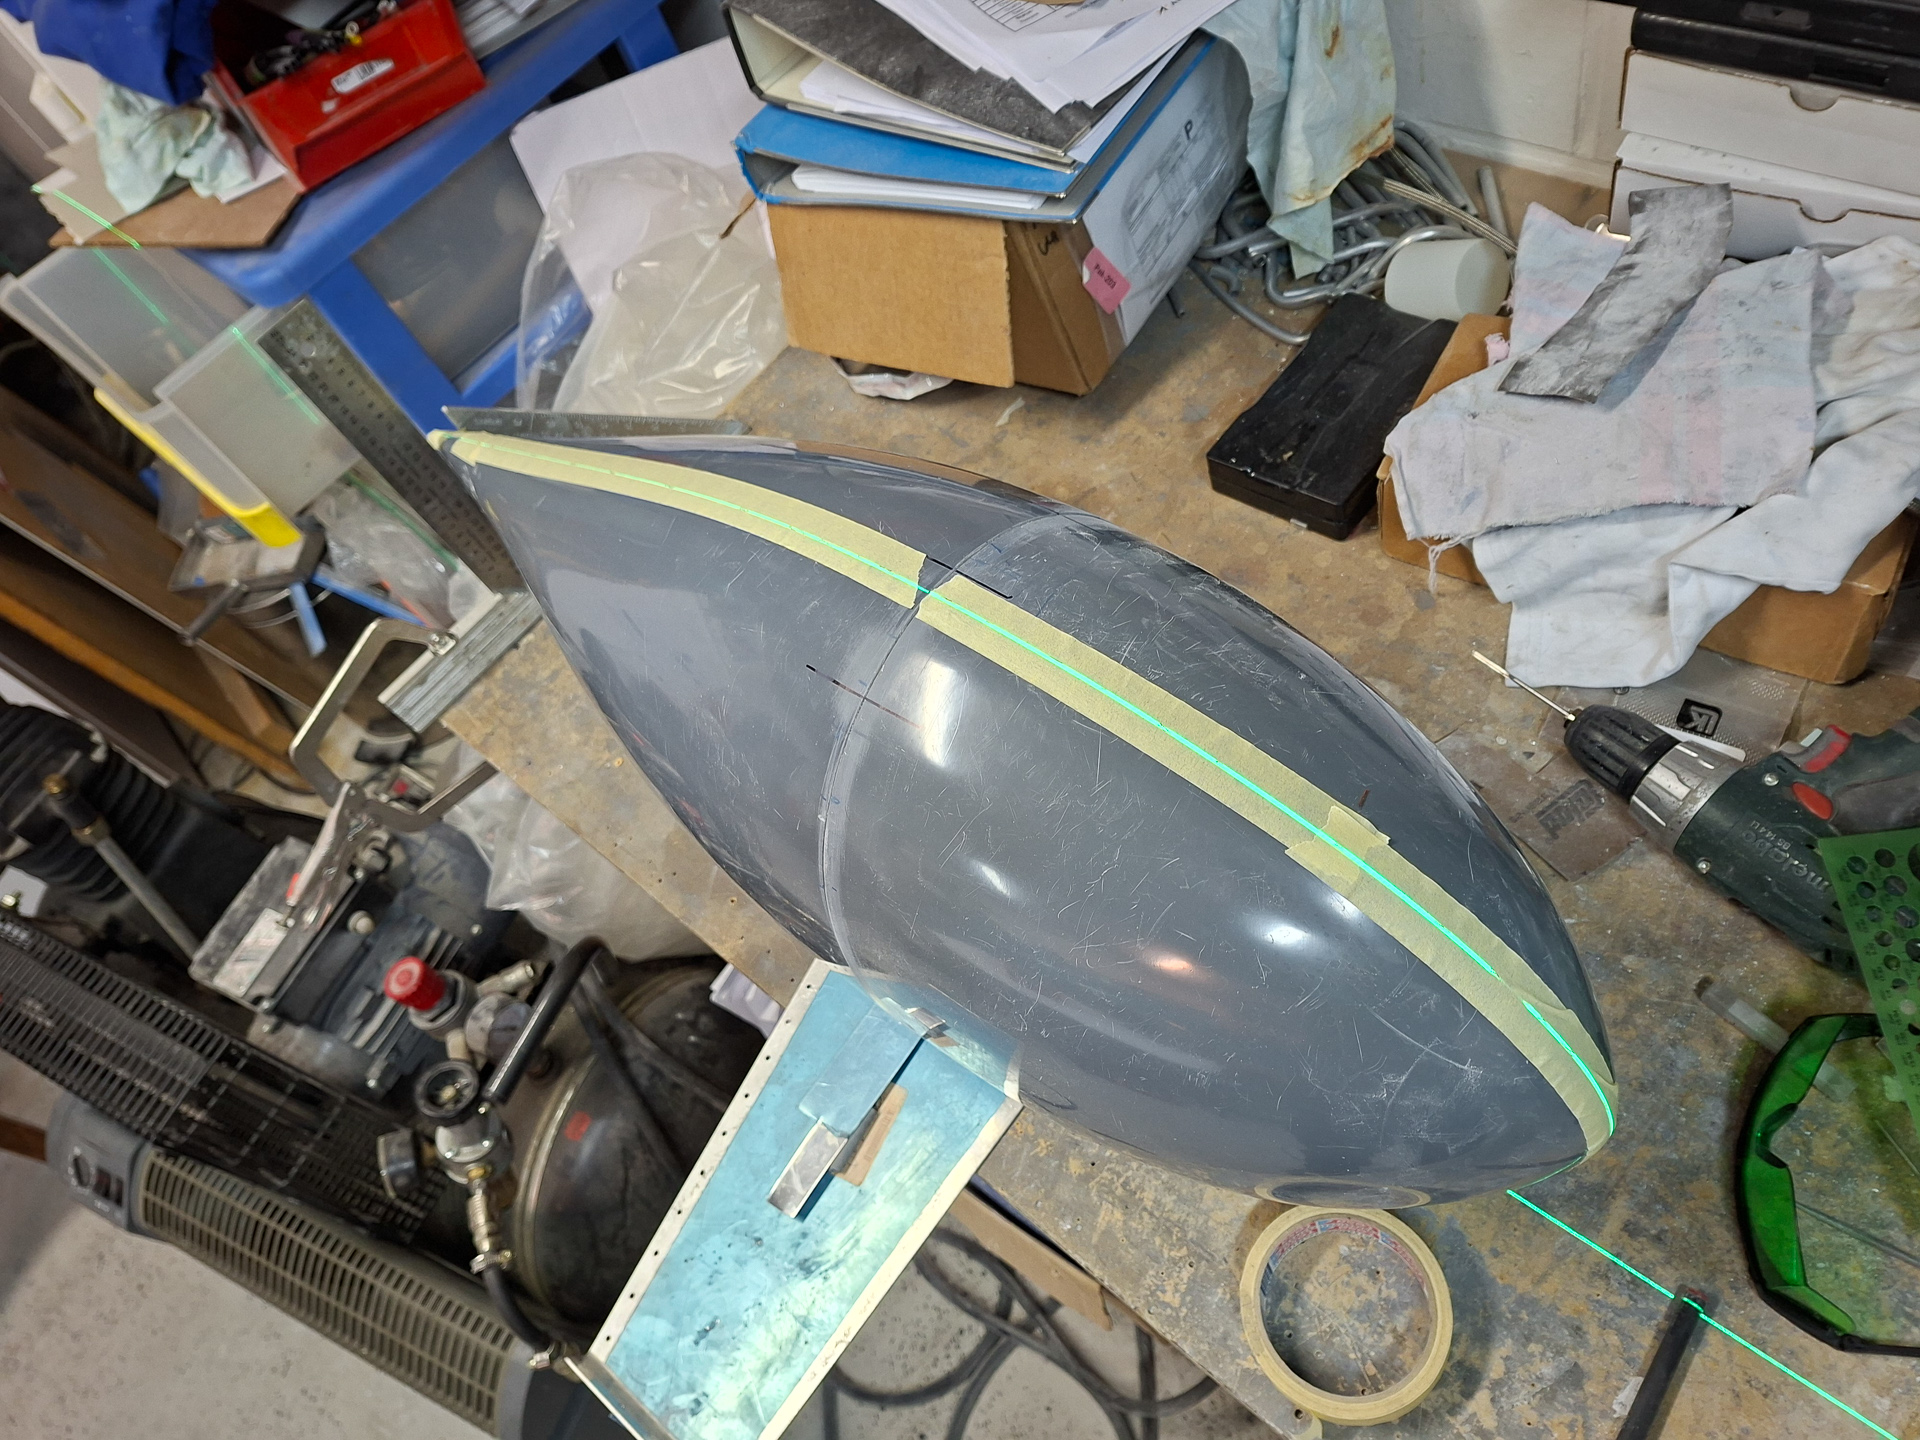
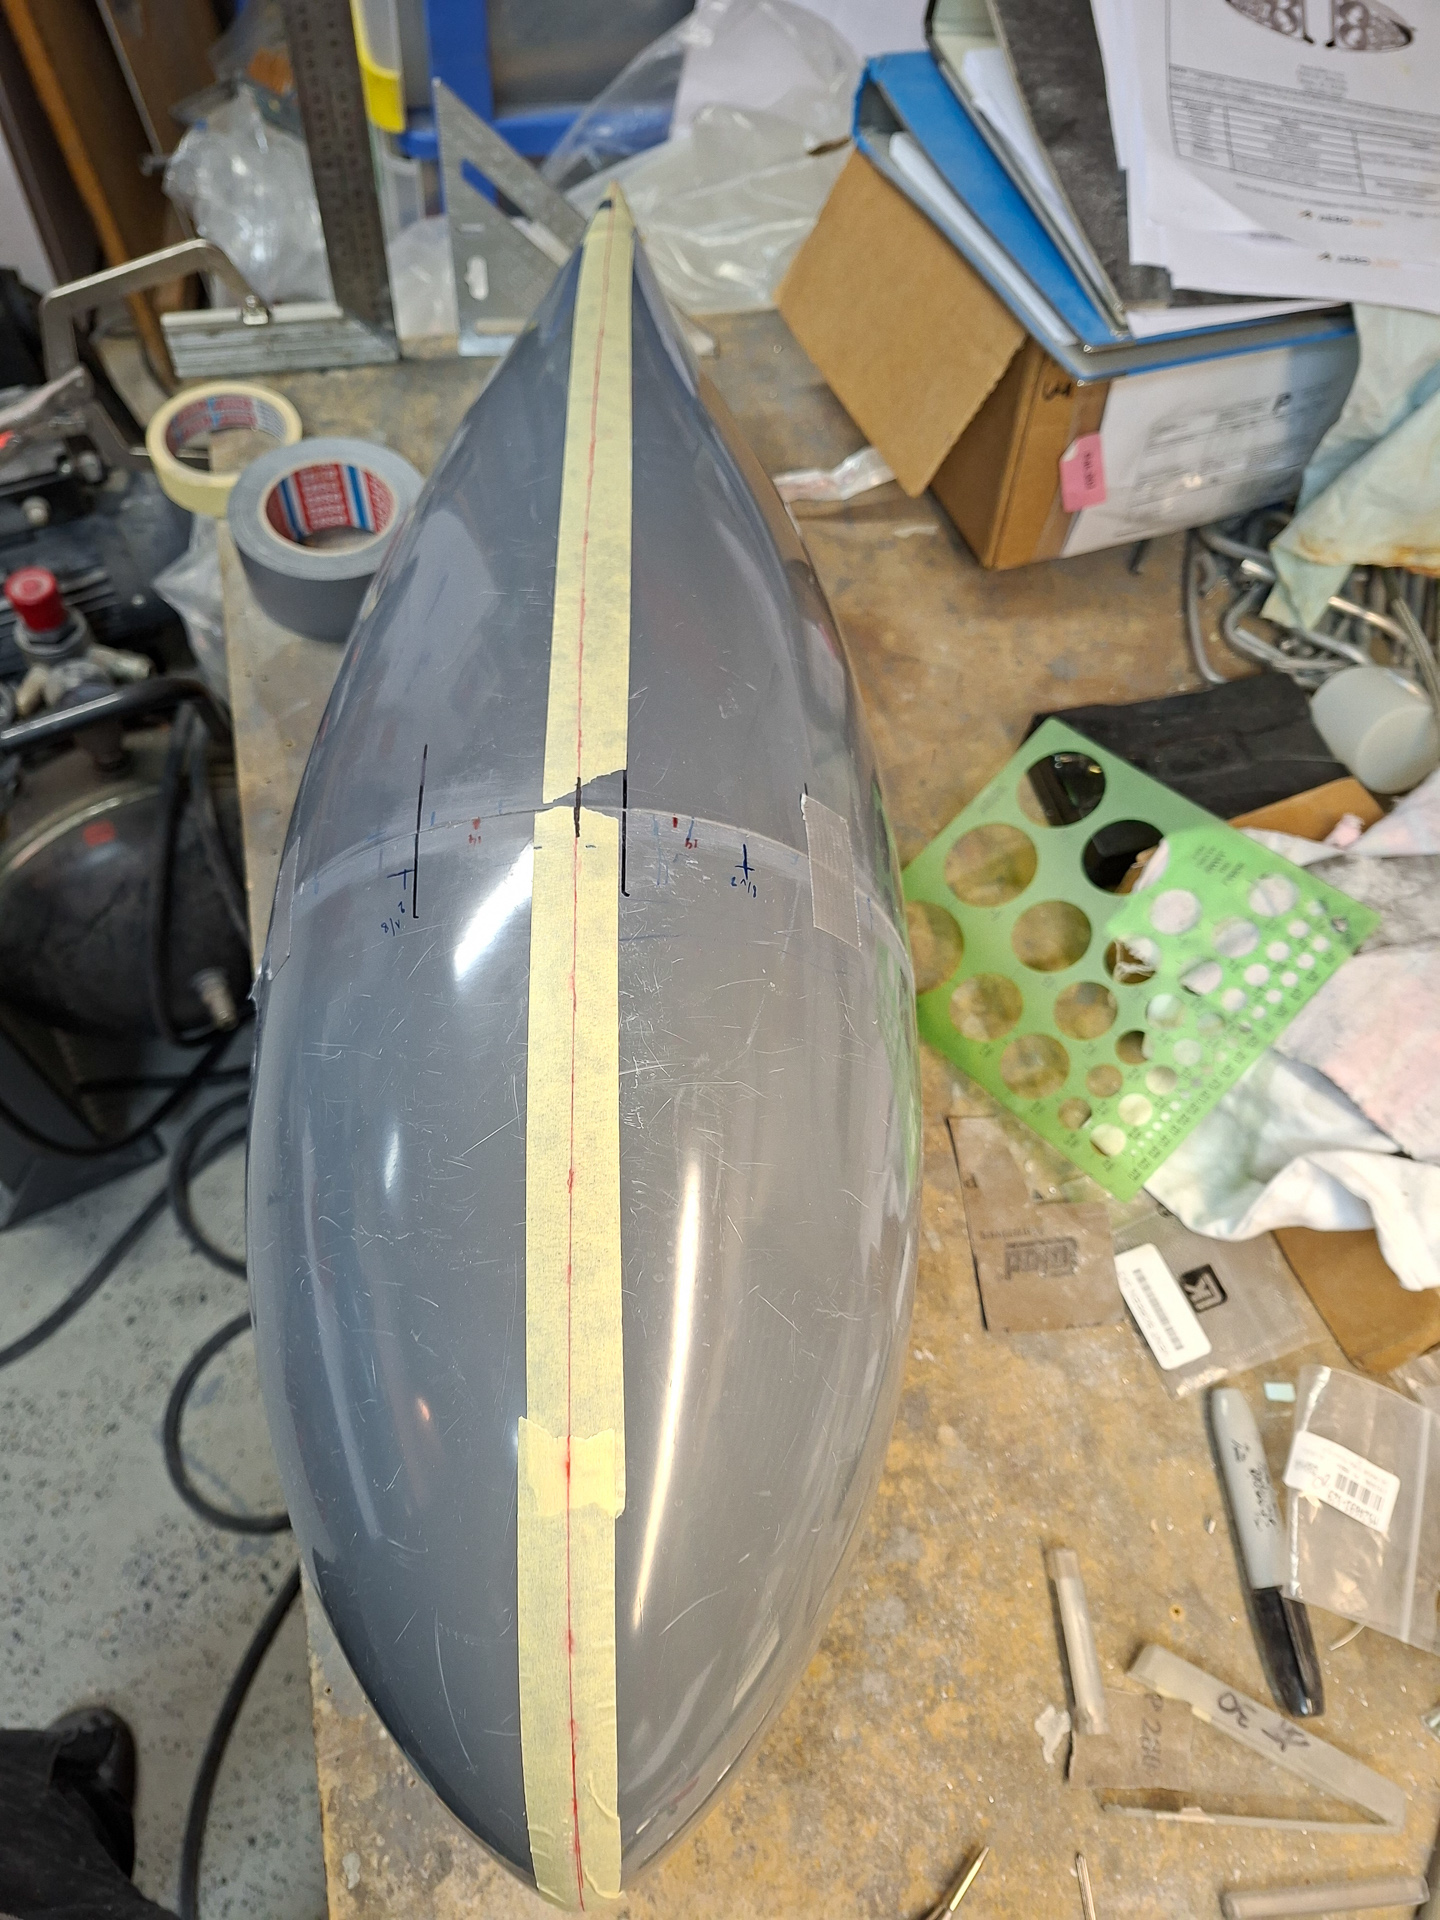
The next step for me is drawing the centerline on the wheel fairing. This sounds easier than it is in reality. There are hardly no reference points and especially the front point is a bit tricky.
I got out the laser level again and made the setup on the tripod on the workbench. The rear is centered and squeezed between 2 squares. I had to place some scrap aluminum spacers between the bench and the right side to keep the back aligned with the squares. The cutout in the bottom is not equal and this makes that you cannot just rest it on the cutout and rely on being level.
The laser projected it's beam across the wheel pant. The yellow paper tape is just to make it easier to draw a sharp line and measure accuratly.

Here you can see the line projected on the fairing.
Below is a shot of the laser line that centers over the trailing edge of the fairing.

The fairing itself is squeezed between the two squares. Squeeze is a bit word as even the trailing edge of the fairing is not two parallel straight lines but kind of tapers down towards the bottom.
I had the top tough and placed the spacers underneath on the sides to get a more or less equal gap between the bottom of the trailing edge.

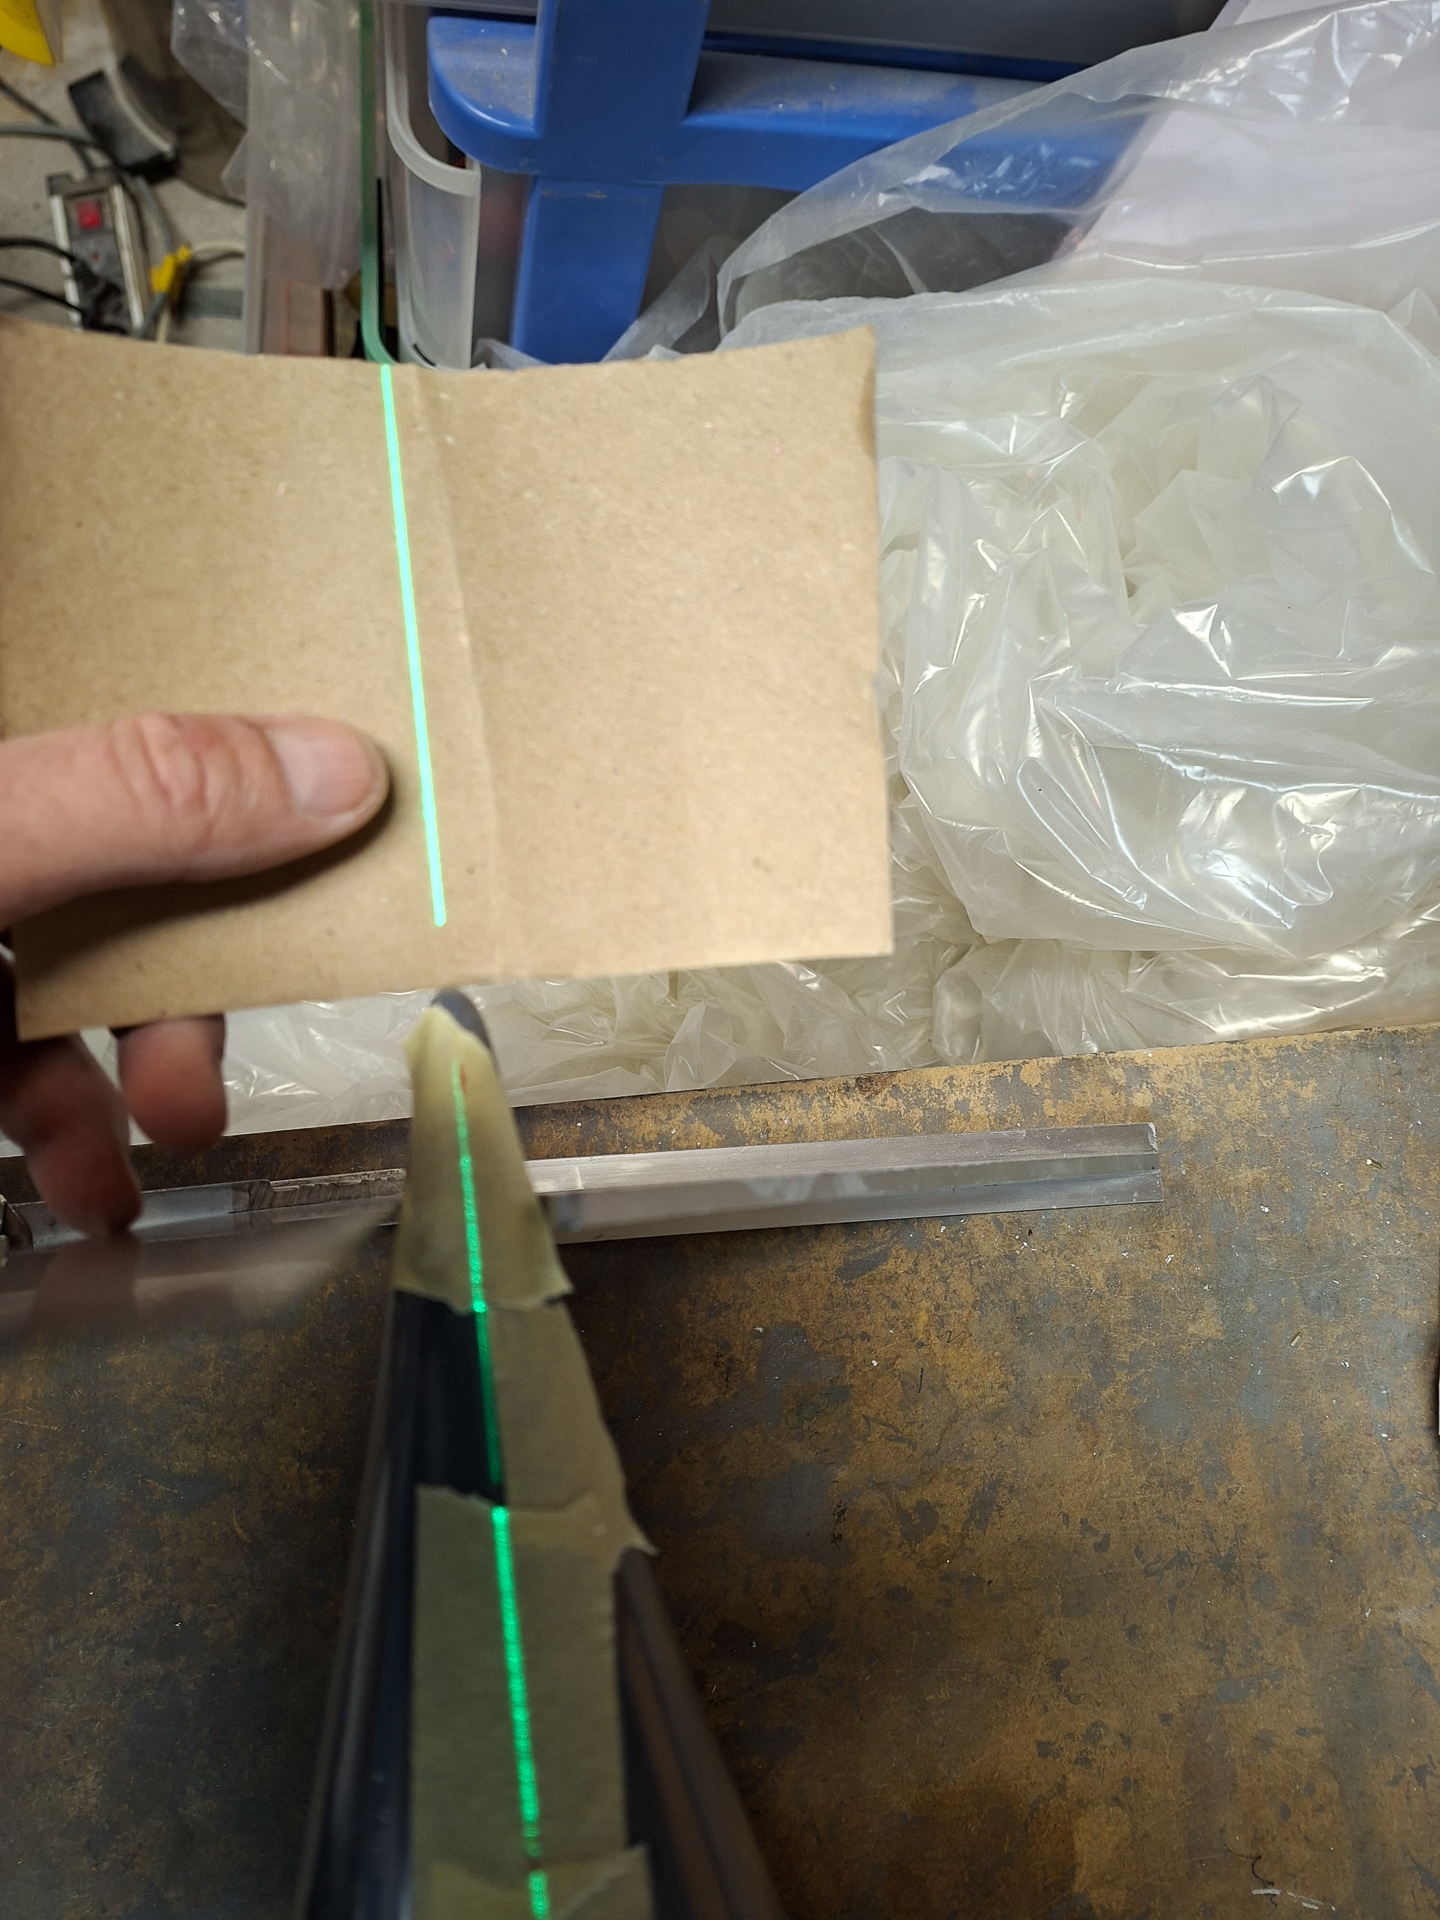
Holding a paper behind the trailing edge to show the laser is perfectly centered on the top of the trailing edge
Now to the front... this is tricky. The best way I could think of what taking a plastig square and aligning it on the workbench with the bottom aligned with the projected line on the workbench.
Then moved the square towards the wheel fairing until it touched a the most extreme point. This should be centerpoint at the front

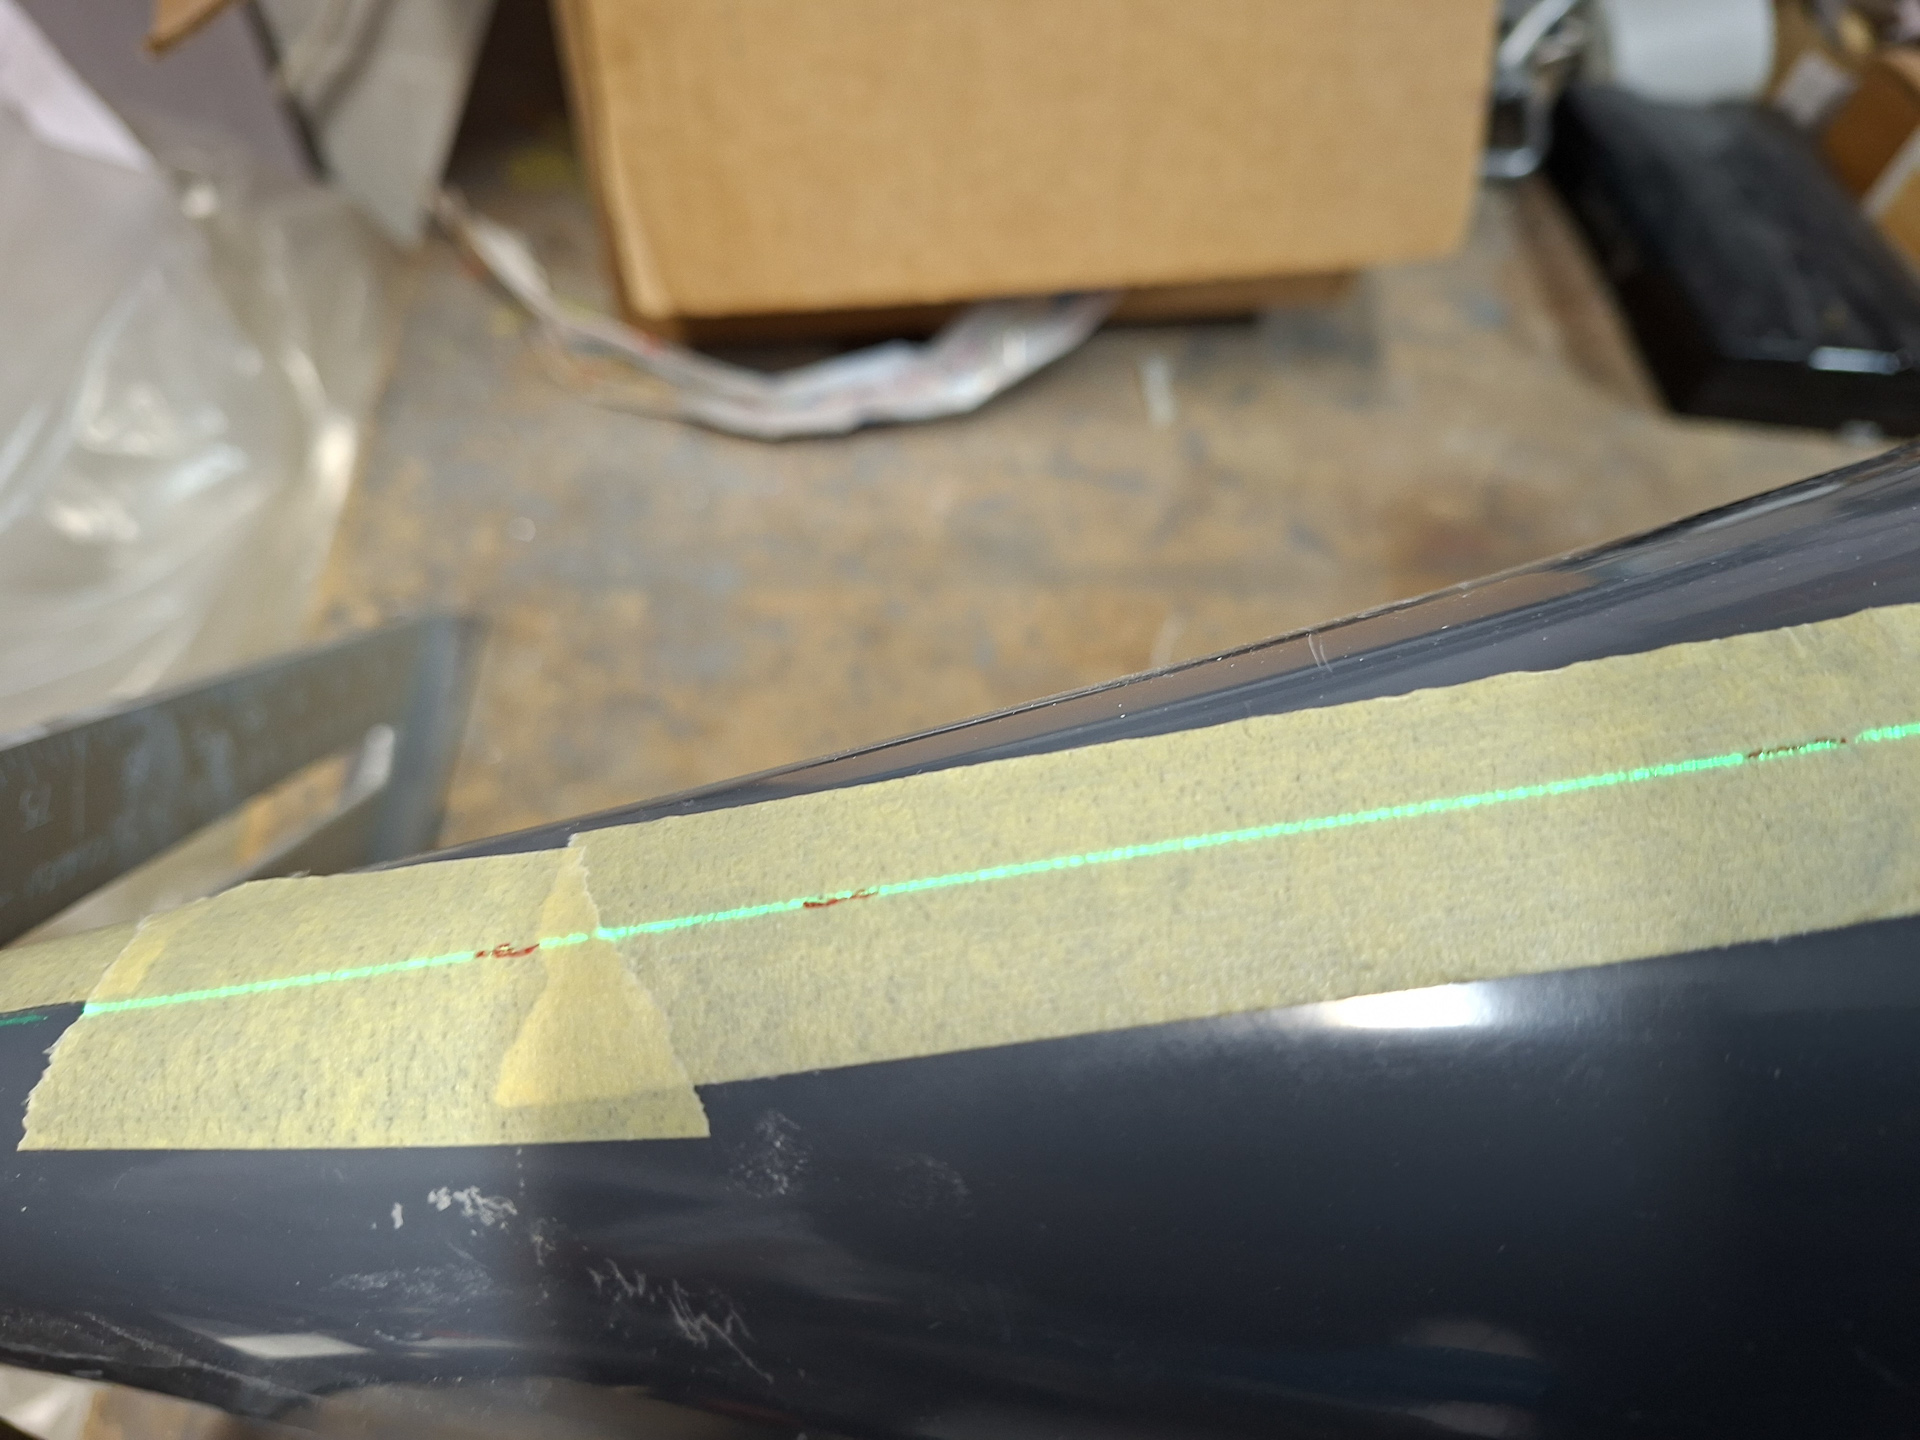
Then used a fine sharpie to mark lines on the paper on the laser line at numerous points and then connected the lines with a flexible rules making sure passing through all the marks.
As I'm being anal again, I wanted to be absolutly sure my centerline was correct and did a double check using another method.
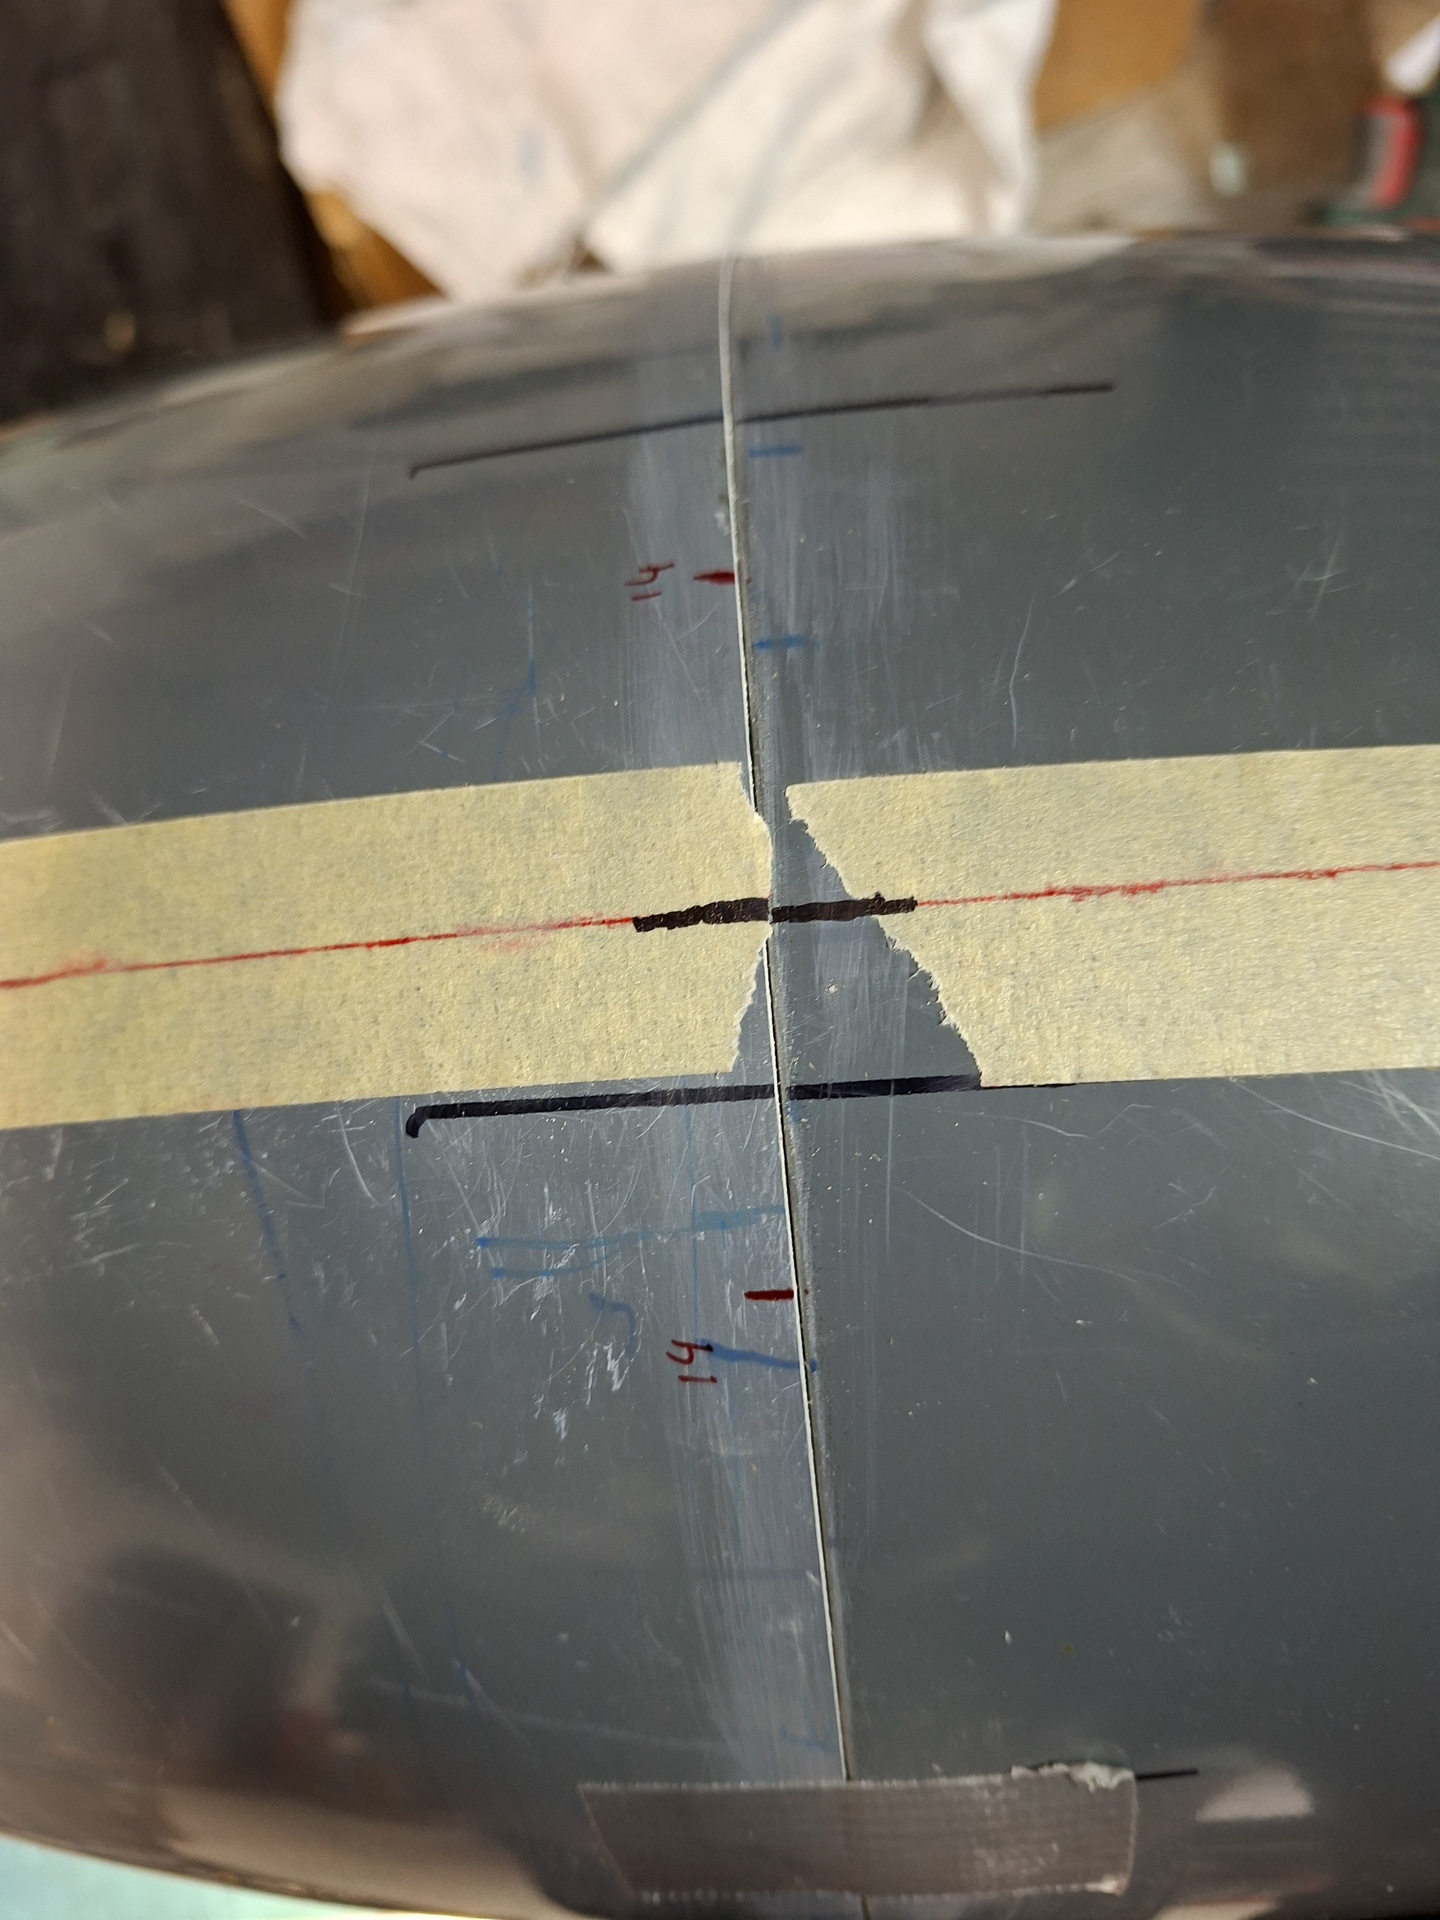
If I measure from both sides of the joint line to the top of my center line, I should get an equal distance, right ?
Then the question is, how to measur to the centerline.
Well that's easier than it looks. I took a square and positioned it parallel to the joint line. Held a ruler next to it and marked a point on the fairing at 7 inch high. Did the same on both sides.
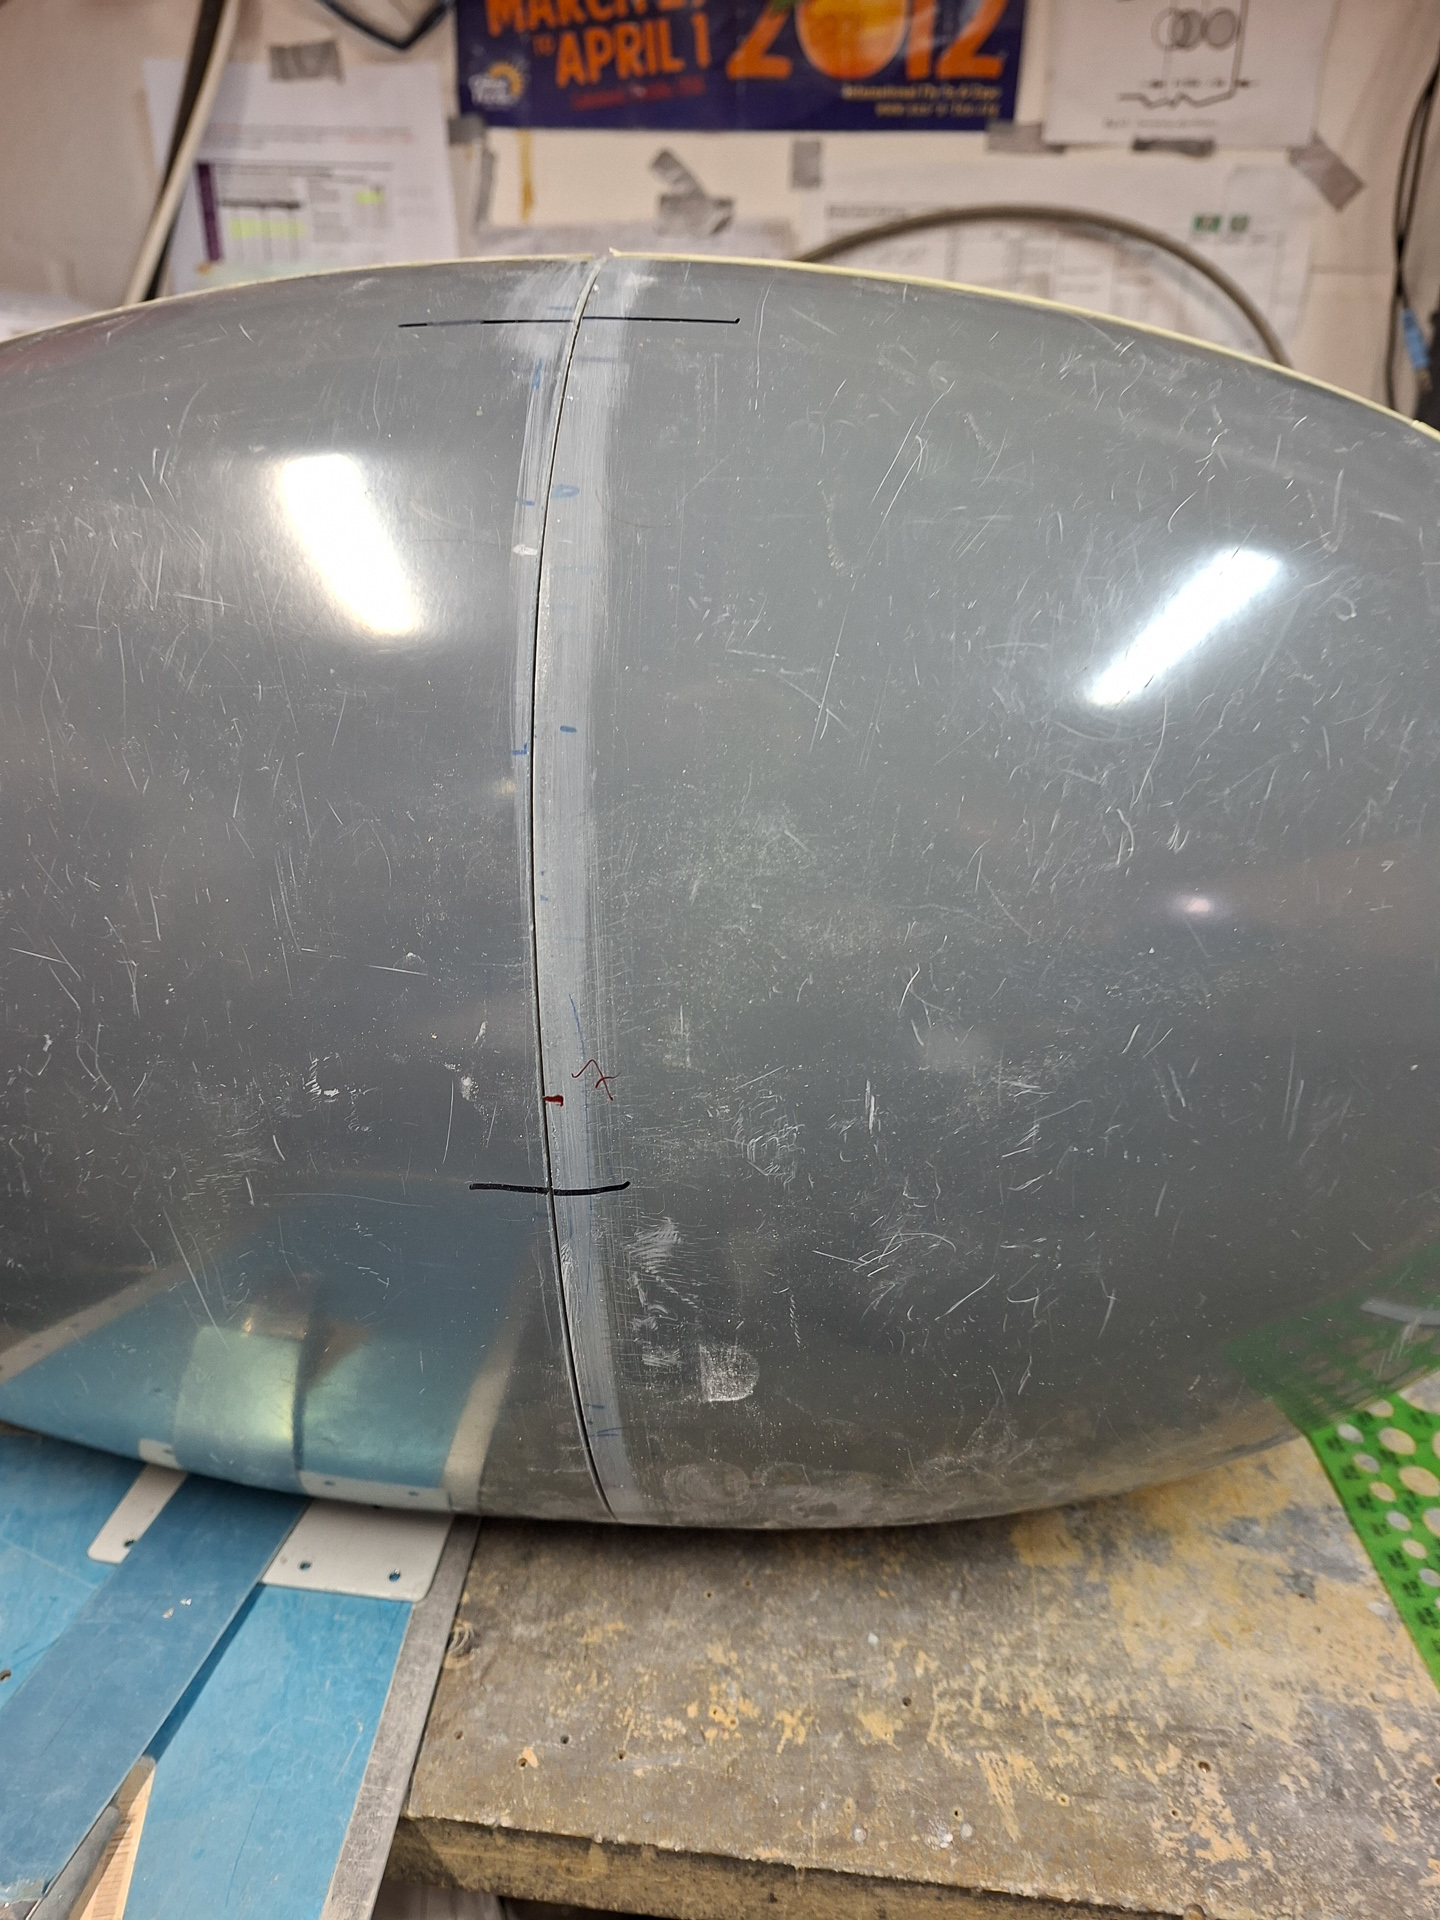
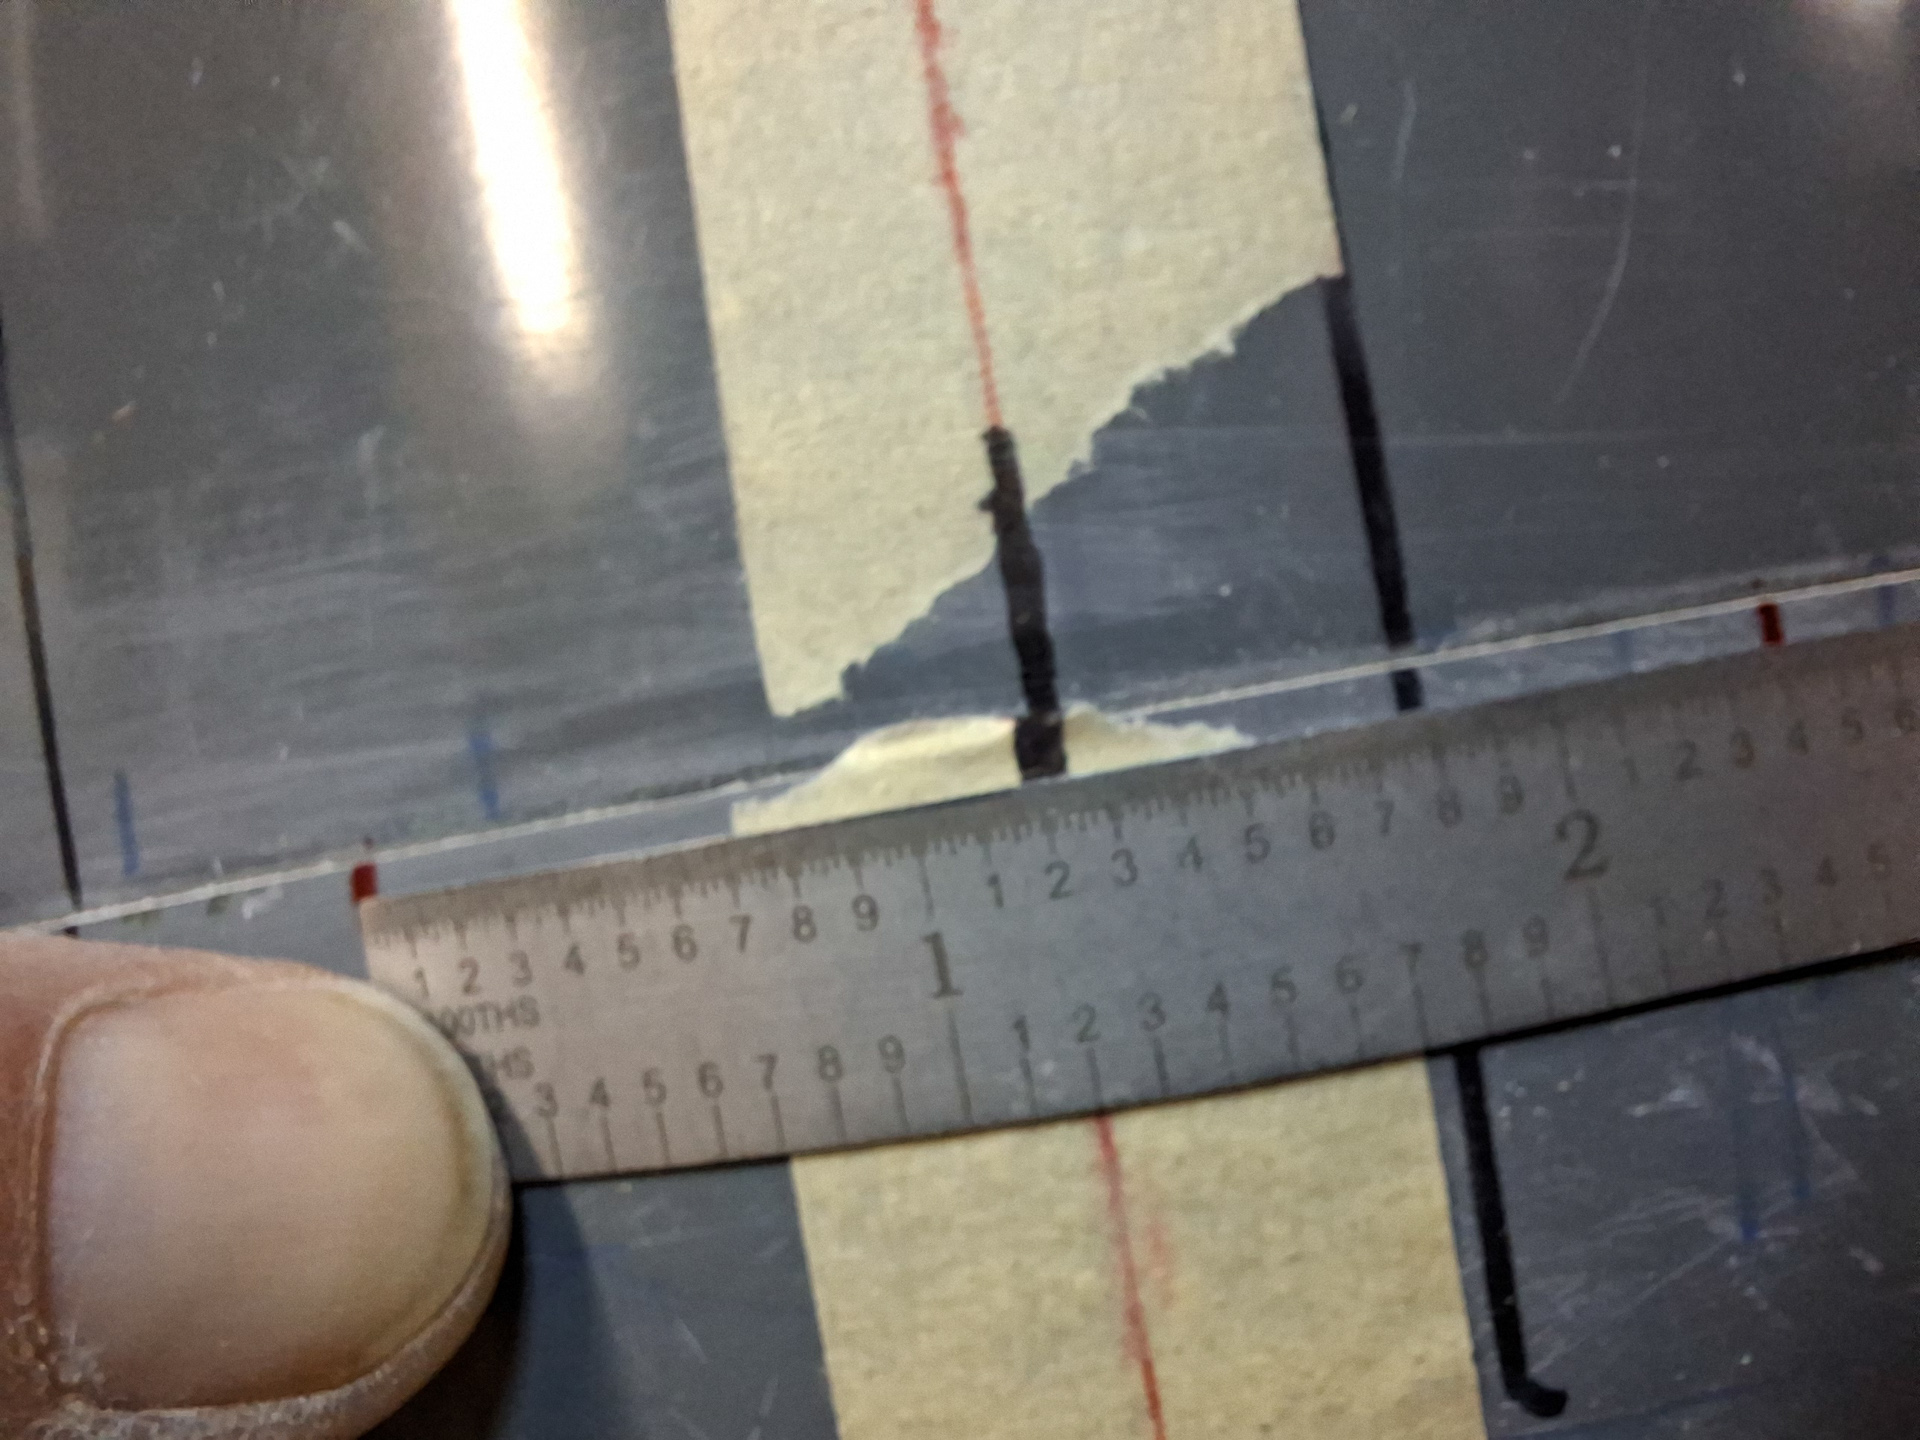
Now from each 7 inch mark, use a flexible ruler to measure another 7 inch until you get close to the center line. In the image below, the two short red lines on either side of the tape at the joint are the measured offset points.
The two marks represent 14 inch distance
Now measure the distance between the two marks, divide by 2, and at that mark you should find your center line.
The distance between the 2 marks is exactly 2.4 inch and guess what I found at the 1.2 inch mark, tadaaa, the centerline !
I should have more confidence in my skills. This proofs my method worked.
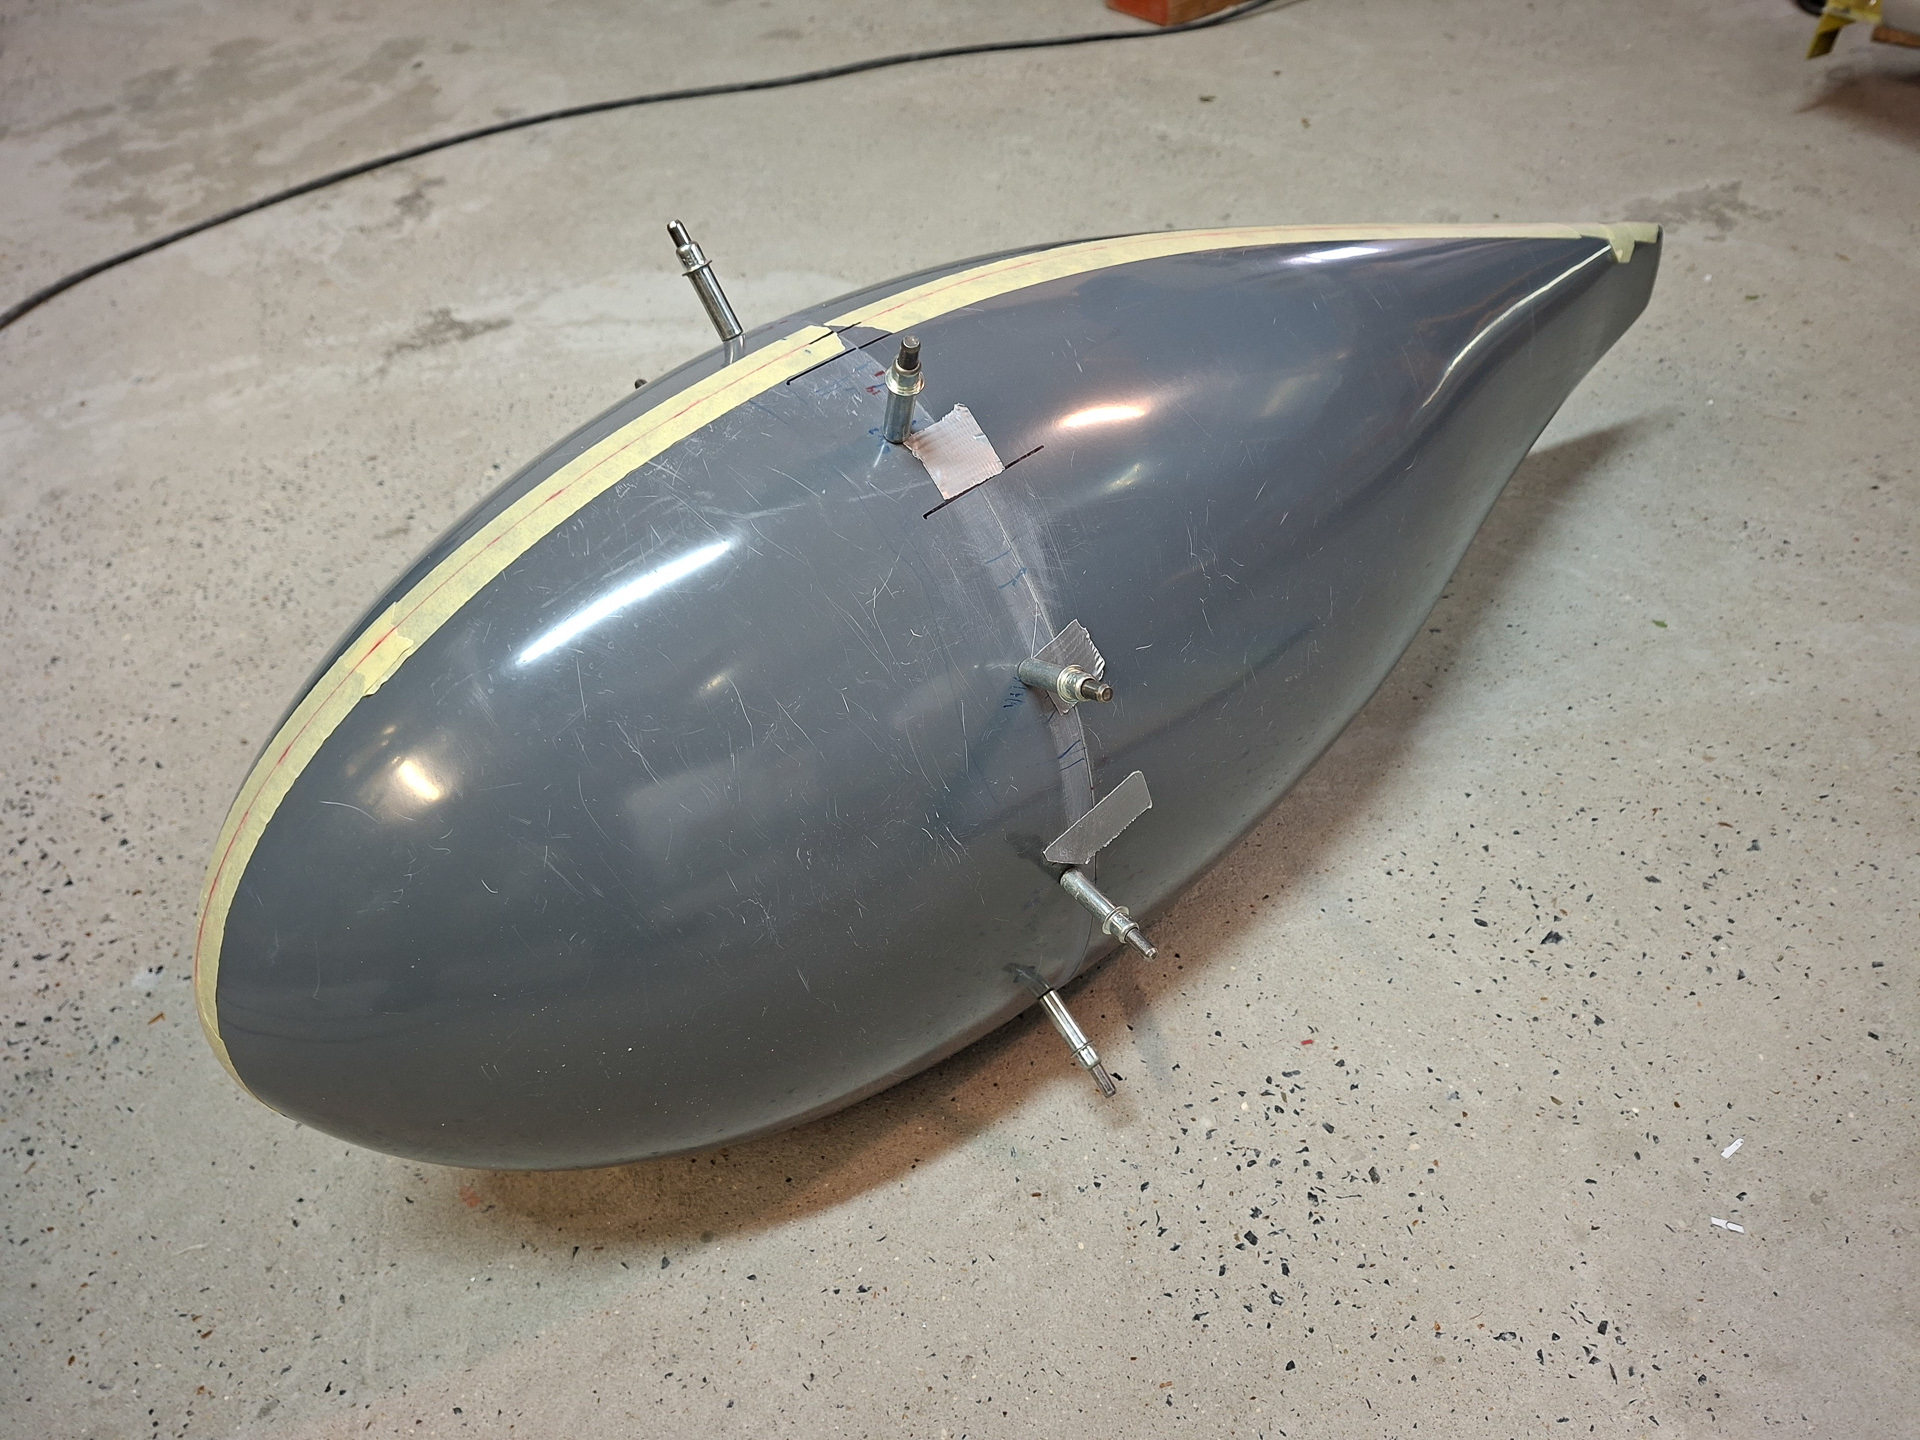
Then I started measuring the different offset points from the centerline to drill the holes that will mate the 2 halves.
You cannot measure from the bottom as the final cutout of the wheel opening will only be made at a later stage.
Vans off course measures distances from the bottom so you have to come up with some math to calculate the distance from the centerline to the 2 top holes which are not shown on the plans.
I came up with 2 inch and 1/8 for the distance from the top and from there measured the 3 and 3/4 distances given by the plans. This worked out fine in the end.
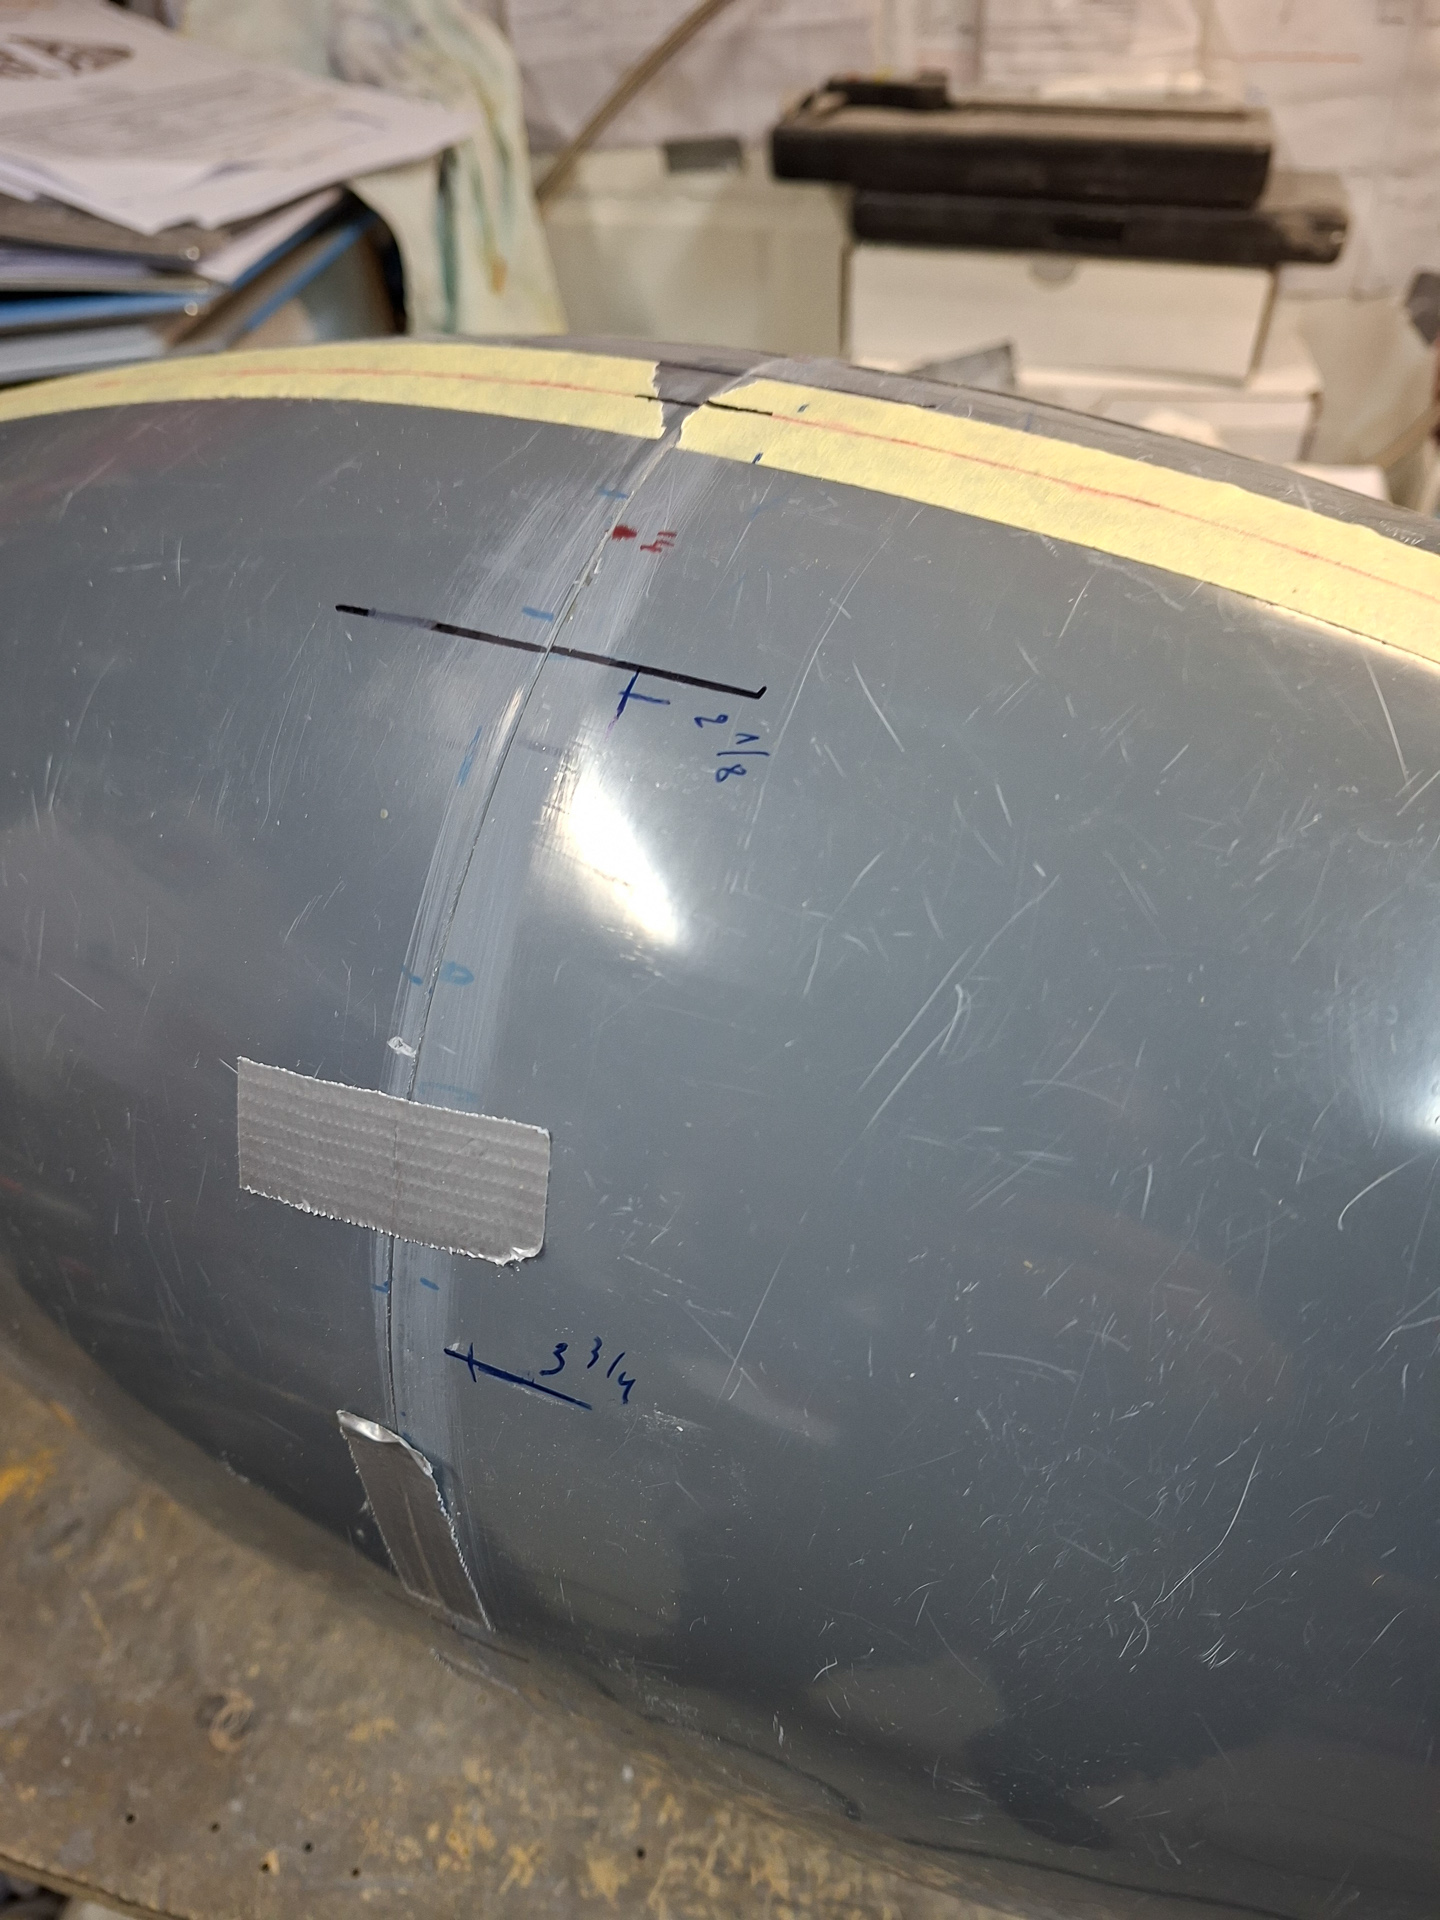
Pay attention where you will drill, there are lots of markings on the wheelpant already and it's easy to make stupid mistakes. Also pay attention on the side of the joint where you mark your drill marks. They need to be behind the joint line at 1/2 inch from the edge.
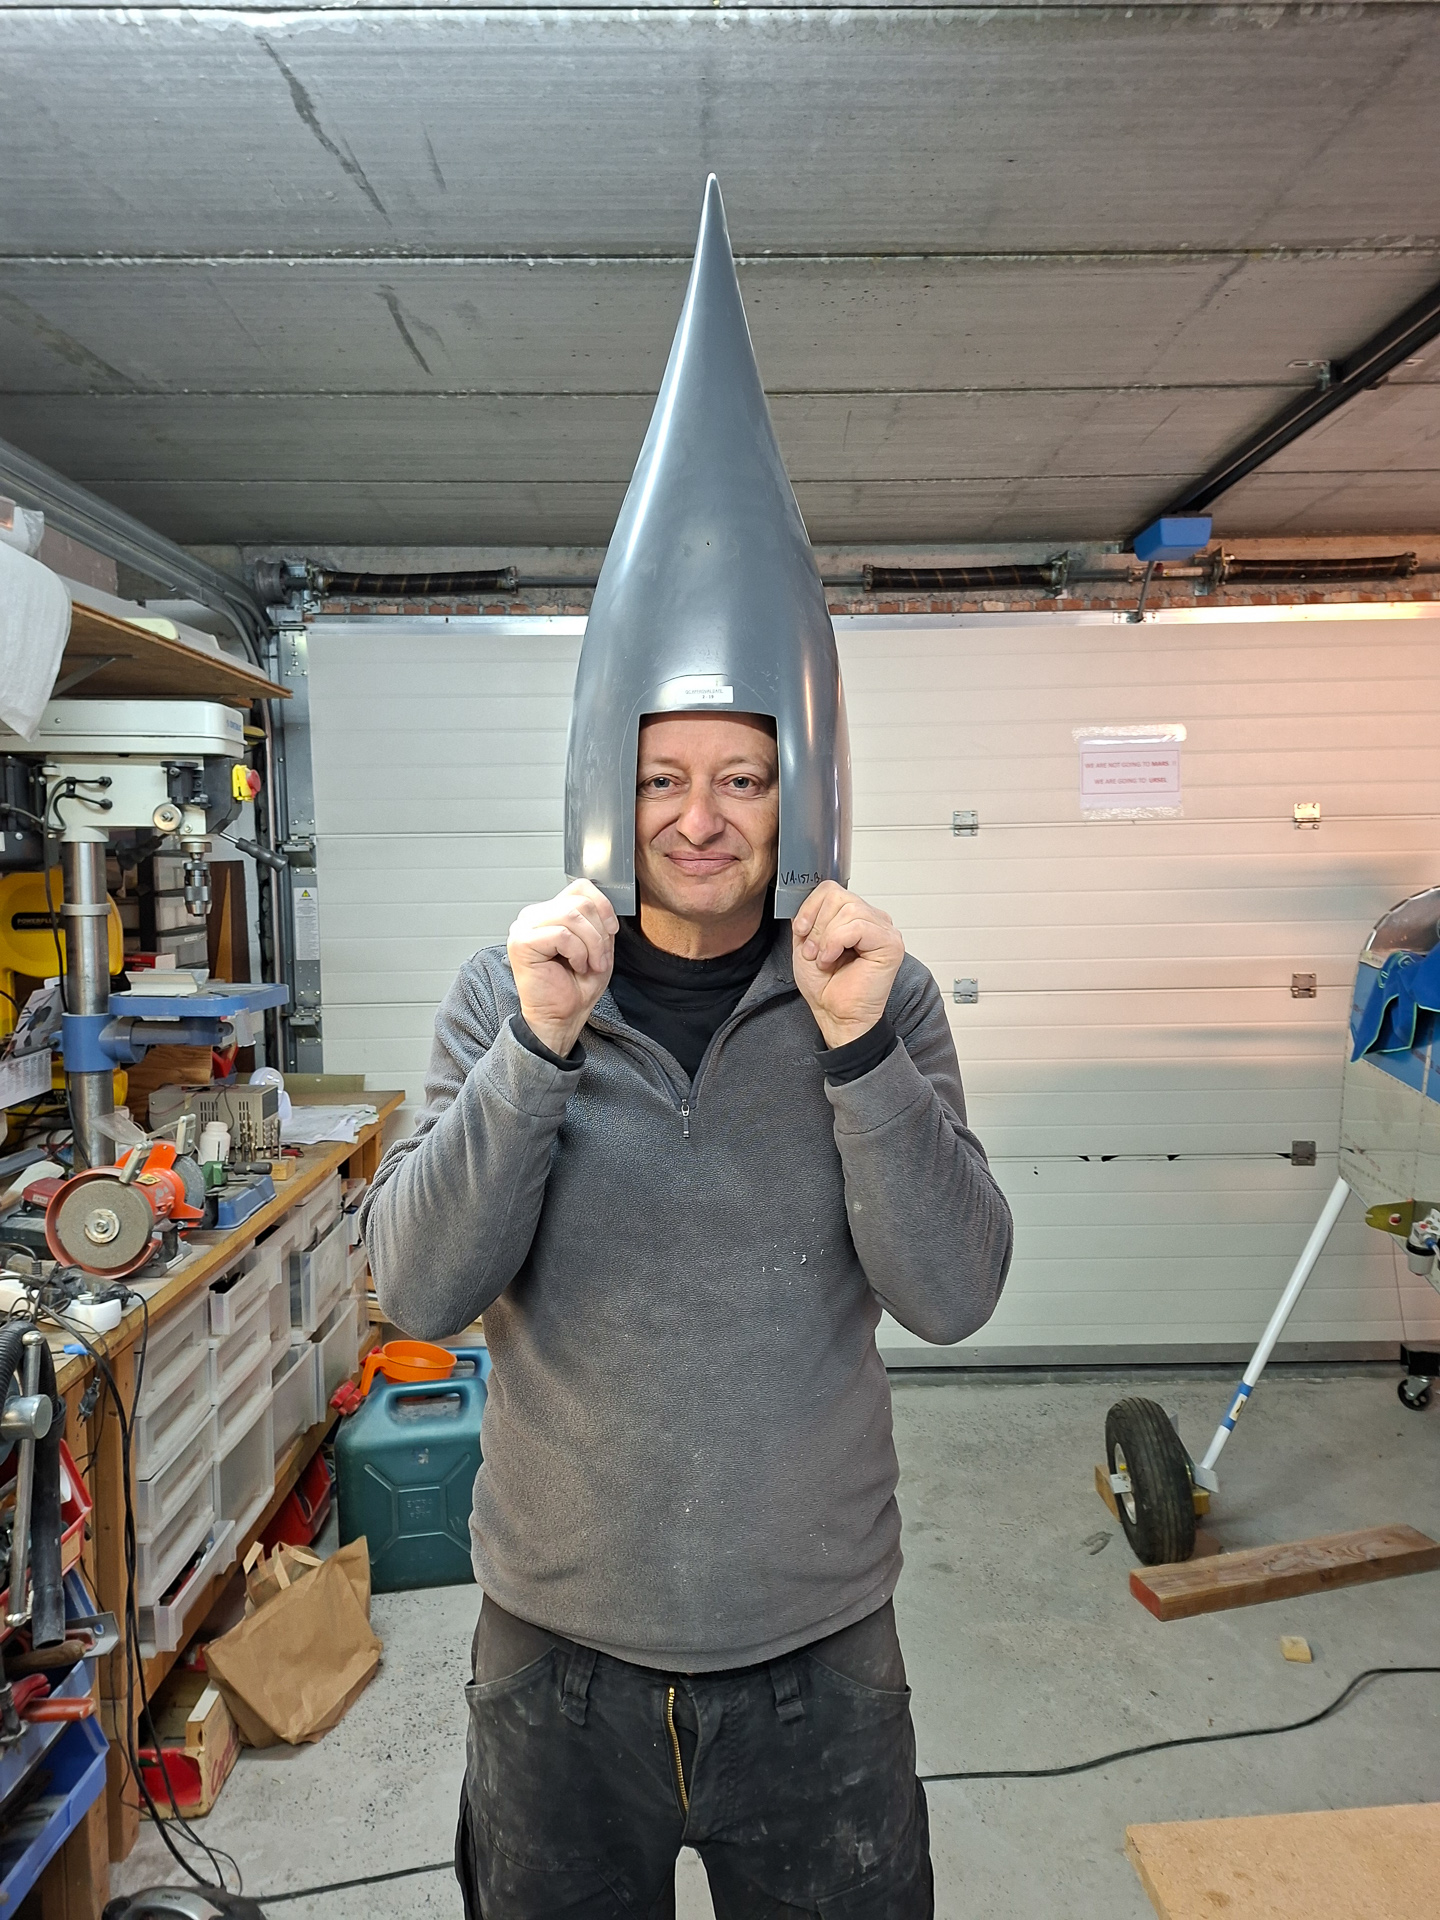
Before drilling, I could not resist to have my son shoot the obligatory Vans cone head picture.
Then drilled #40 the holes that mate the 2 parts. Have somebody press the back and front together as you drill so that the joint is nice and closed.
This was a satisfying and productive day. Next is the other wheel pants but I deserved a good beer now.


