28/03/2023 - FFW Passenger side brake lines - 1h30

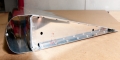
Moving on to the passenger side firewall forward brake line routing. As said in previous article, here is an image after cutting the line.

 The next step is to insert the tube in the metal head of the fitting hardware. Just pushing it on and checking that it bottoms out.

 In the next step, the gray head slides over the fitting and clicks on.

Then it's just a matter of thightening the red bolting side on.

When the fittings where installed, it was just a matter of connecting both side and ruting it via the lower bar of the engine mount.

As I have no idea where everything will come, I only temporarily installed some adel clamps to hold the line in place.


Site Options

Legal Mumbo-Jumbo

It’s possible (not likely) that I’m not as smart as I think I am. (Occasionally, I have moments when I know this to be true. Fortunately, the feeling passes quickly.) Although I have tried to make this information as accurate as I can, it is not only possible, but also quite likely, that erroneous and misguided information lurks within these pages. I cannot and do not warrant these pages to be error free and correct. Furthermore, I accept no liability for the use of this (mis)information. And, as many would say, your mileage may vary. If, after reading this, you are intent on proceeding, please be aware that the contents of this site are protected by copyright (copyright © 2011 and 2012). Nonetheless, you may copy this material subject to these two conditions: (1) any information used is for non-commercial purposes, and (2) the source of the material is properly credited. Of course, you may link to any page herein. At some articles, snippets of the plans from Vans are visible. These are for educational and illustrations purposes only and should never be used as plans for part construction or assembly as plans may have changed since the picture was taken and more important they are protected by Copyright by the Vans Aircraft Mothership company.