
In a previous article, I described the process of installing my Aerosun VX taxi/landing lights.
The legs on my landing lights broke and I received a new pair from Aerosun.
Overall they provide great service and waranty ! No complaints about that.
I do have my doubts on the system how these lights are made and designed. The plastic legs are very weak spots and I doubt this will withstand vibration before they will crack and break again.
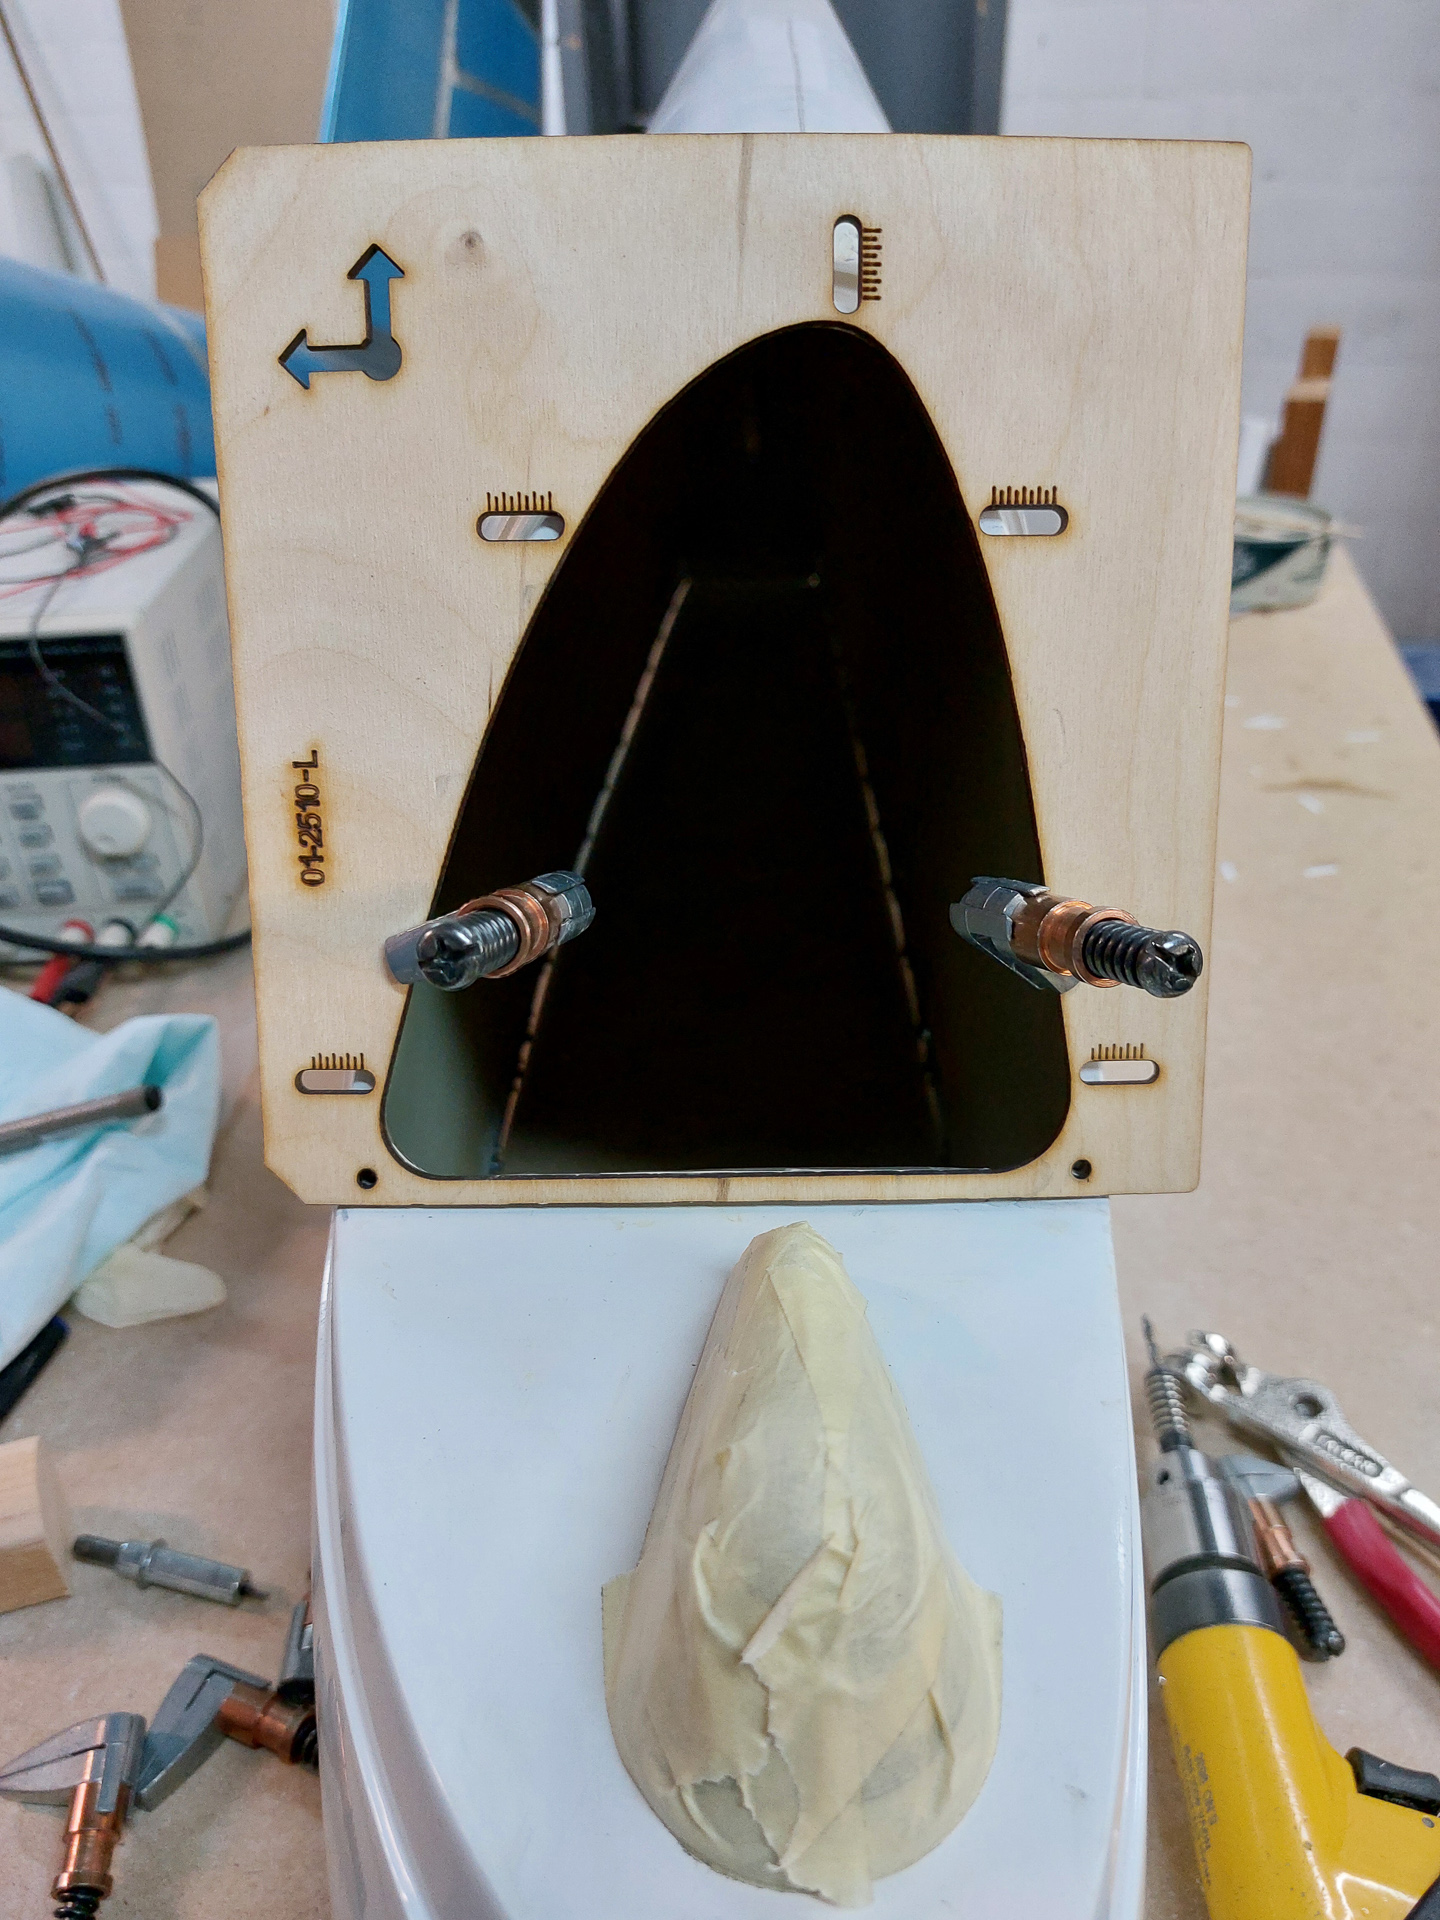
To make sure the wholes where straight before reinstalling the new set, I closed the existing holes with west system epoxy, sanded it smooth and restarted the installation process as described in the installation manual.
(update 01/02/25 : they DID break again... just by moving the wingtips with a lot of care to another spot. I plan on not returning them but fixing them in play with a blob of epoxy over the leg once it's in position. I won't be able to adjust the landing light but that's the price I have to pay. I'll tweak them once the plane is done and then glue the leg with epoxy and fixate the whole damned thing)
Took the template out and aligned it with the already cut hole in order to redrill the 2 screw holes in the bottom. THe template allows you to eyeball the space between light and edge of the tip but looking through the rectangular cut outs.
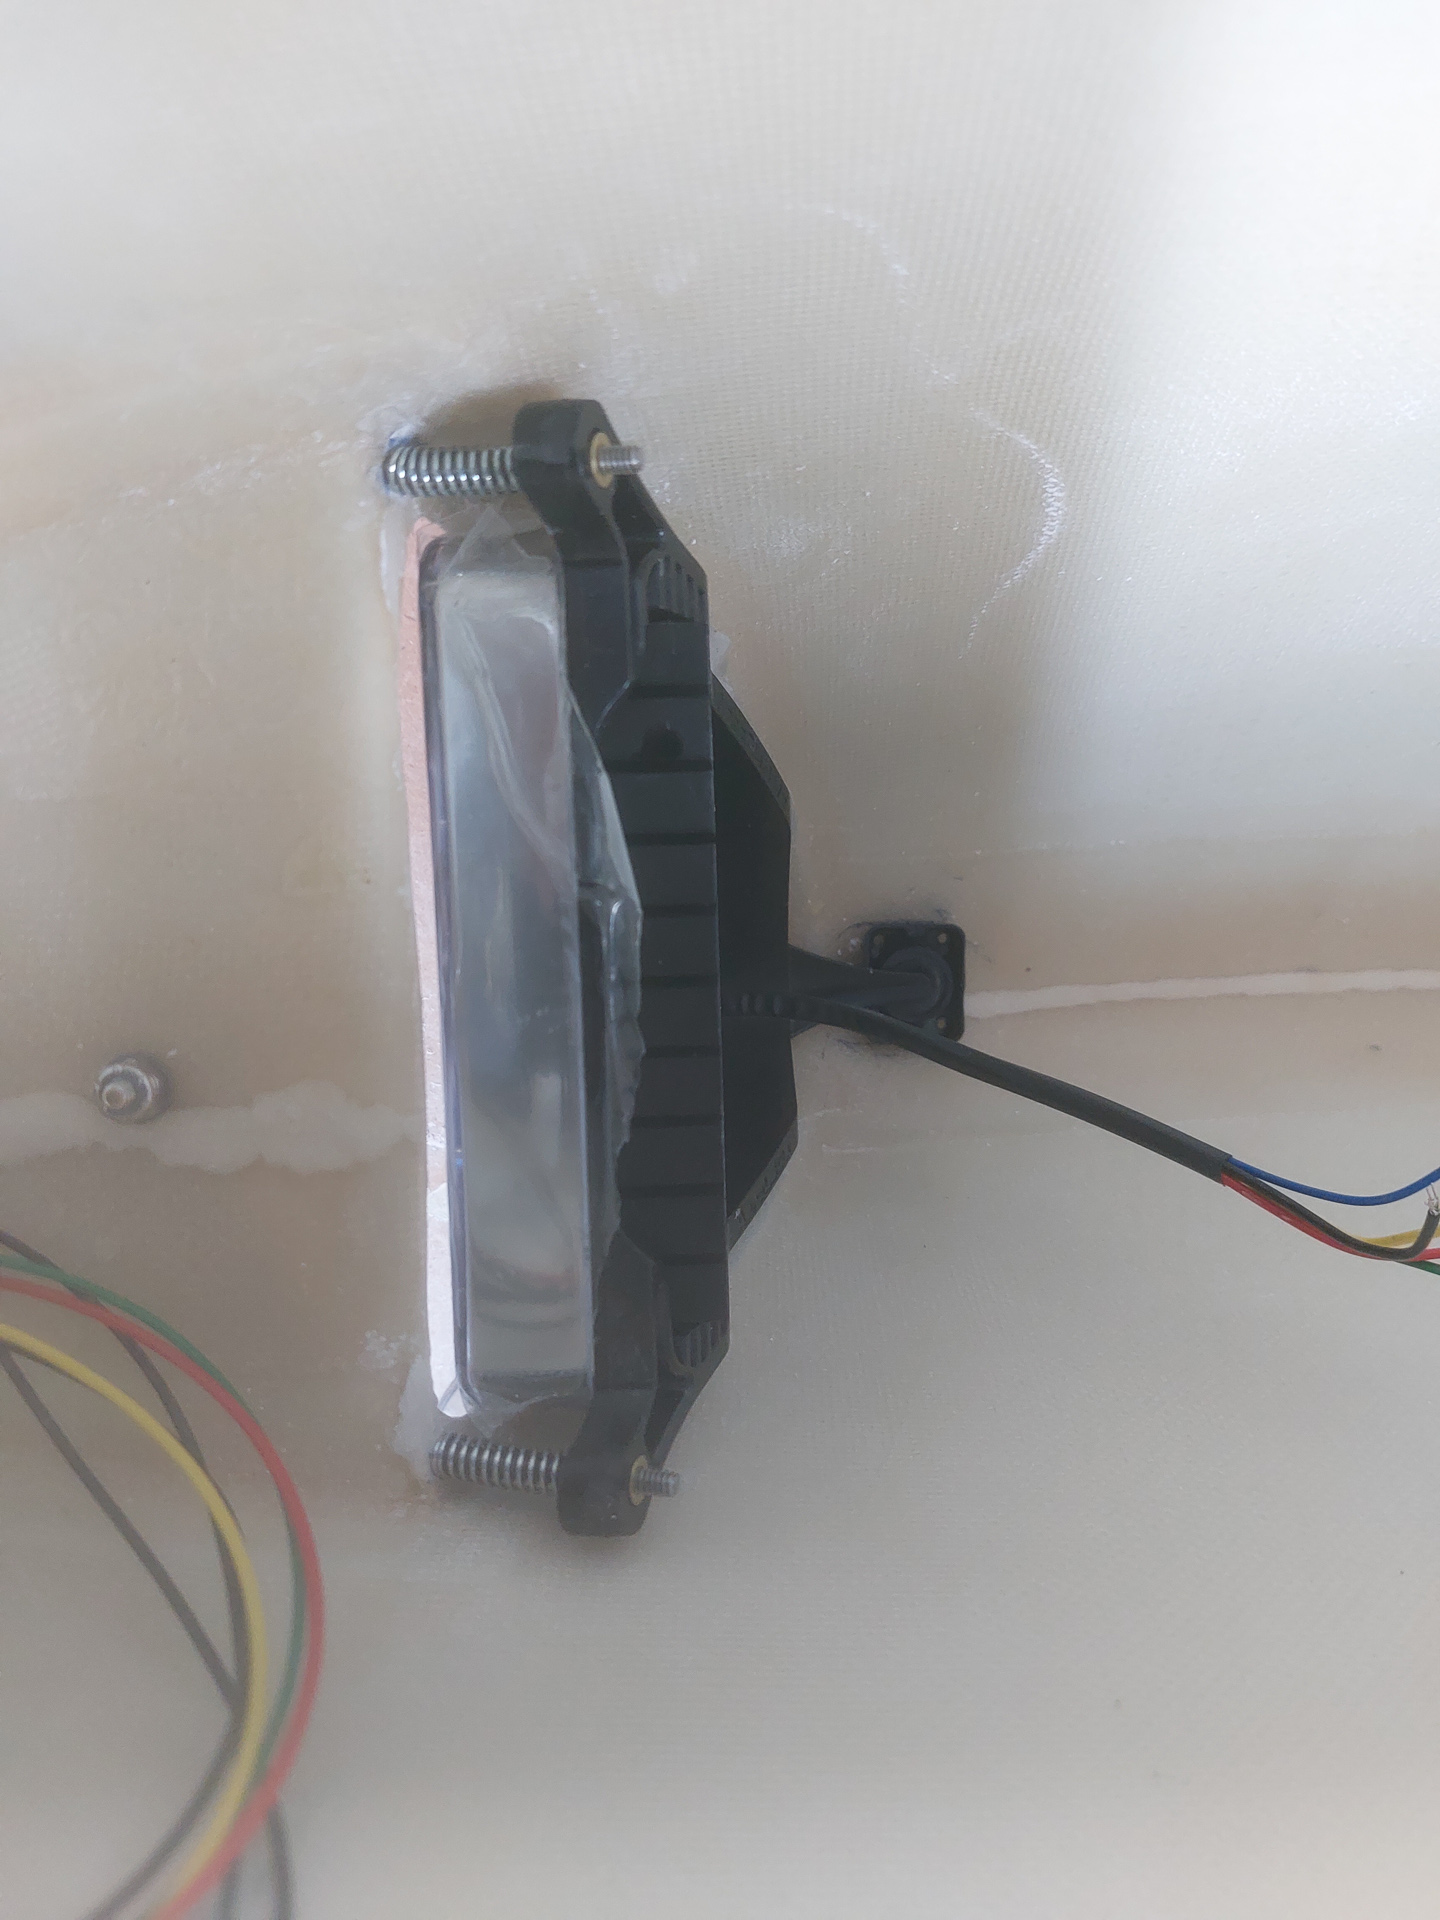
Once drilled I reinstalled the light with the screws and springs. As you can see there is a gap under and above the legs so the legs don't touch the wingtip and are floating on the 2 screws and the outer leg that gets epoxied on the outer edge of the wing tip.
Both lights done and duck taped the inner side to the tip for stability while appying the epoxy on the outer leg. The manual describes quite well how to do this. Just make sure you don't put too much so that you can still remove the light. There is a small rubber band inside the outer holding tab which allows to remove and reinstall the light. Putting some masking tape over the rubber on the outside. that way, the epoxu slurry can't creep into the rubber and light arm.
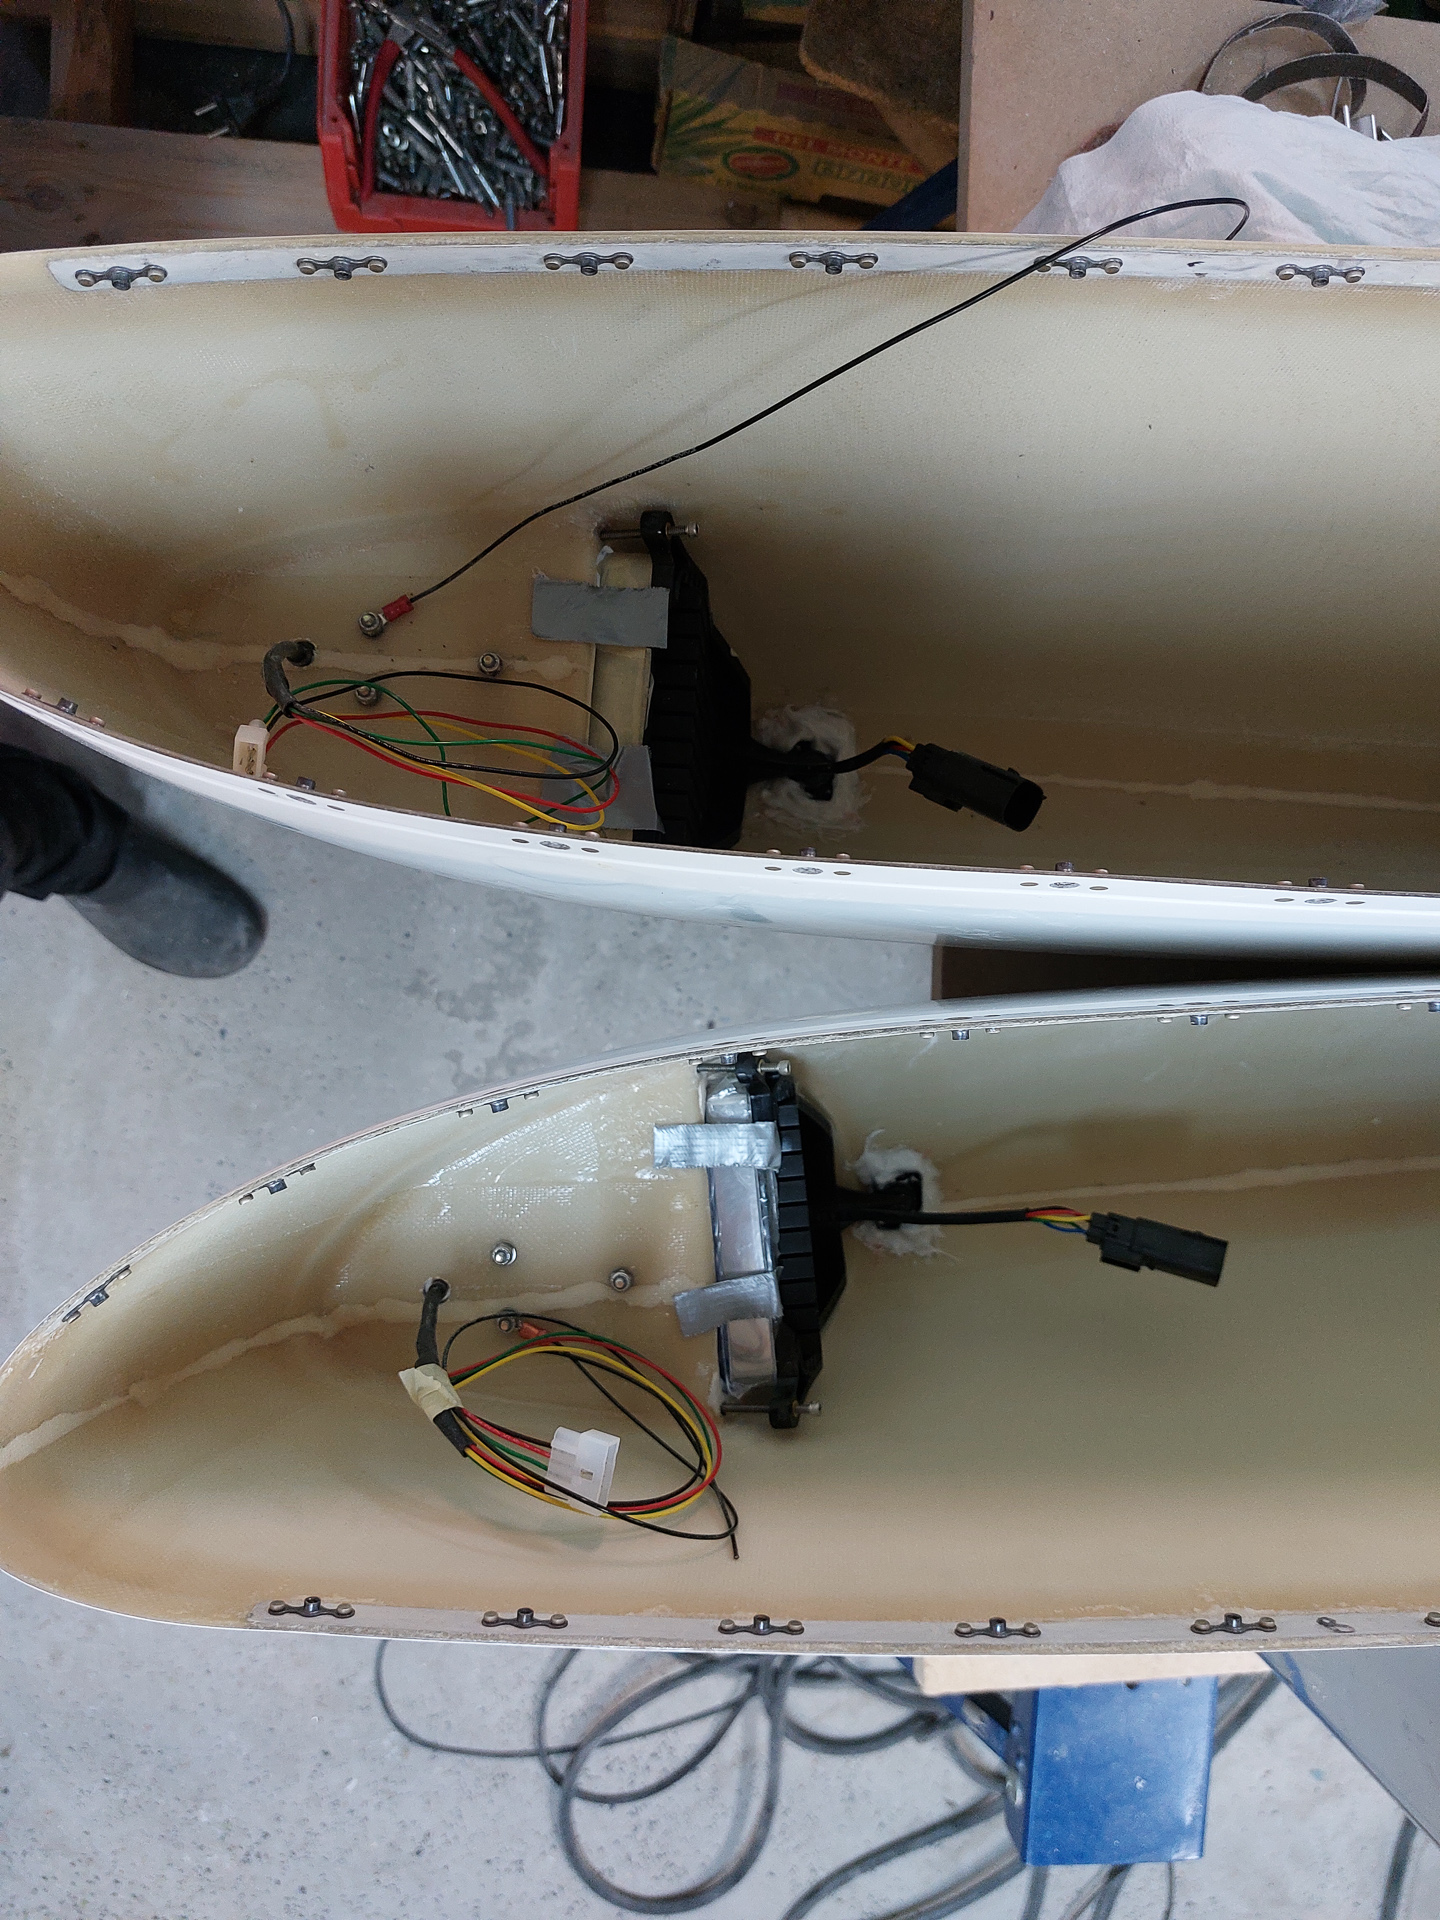
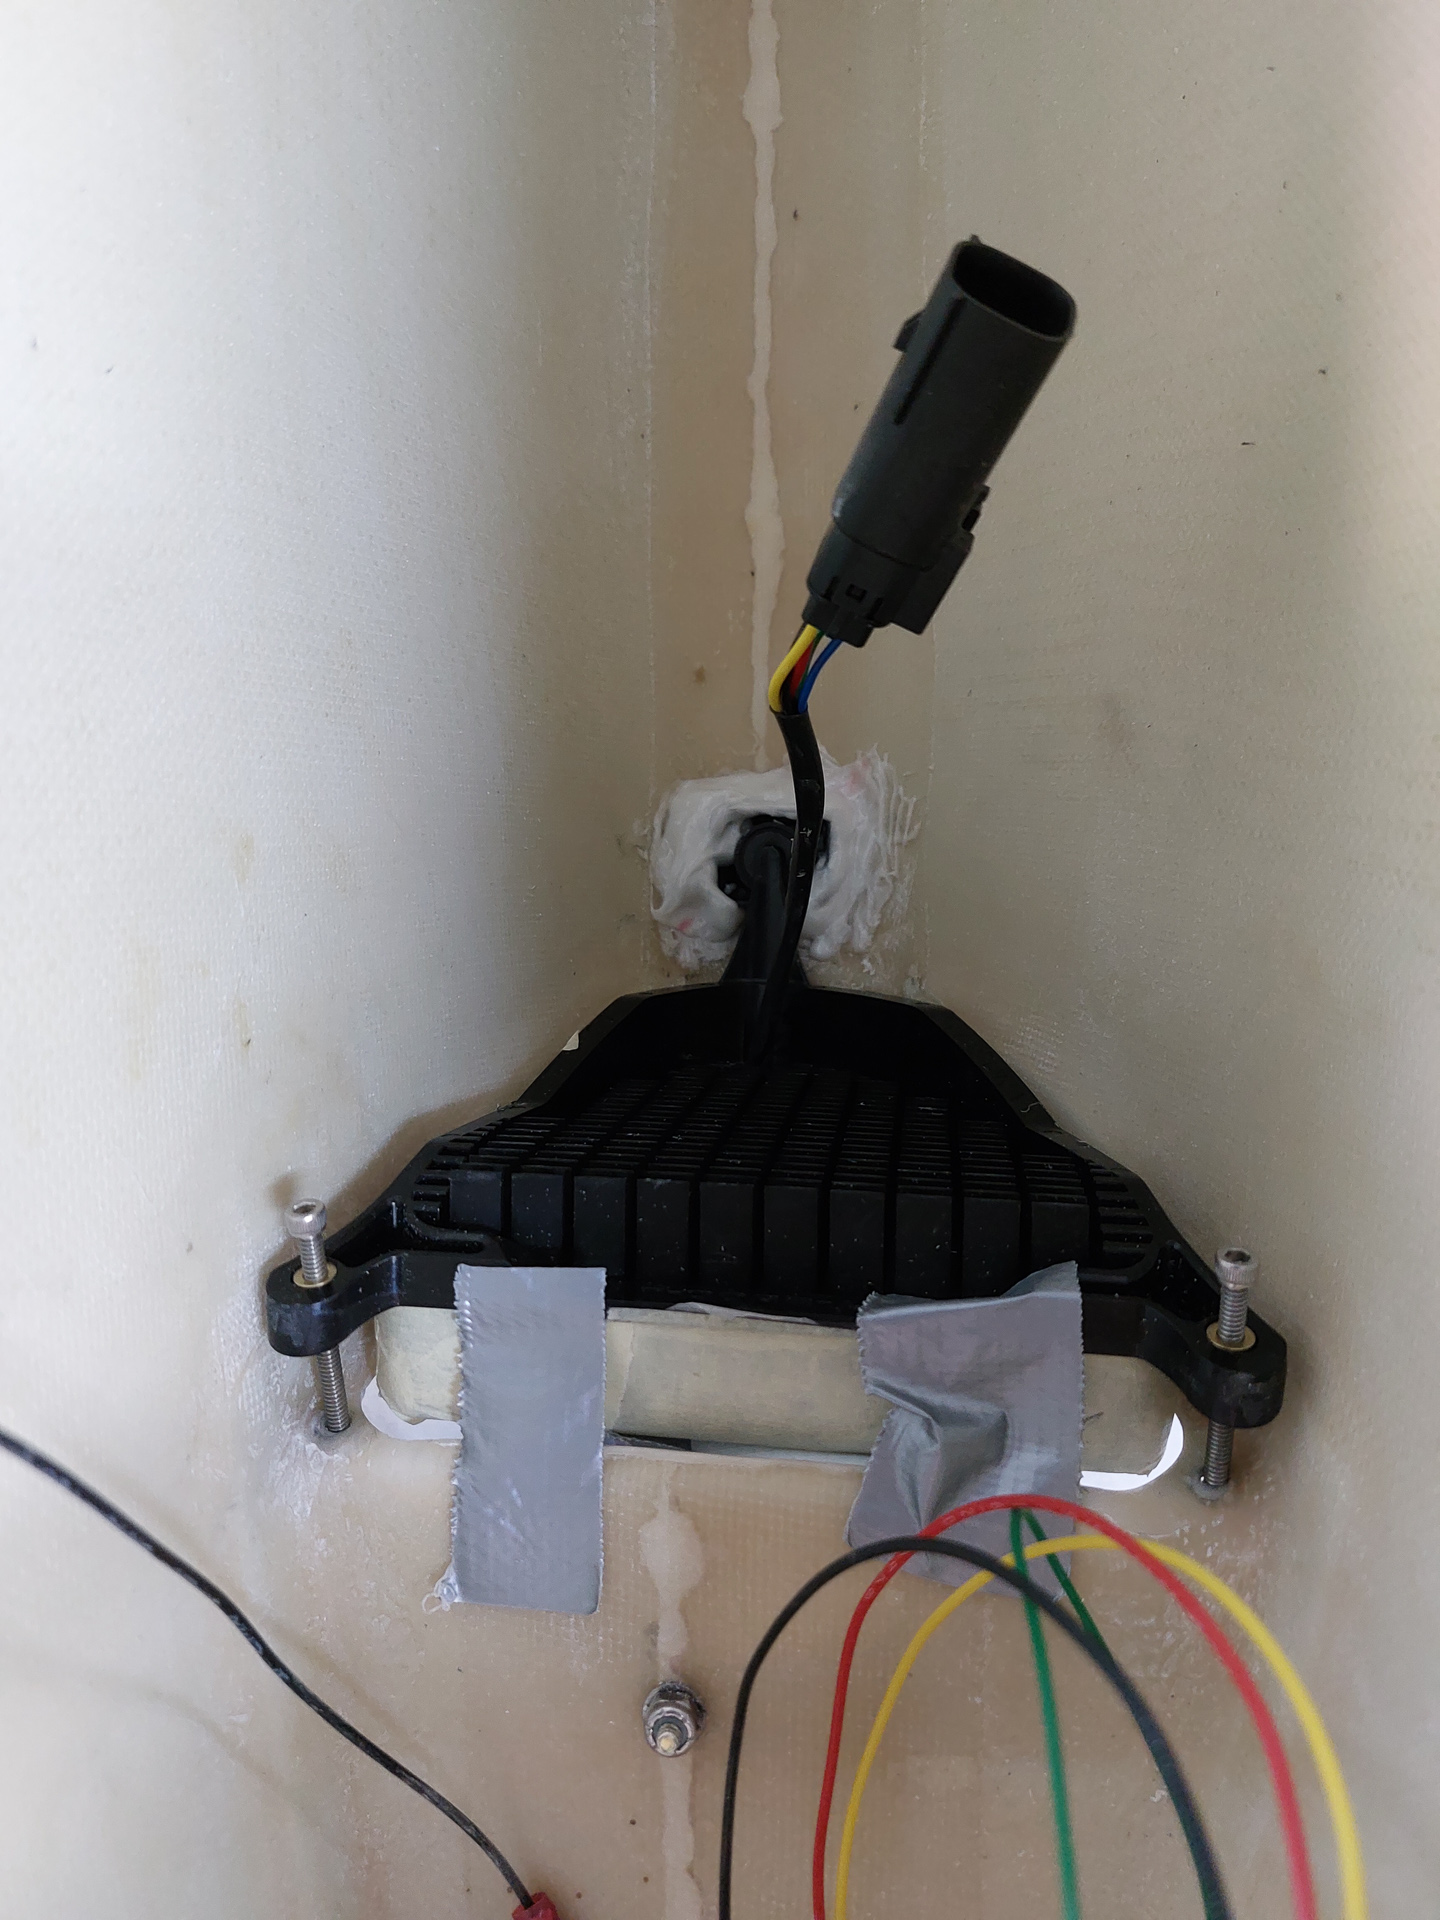
Better picture of the epoxy on the outer edge of the wingtip. As I'm already working on electrical connections, I also installed the connectors. The connectors are delivered with the lights and have molex style pins.
Time to let this cure and see how the lights keep up now.